The New York Department of State business entity search page provides a focused query tool for its visitors. The query is submitted by a user to search the state-maintained business entity database for an entity of interest. Once found, visitors can read this information on screen and may also revisit the search as needed.
Business Name Availability Check
State of New York

Business Entity Search
Step 1. Access the New York Business Entity Search Page
Find the query tool on the business entity search page that the New York Department of State maintains for public use. Prepare your information prior to using this tool.
Step 2. Define The Search Item For the Query
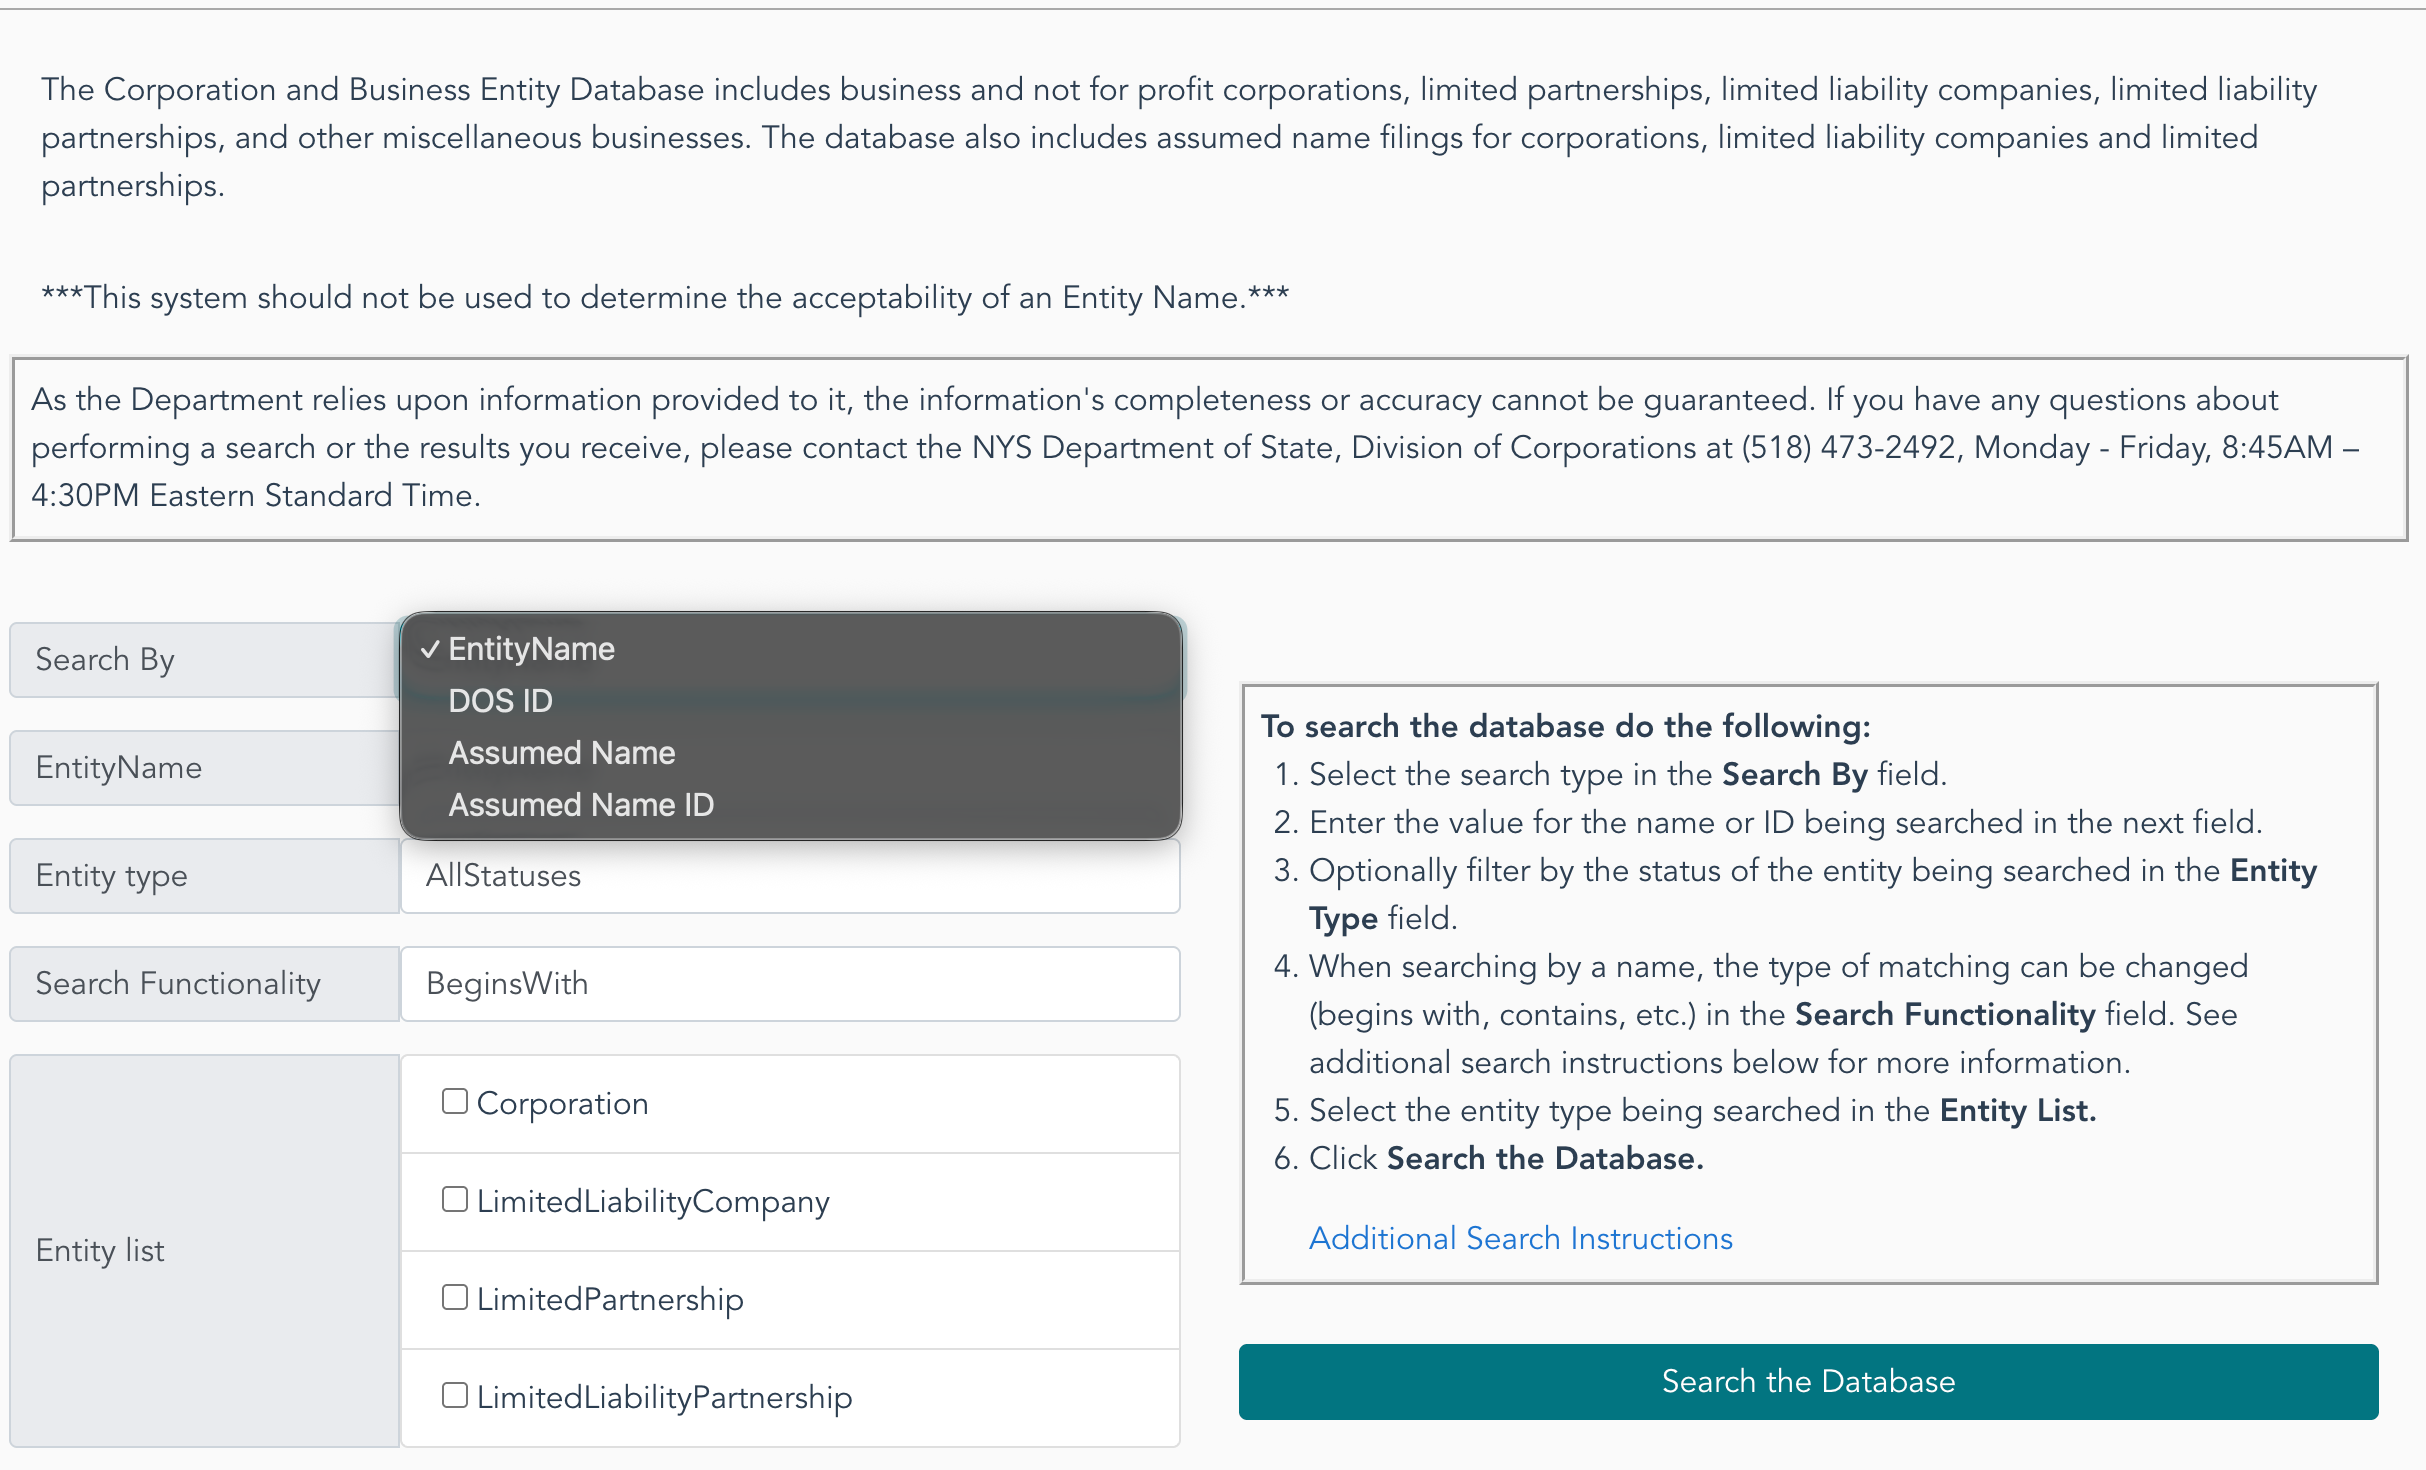
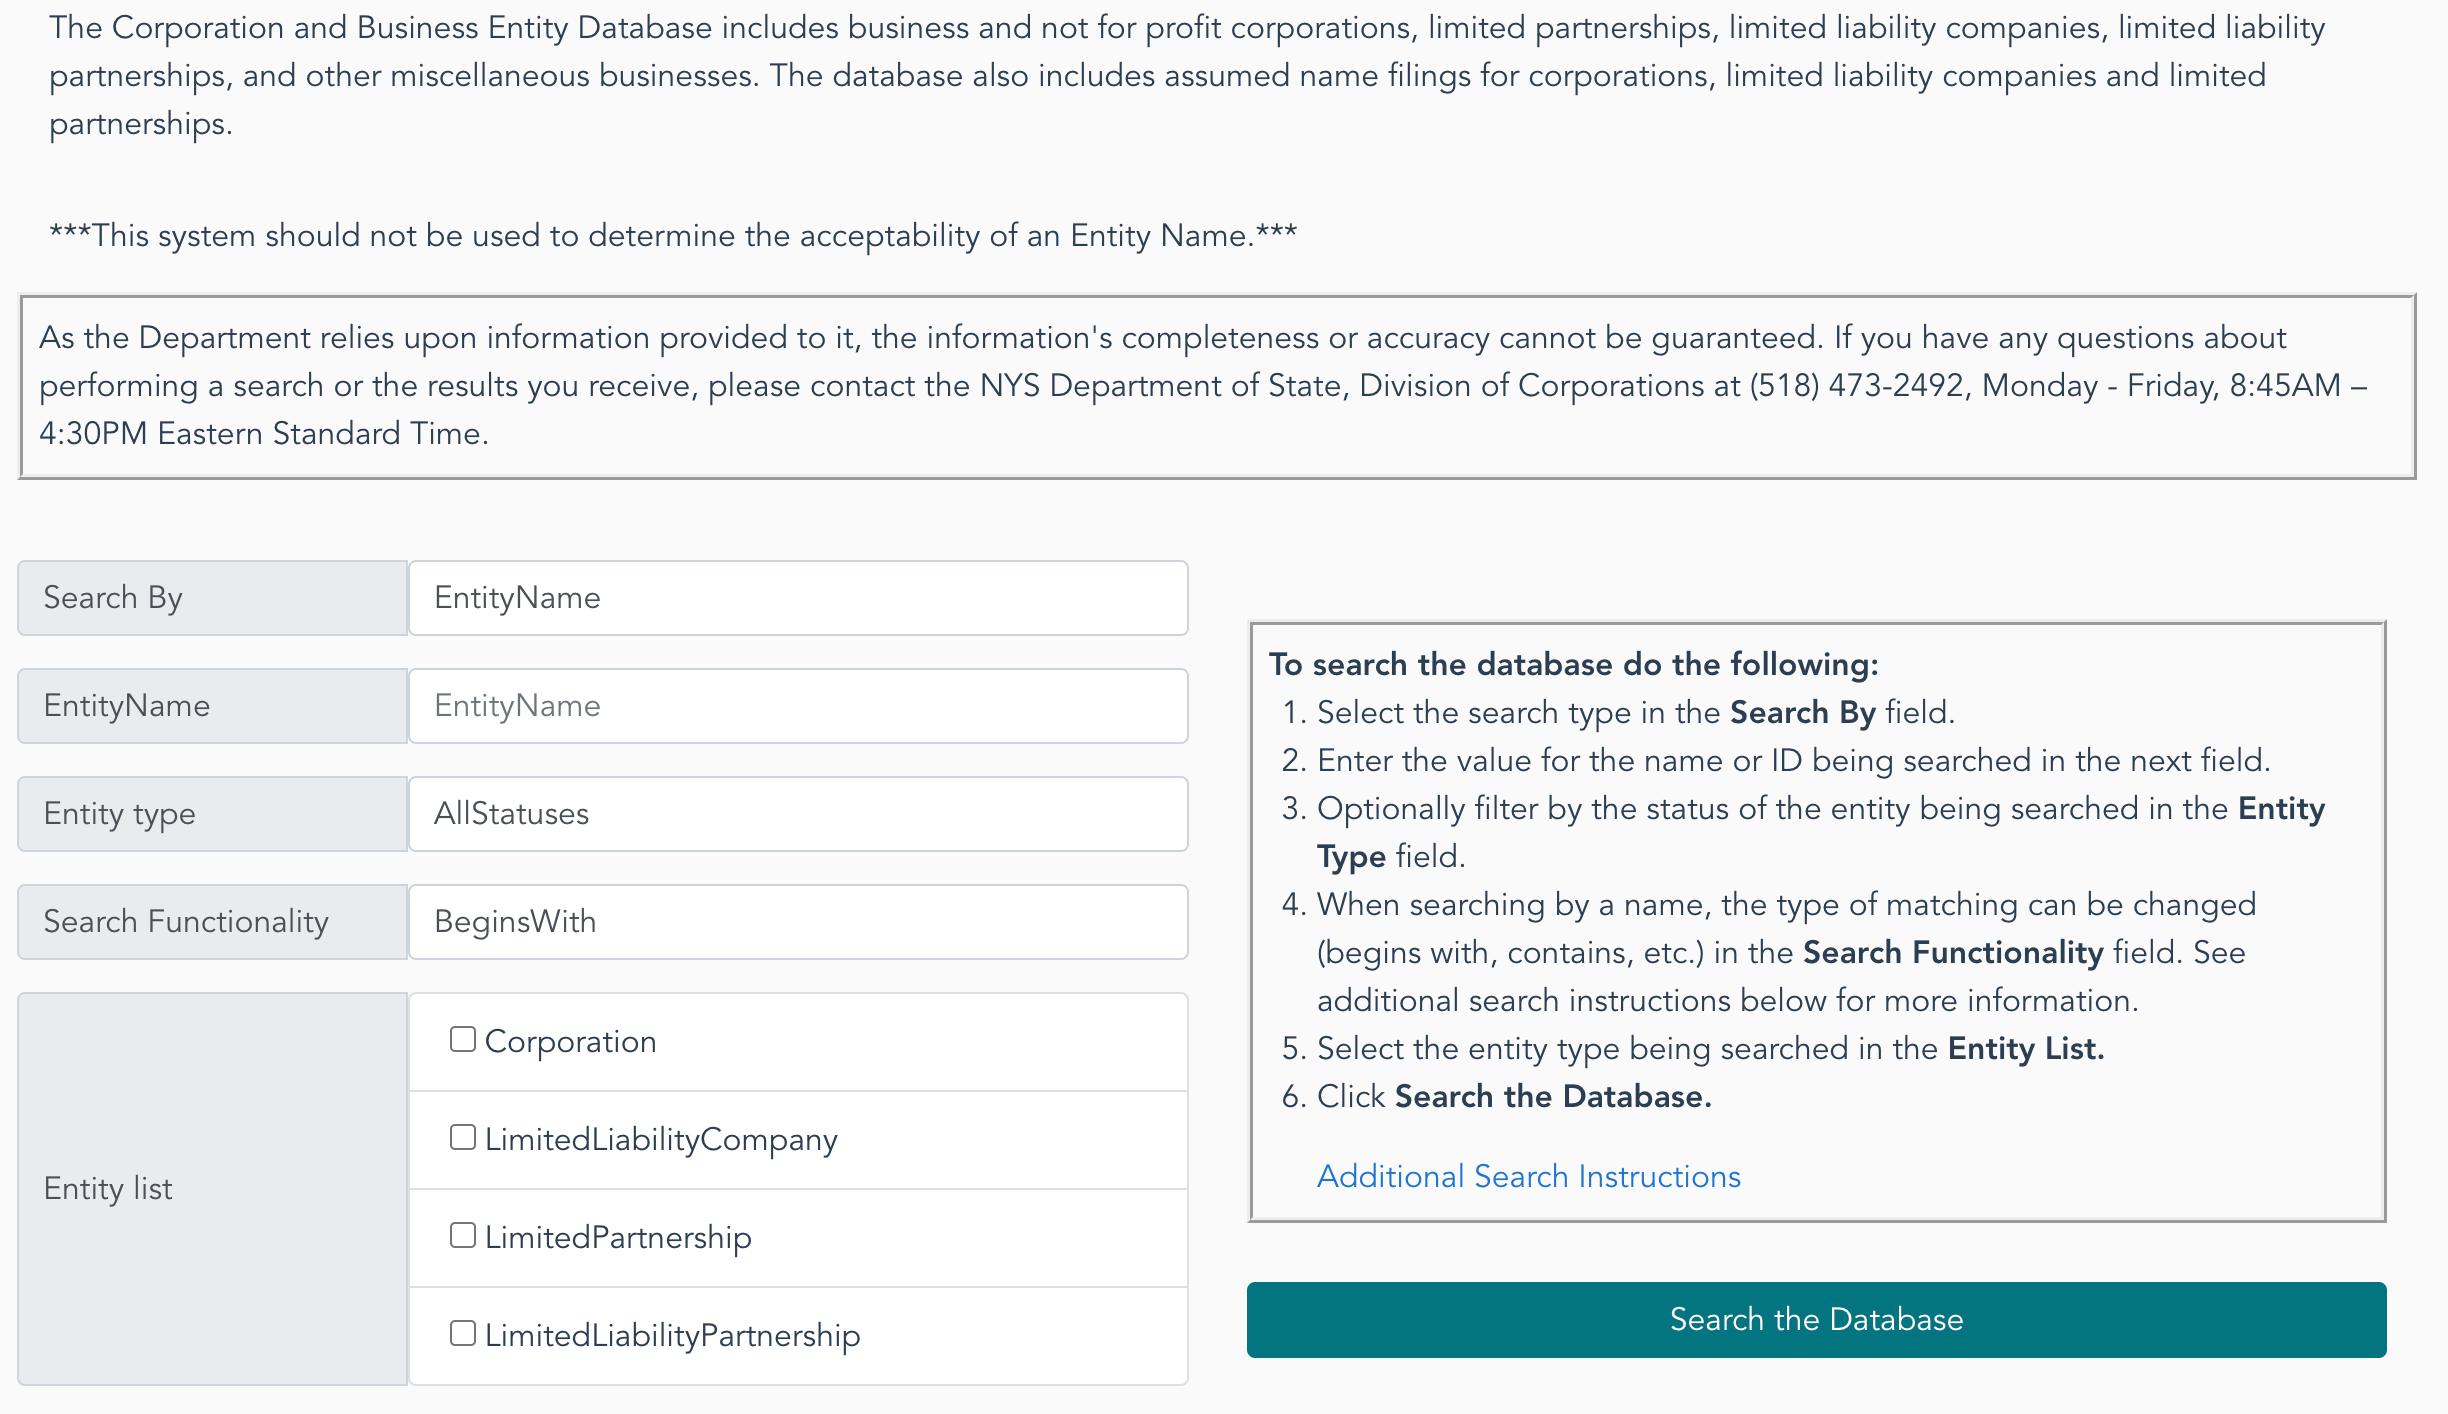
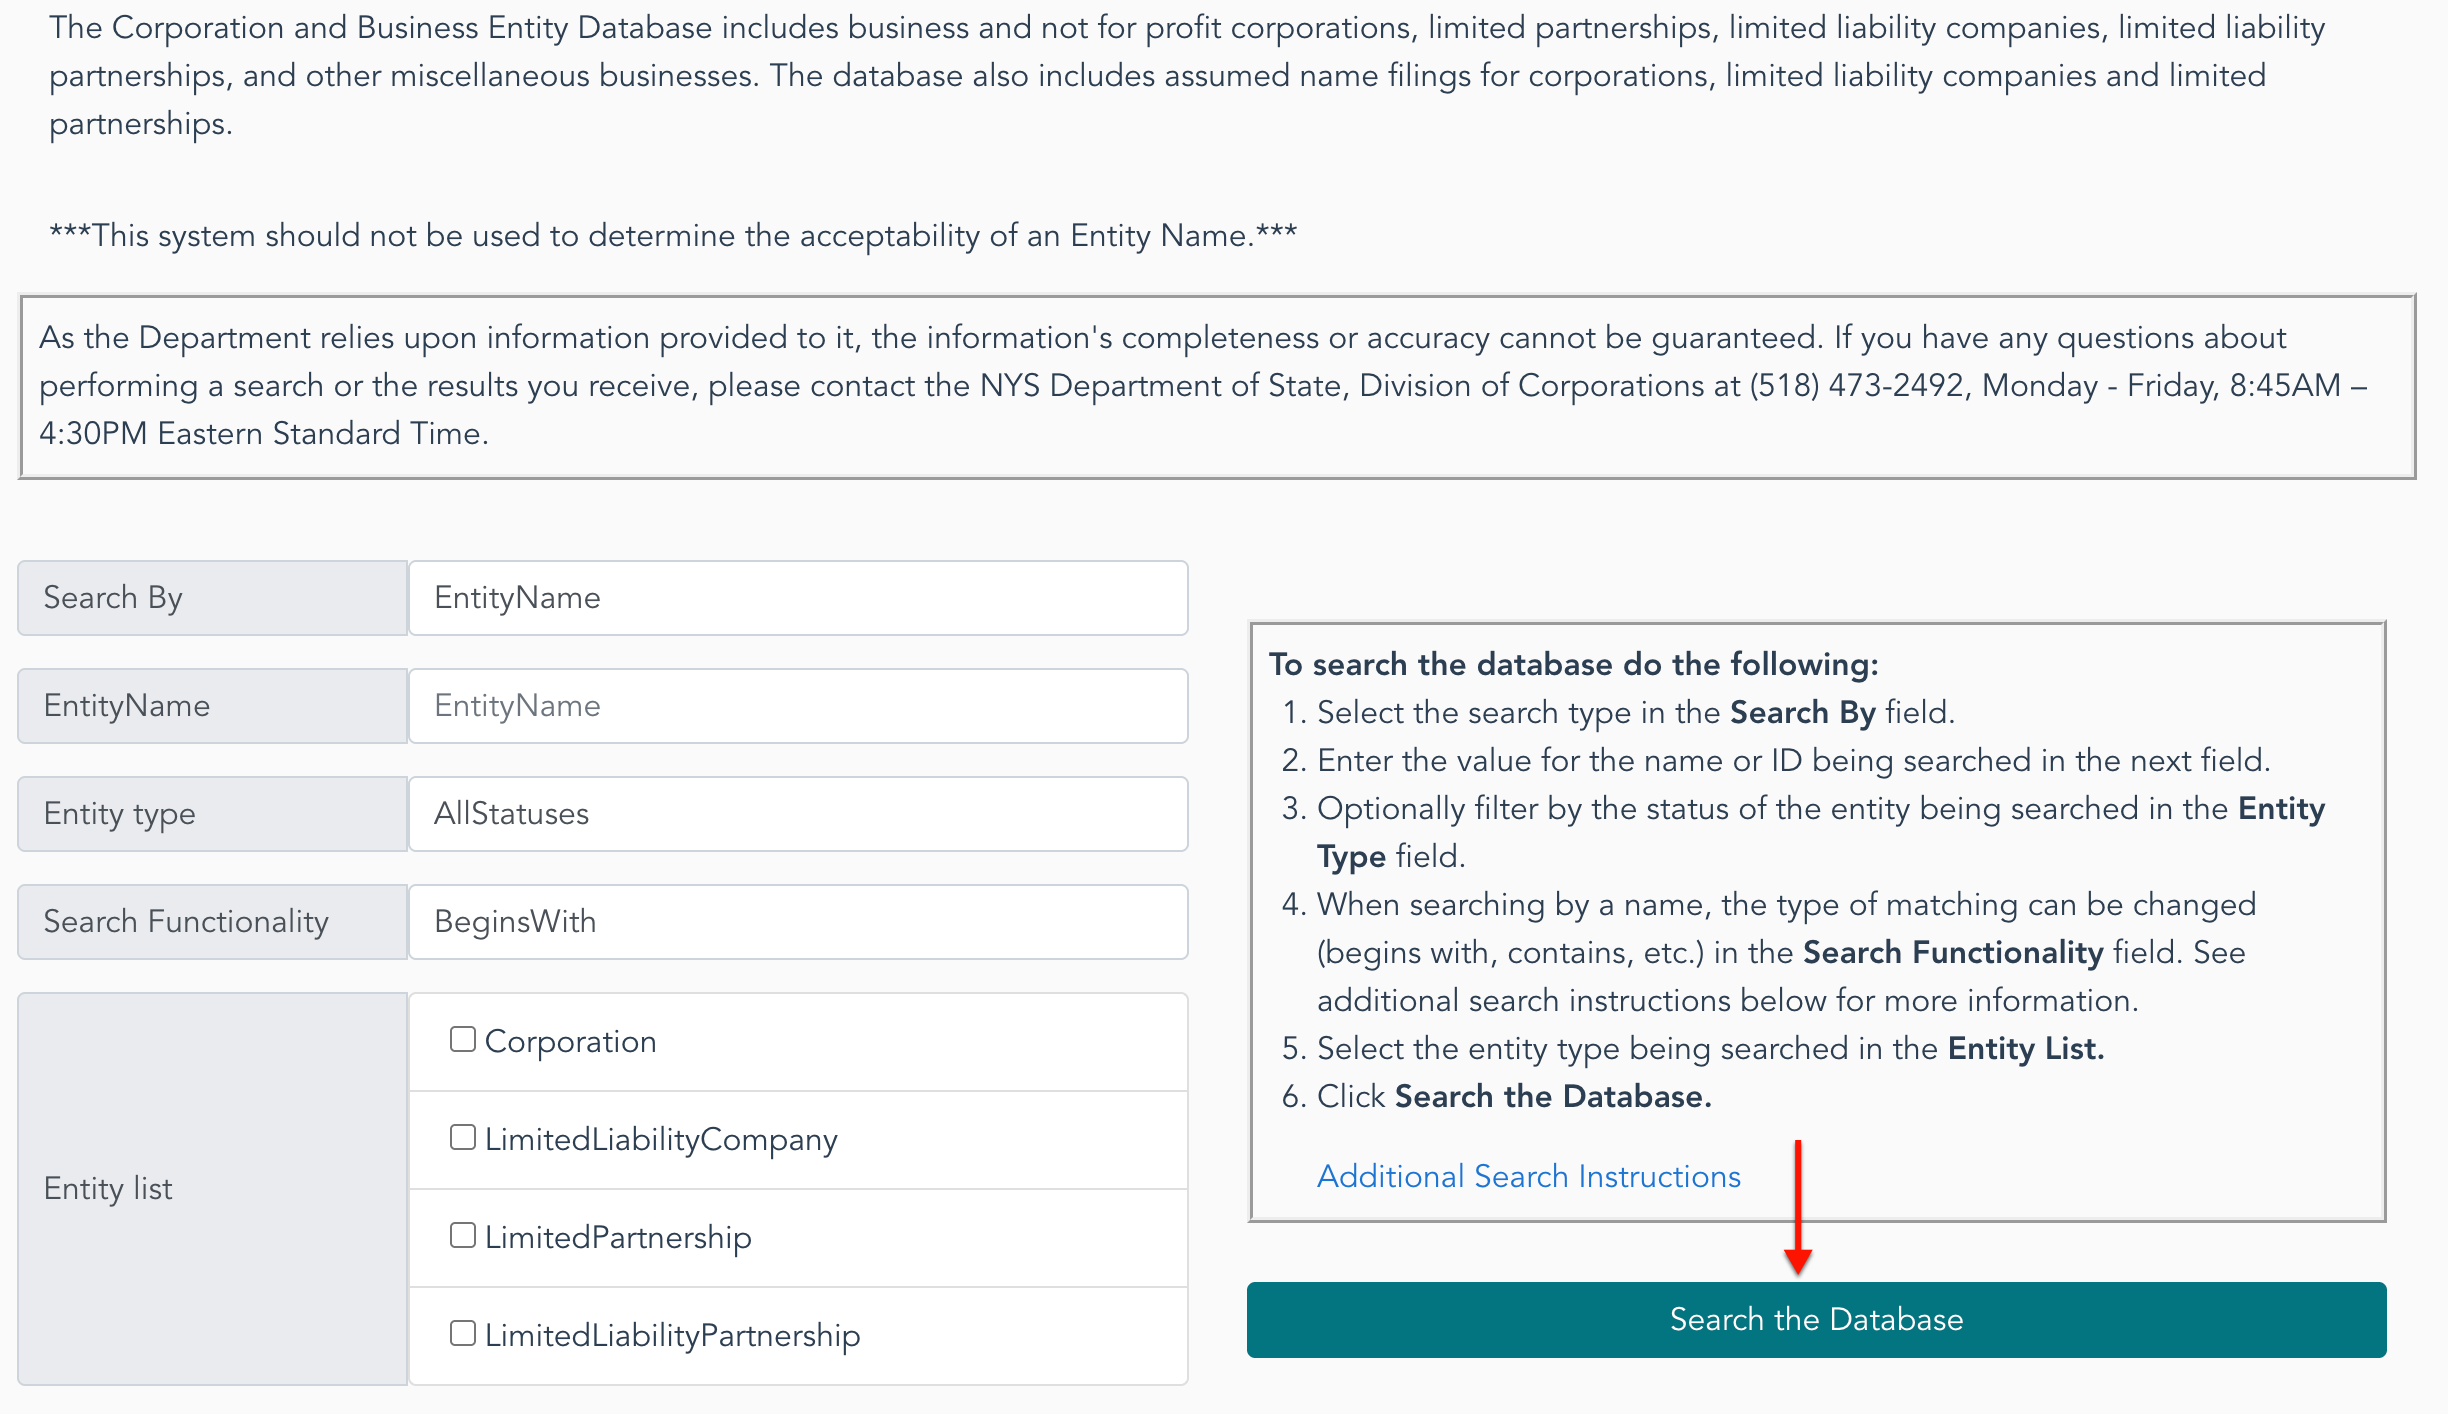
Select one of the options from the “Search By” drop-down menu (see image) to classify your search phrase or number. In this example, choose “Entity Name.”
- Search By
- Entity Name
- Entity Type
- Search Functionality
- Entity List
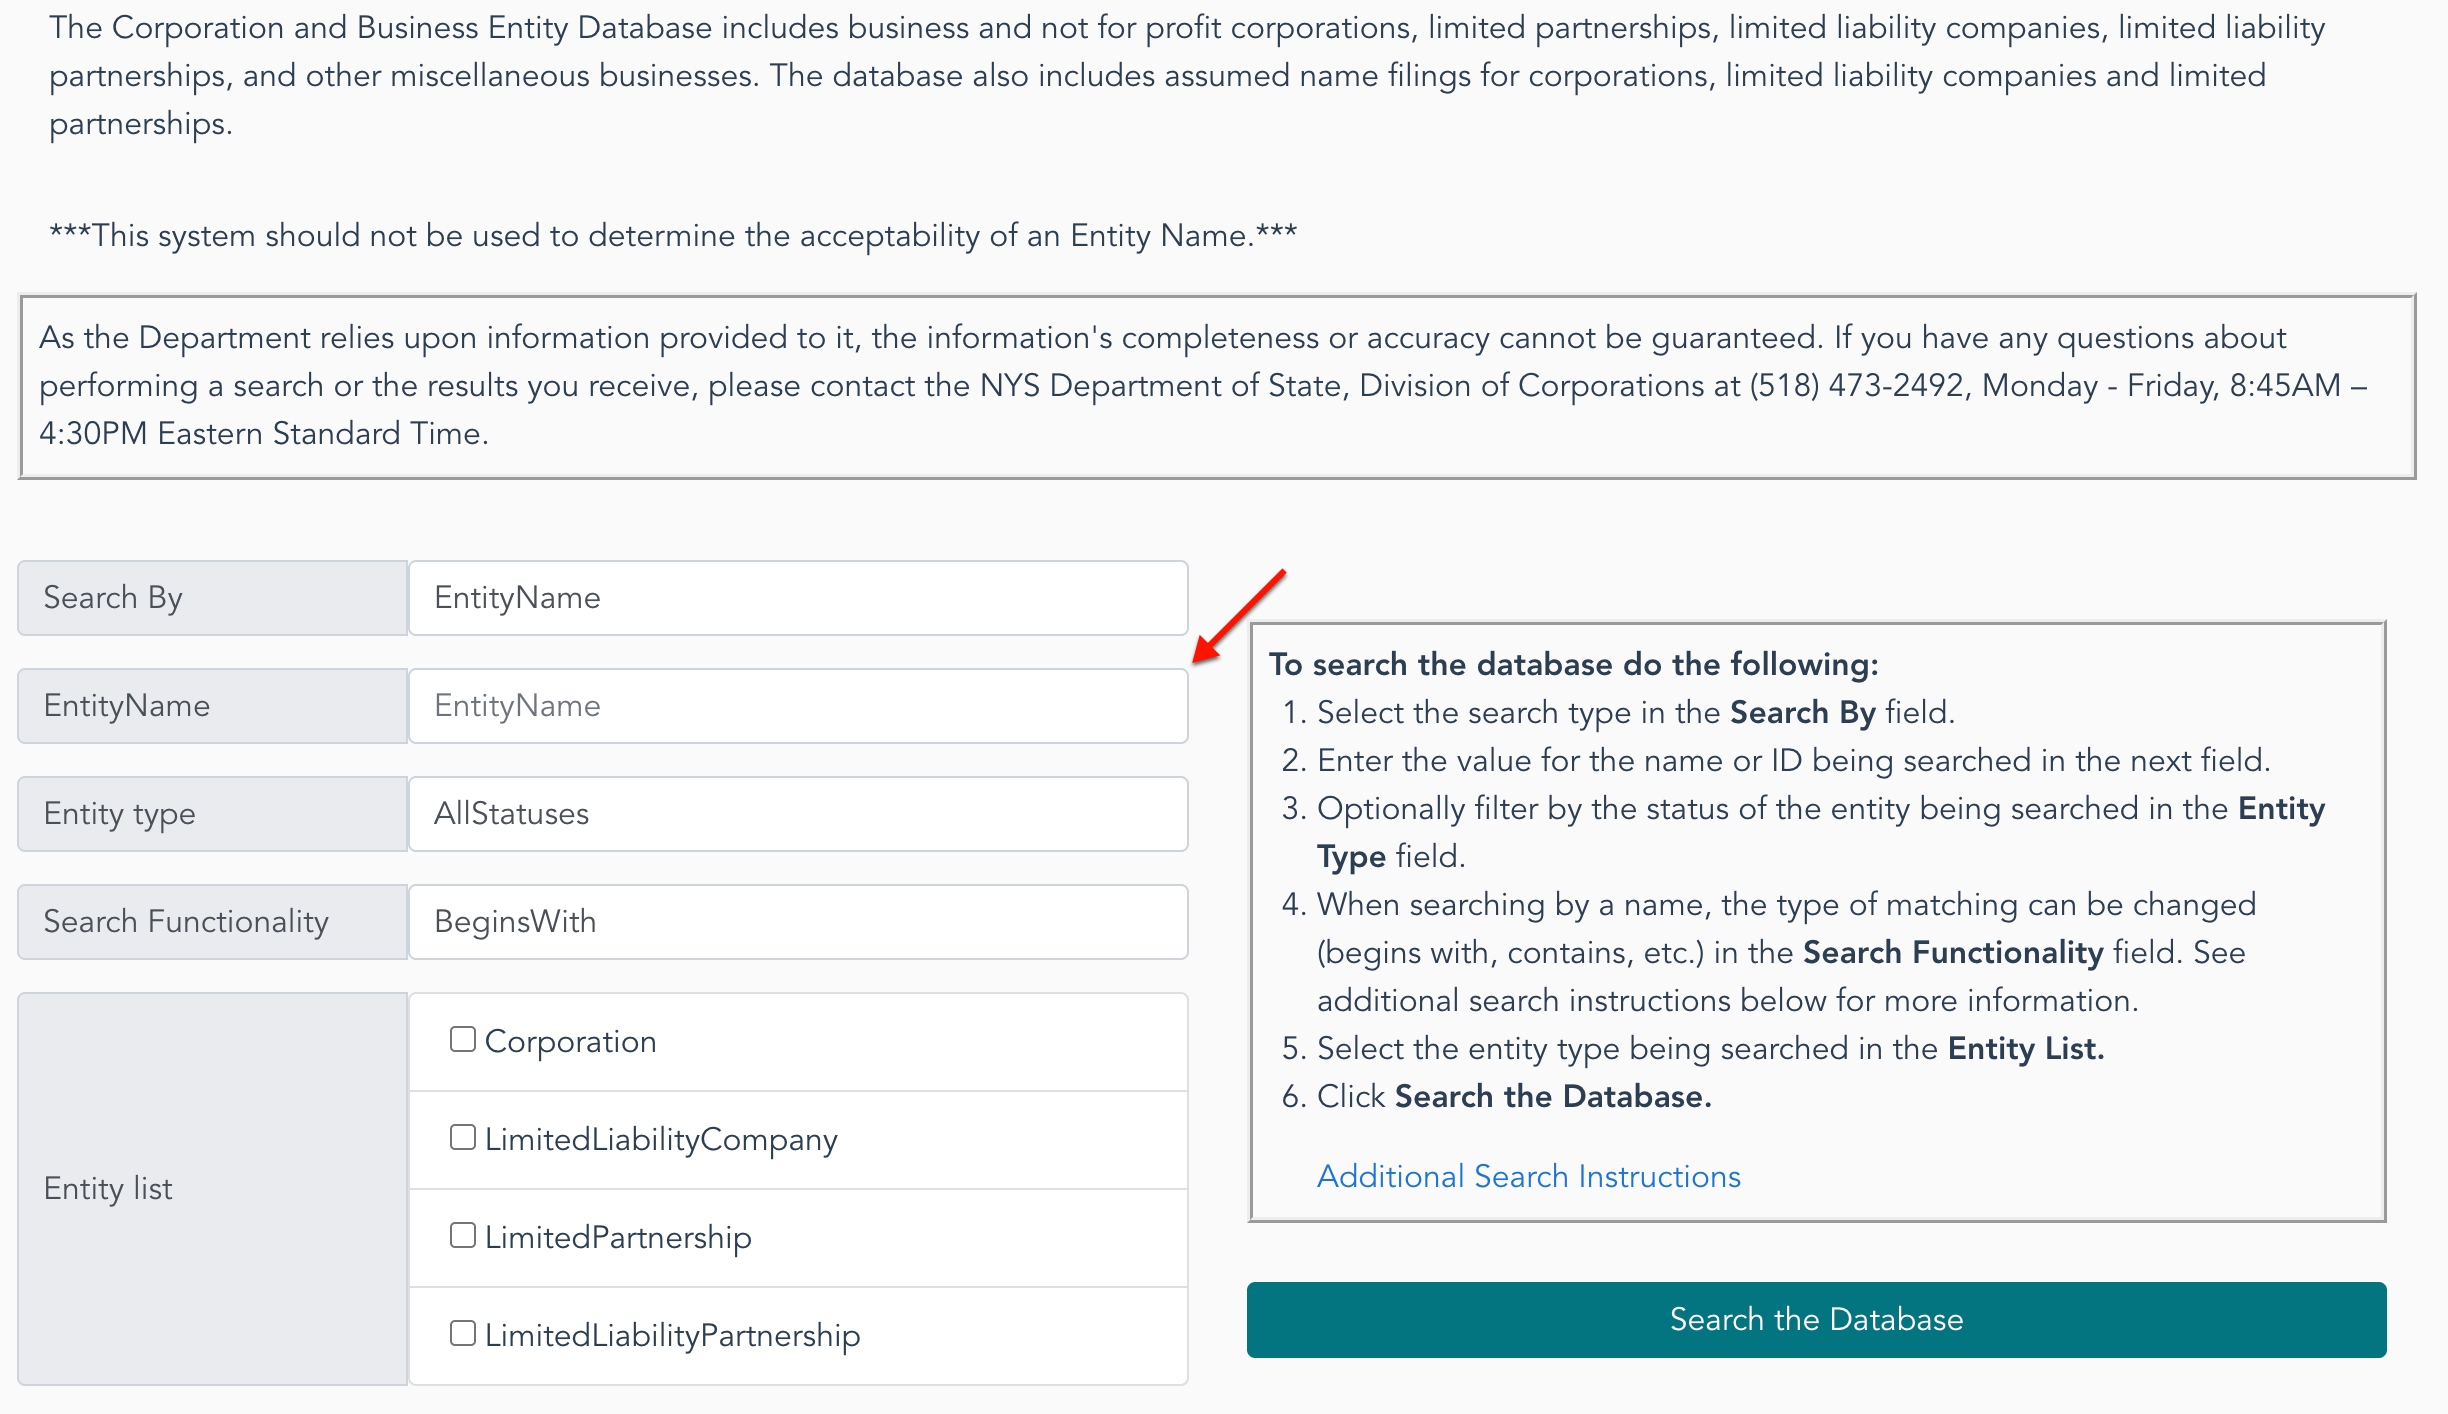
Step 3. Provide a Name or Phrase for the Query to Find
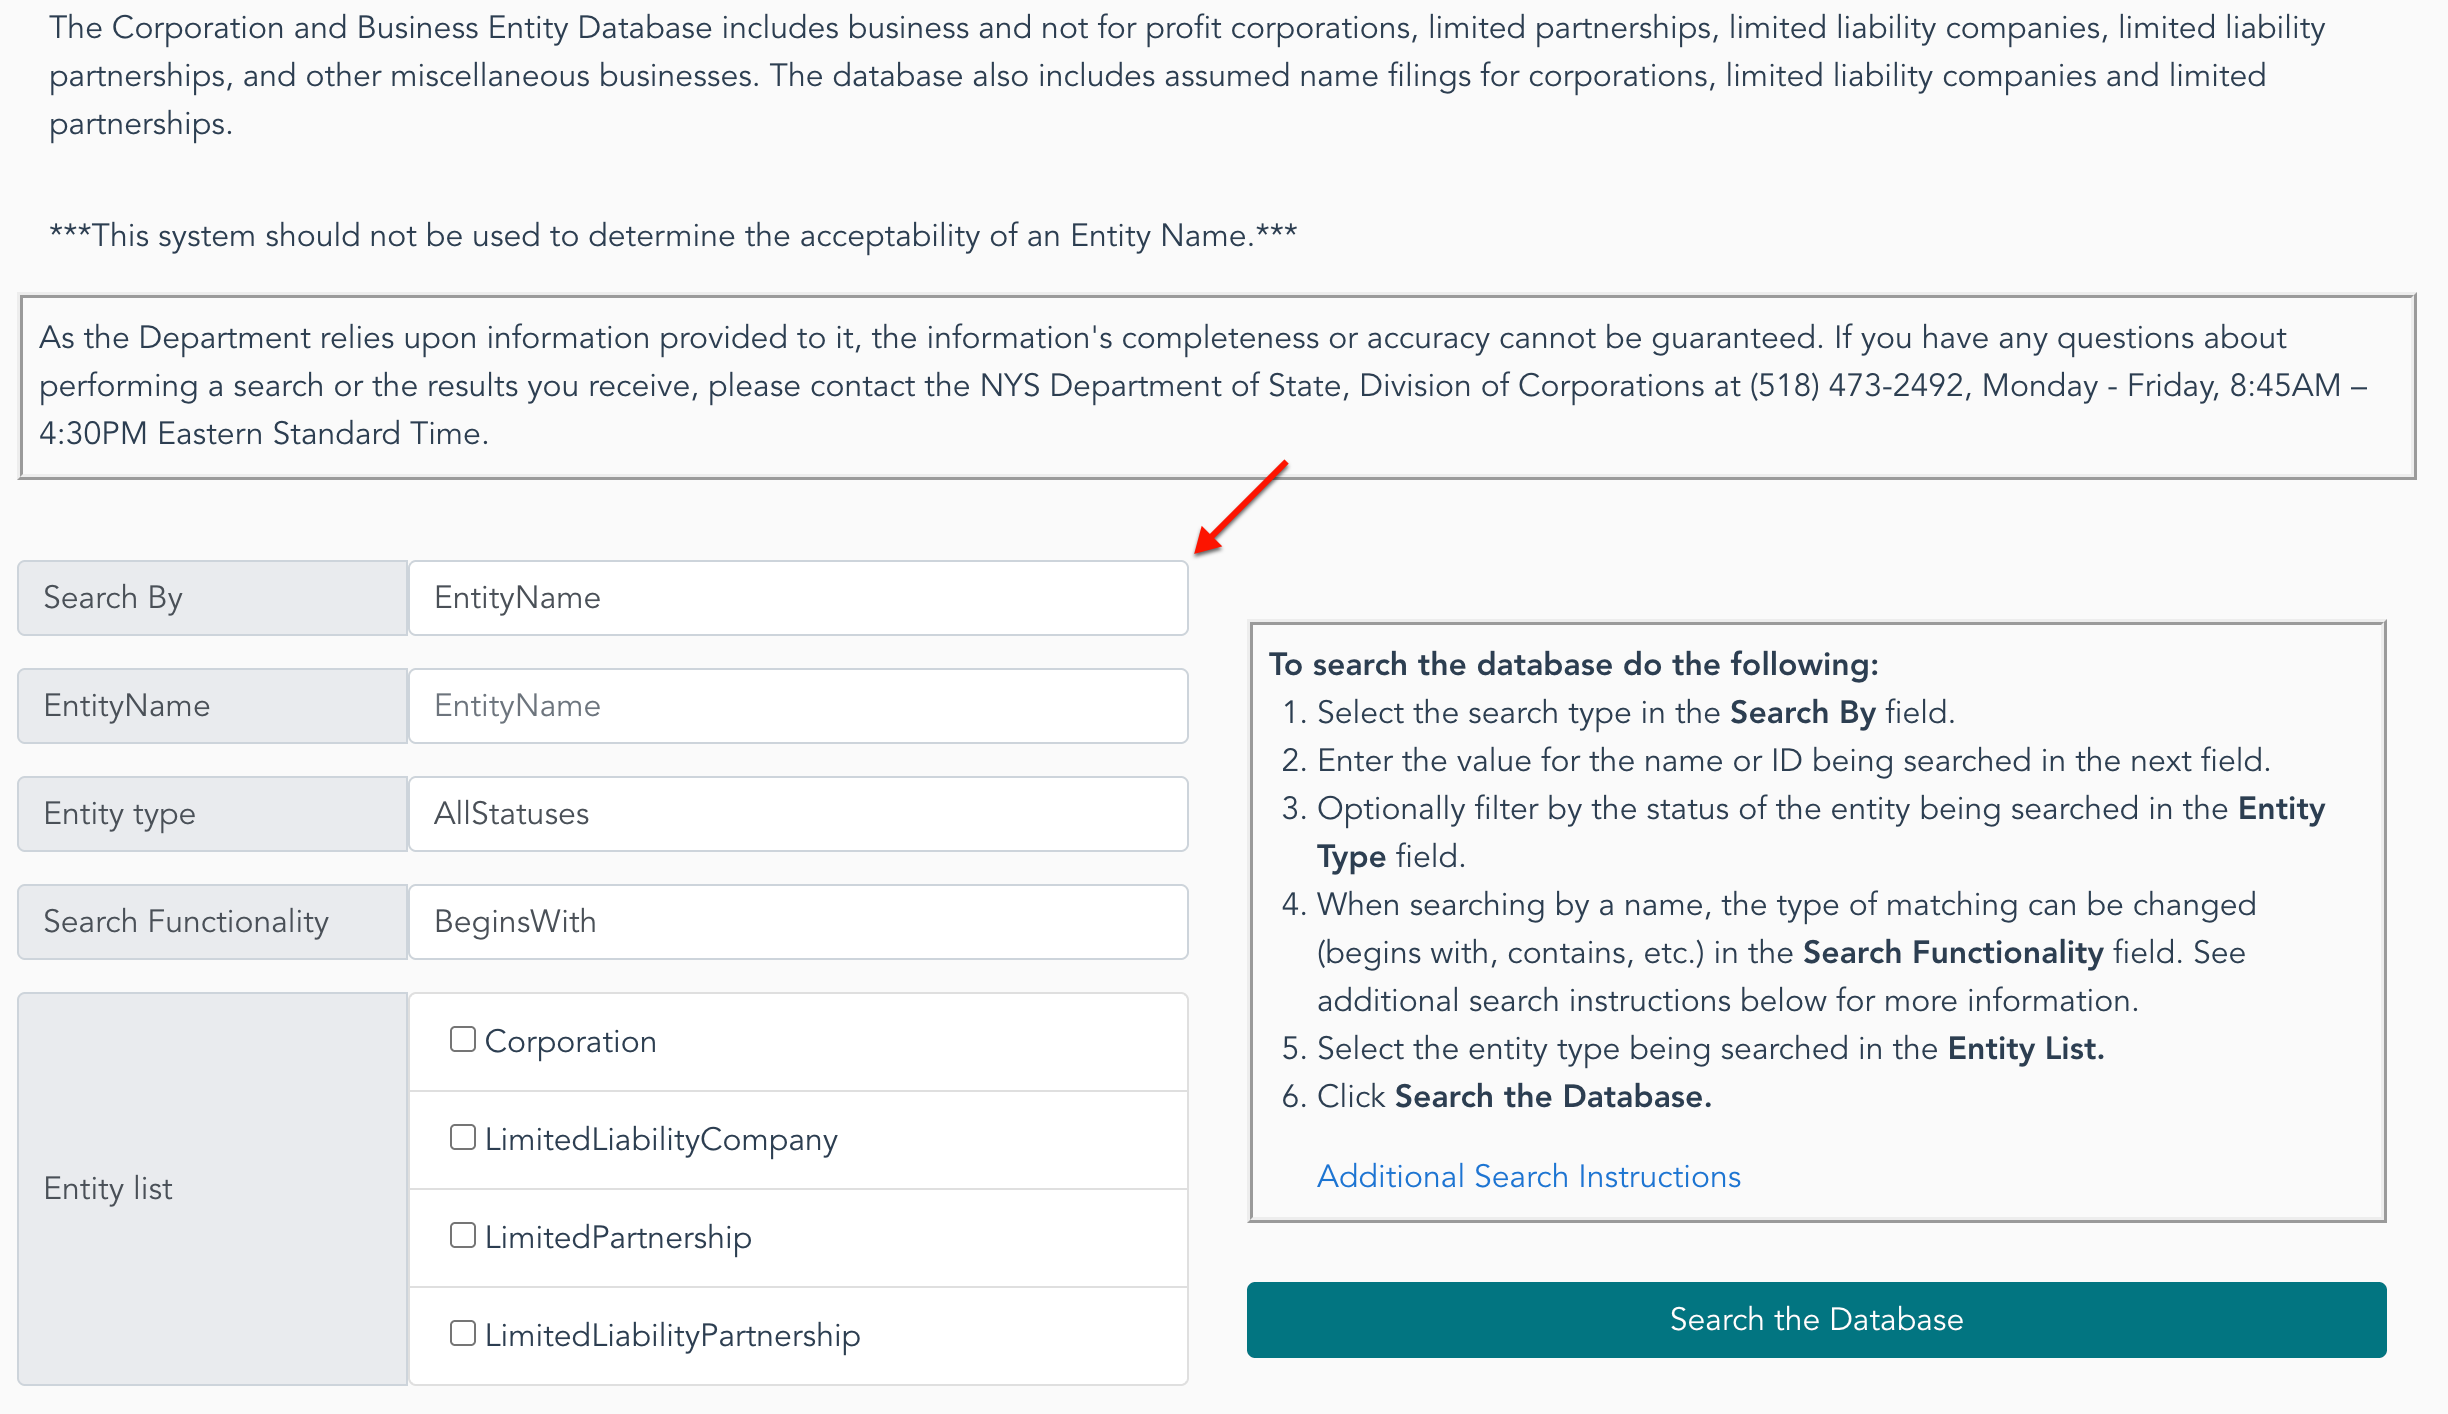
Continue to the “Entity Name” textbox, then enter the target entity’s partial or full name. Since this query tool must search through every entity on file, be as specific as possible.
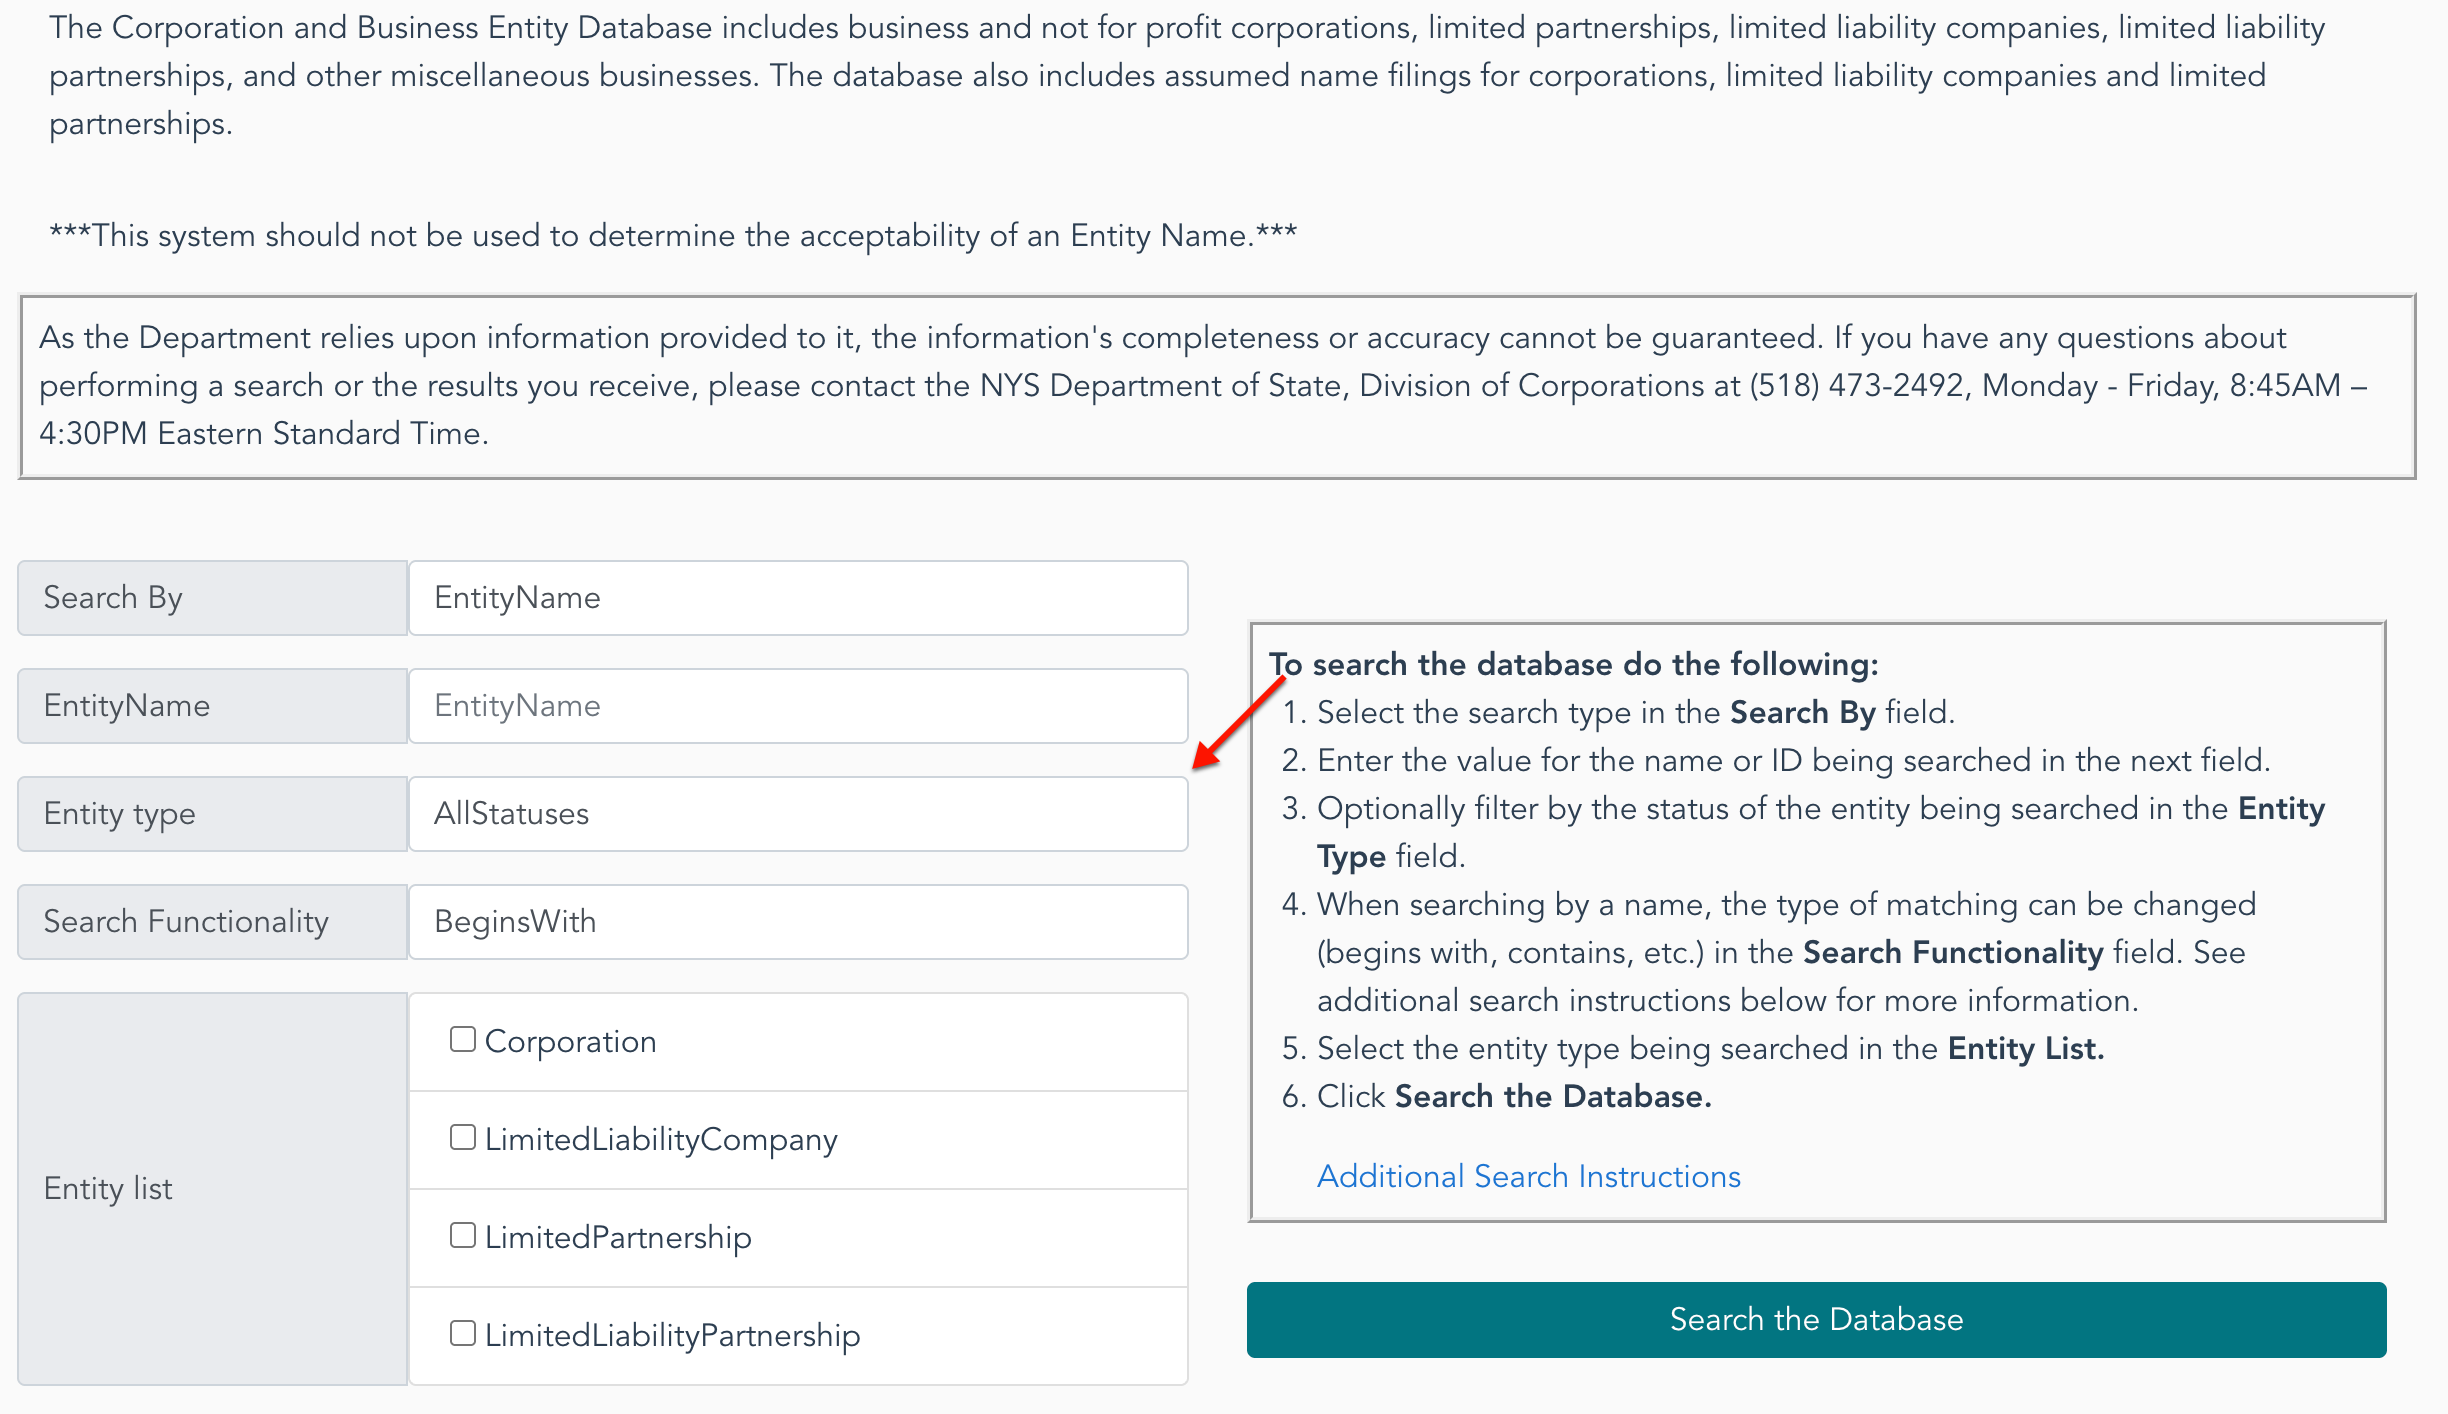
Step 4. Classify the Entity of Interest
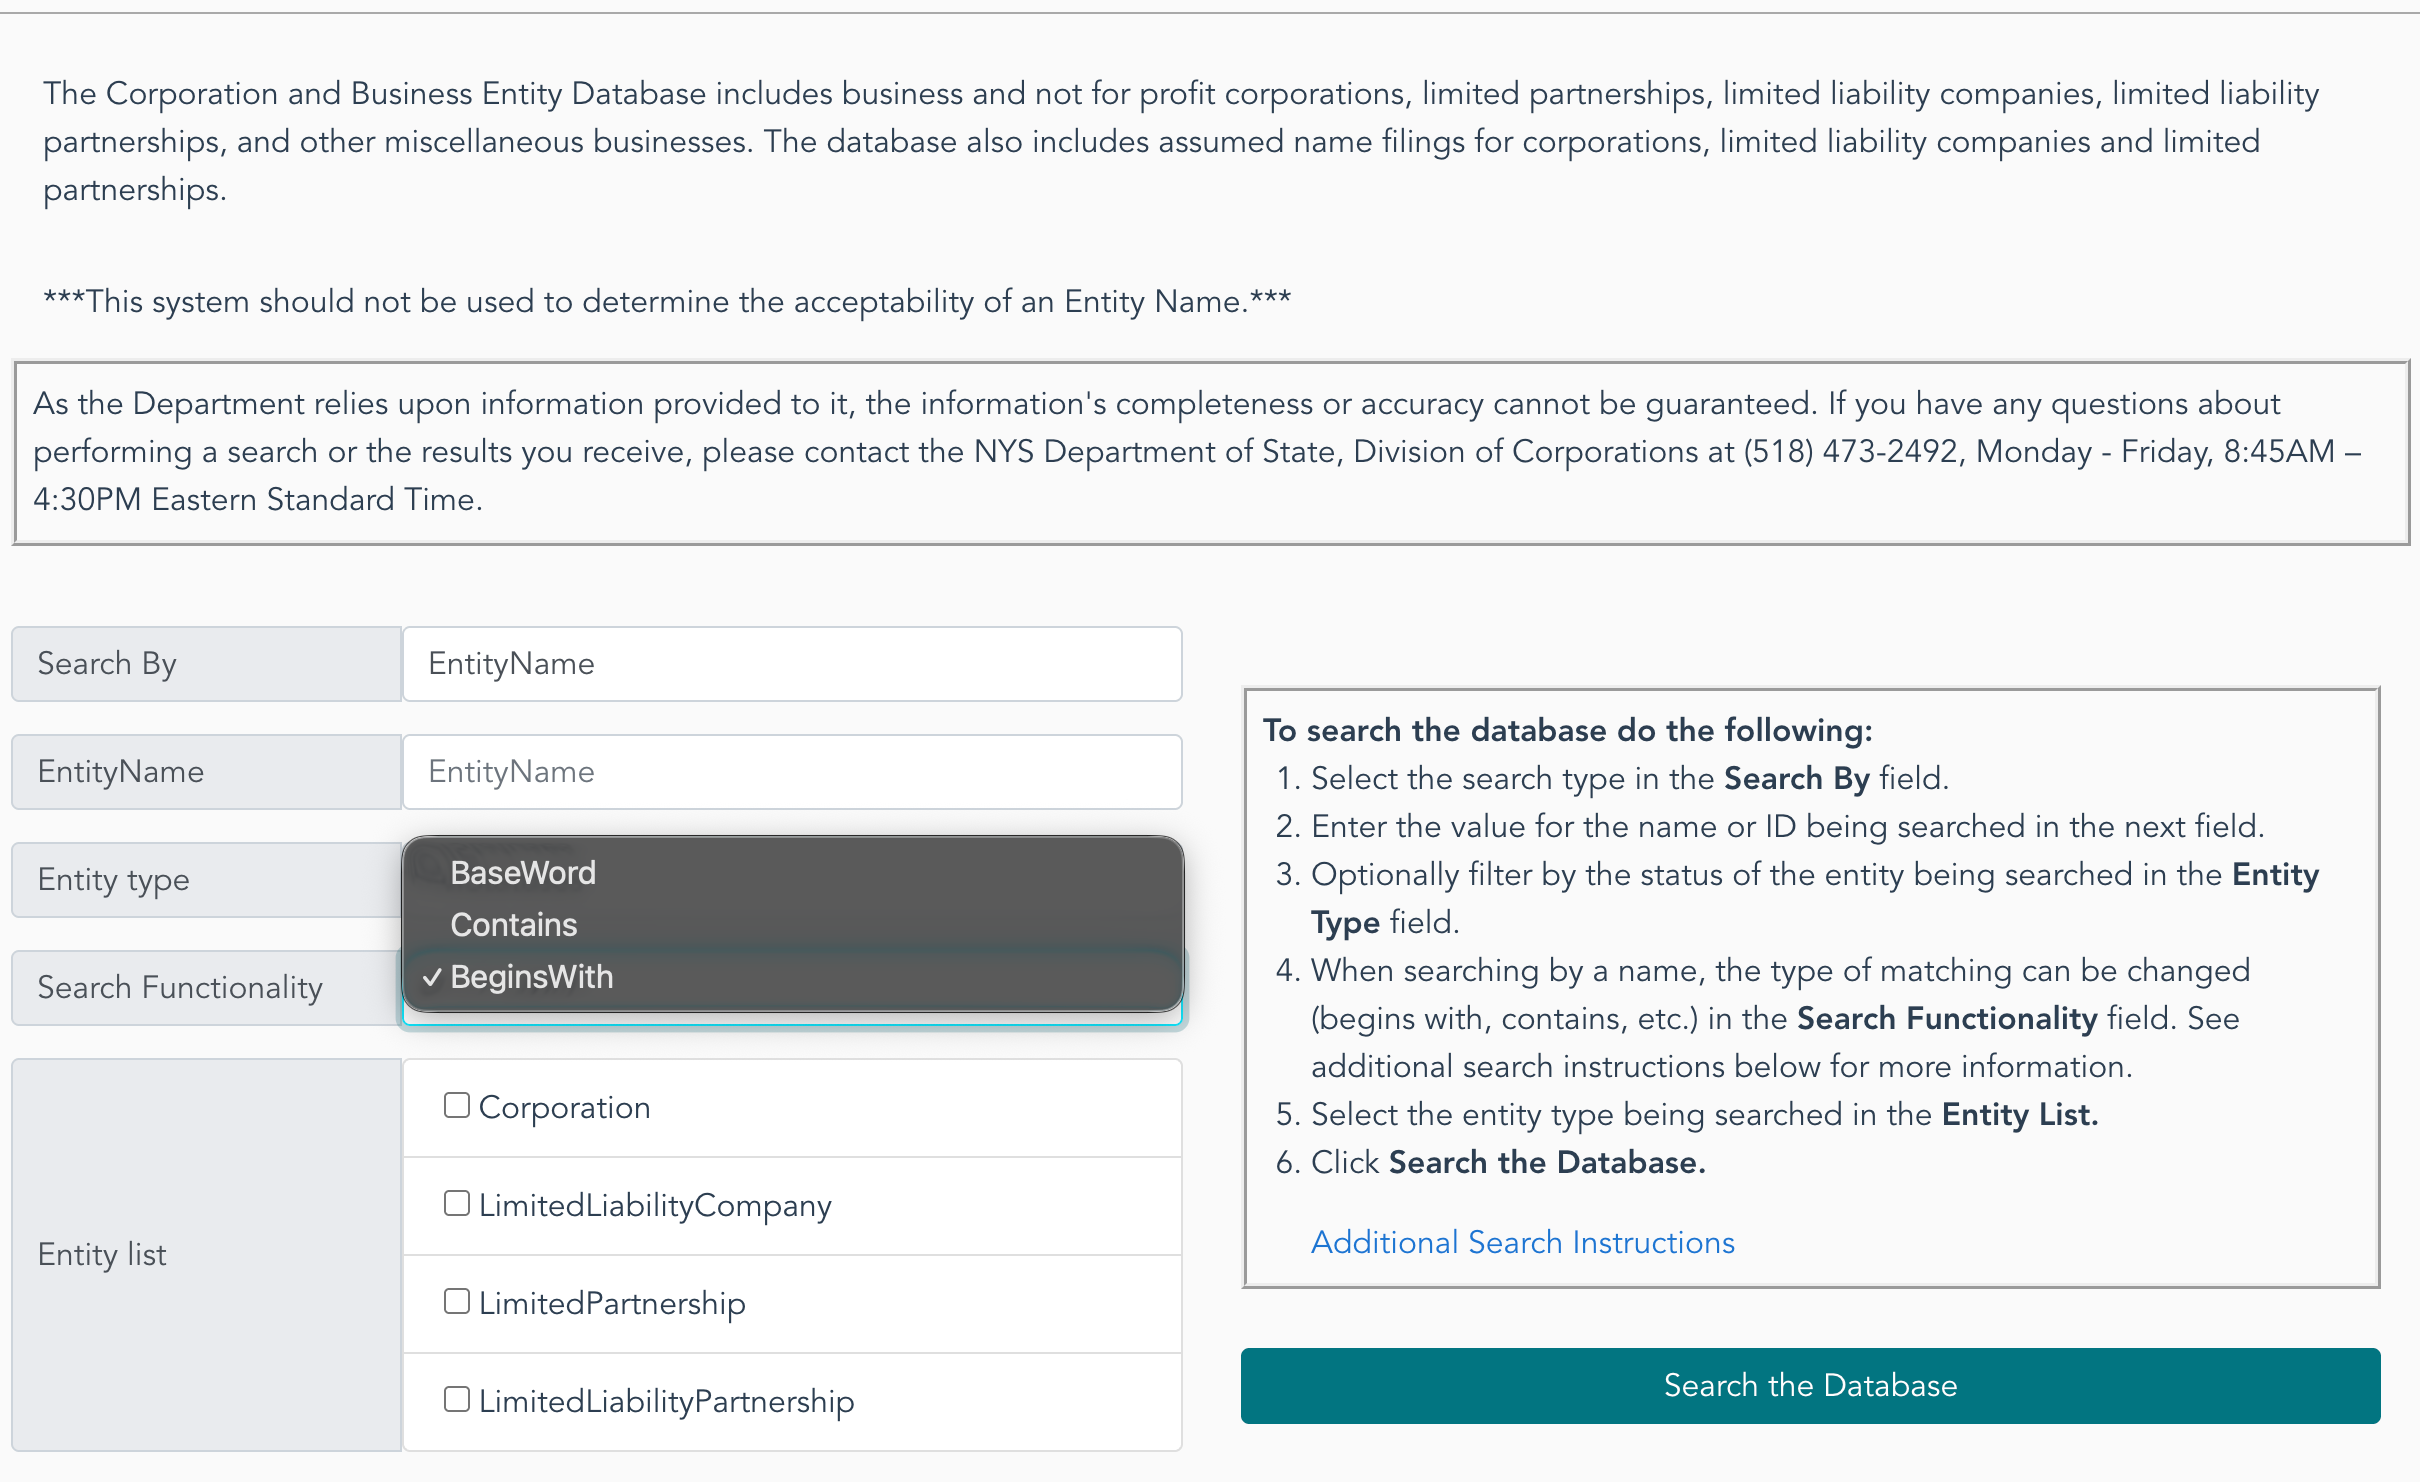
Set the query to narrow the matching results to a manageable number by tending to the “Entity Type” drop-down menu (see image). Use your selection to define the entity’s status.
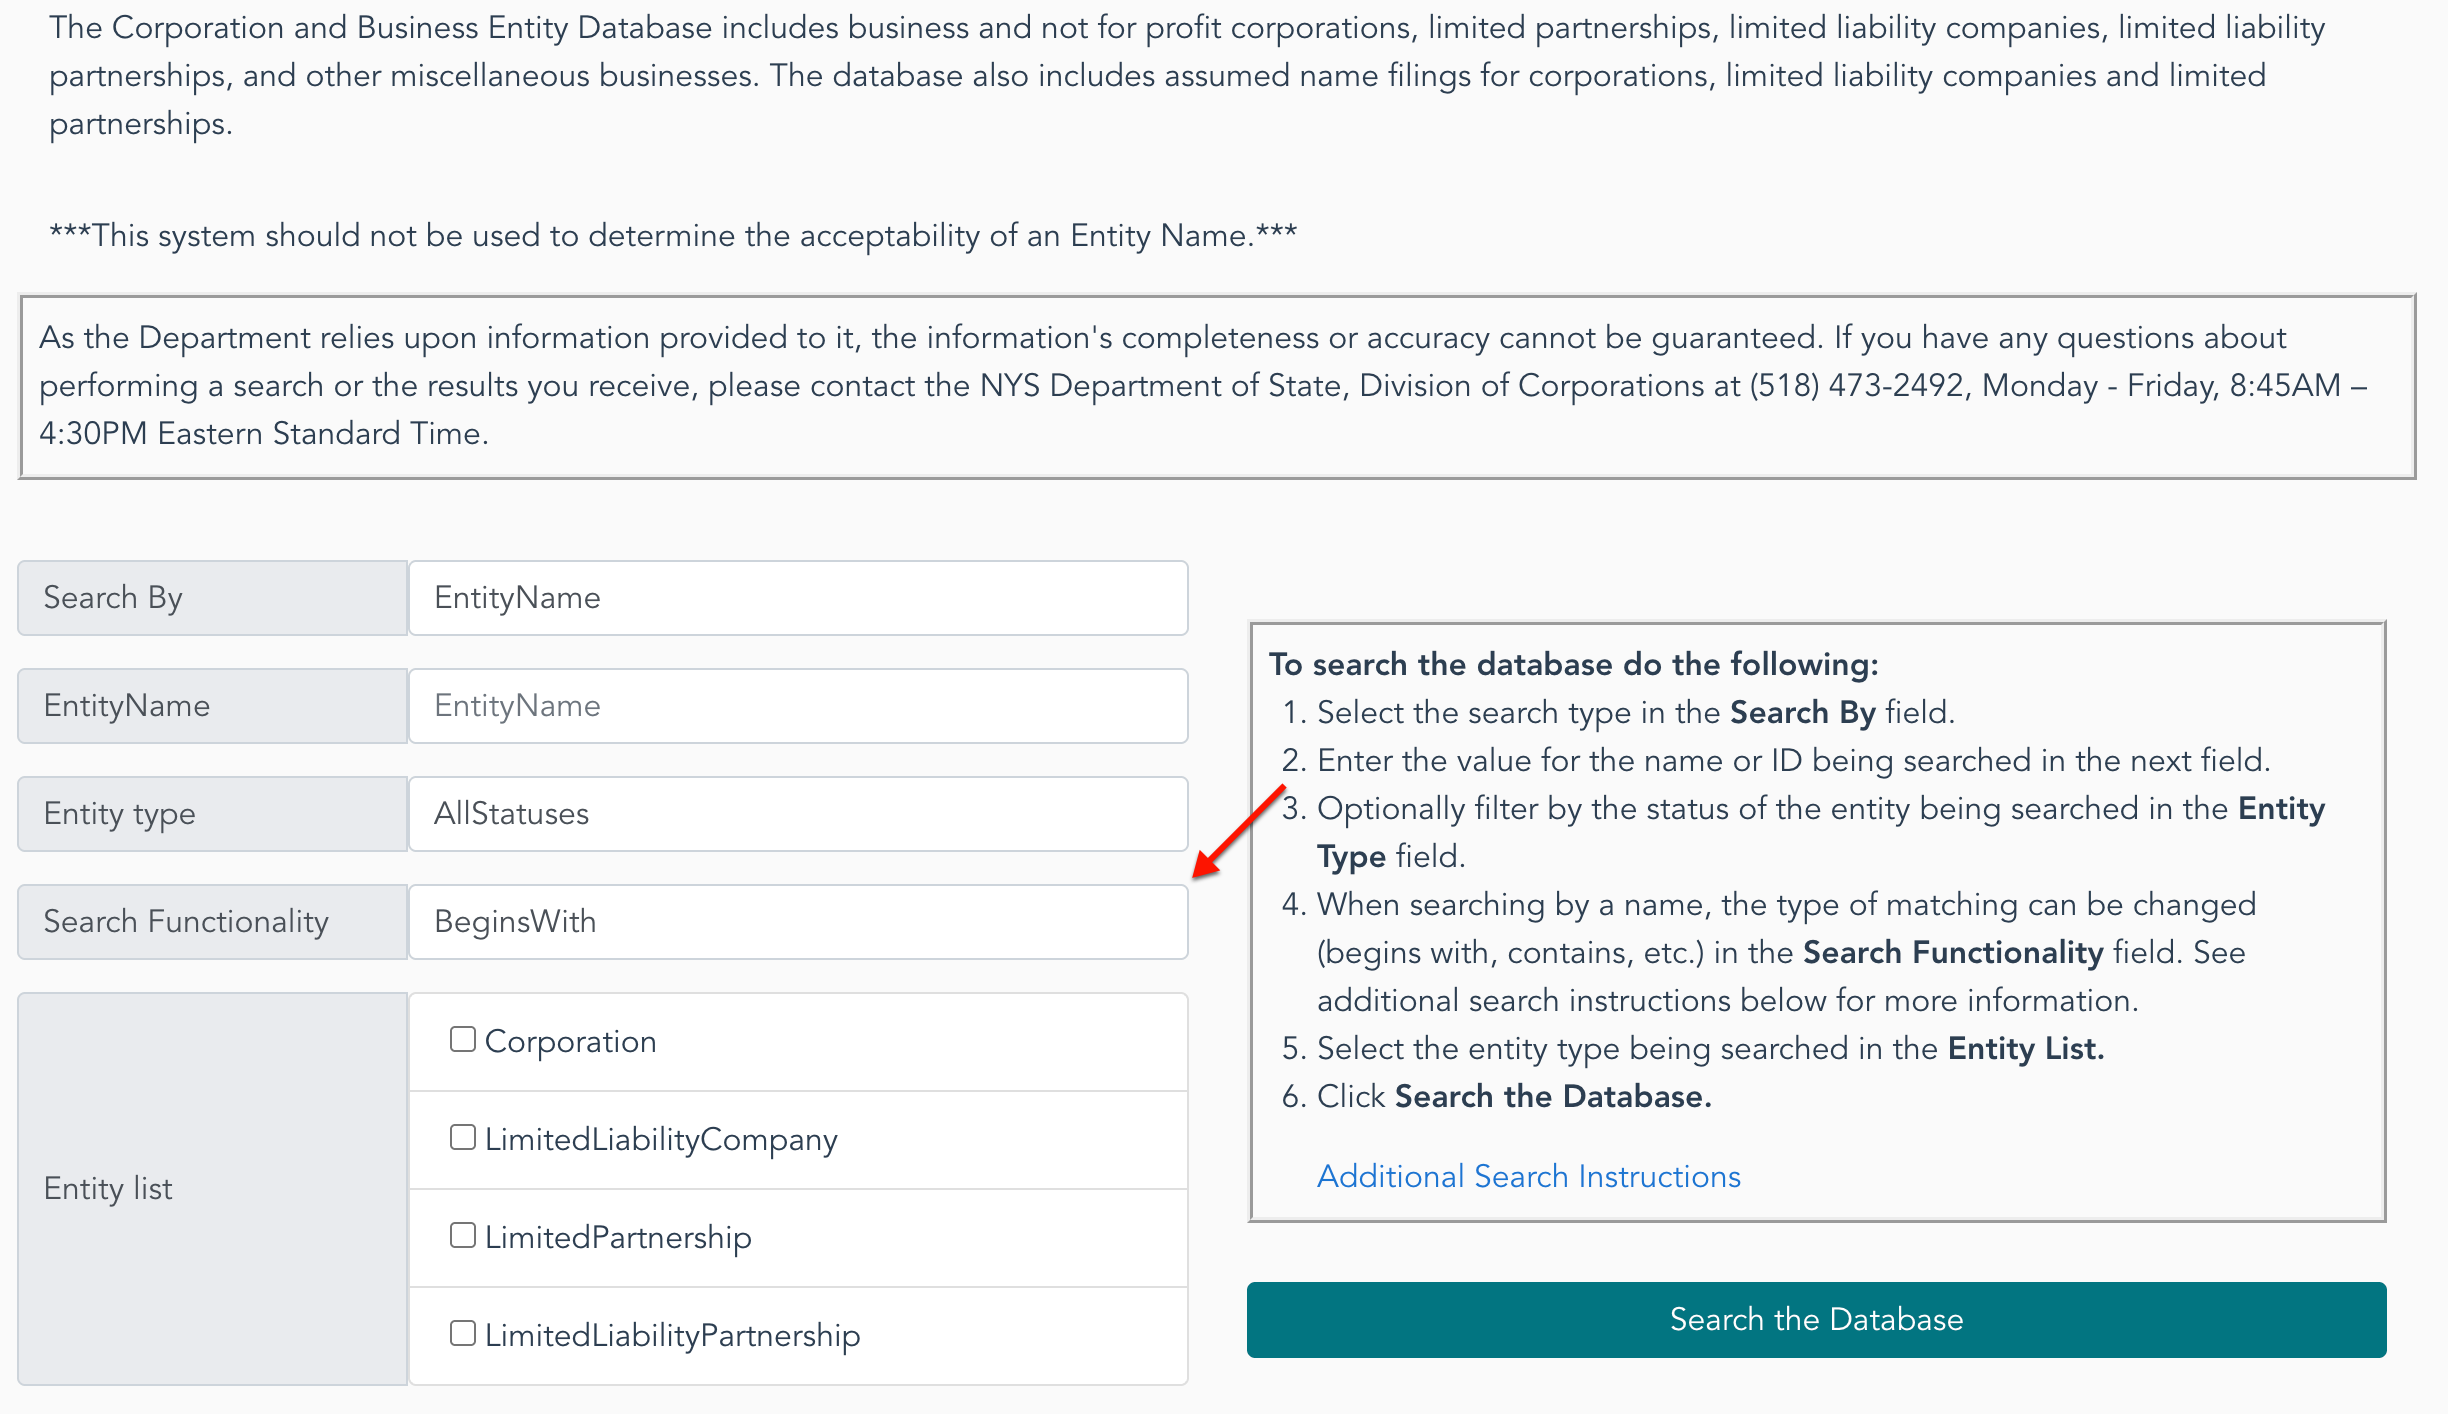
Step 5. Set the Search Function
Make use of the “Search Functionality” menu (see image), to define where the search phrase appears in the entity name. Remember, exact phrasing promotes a tighter query.
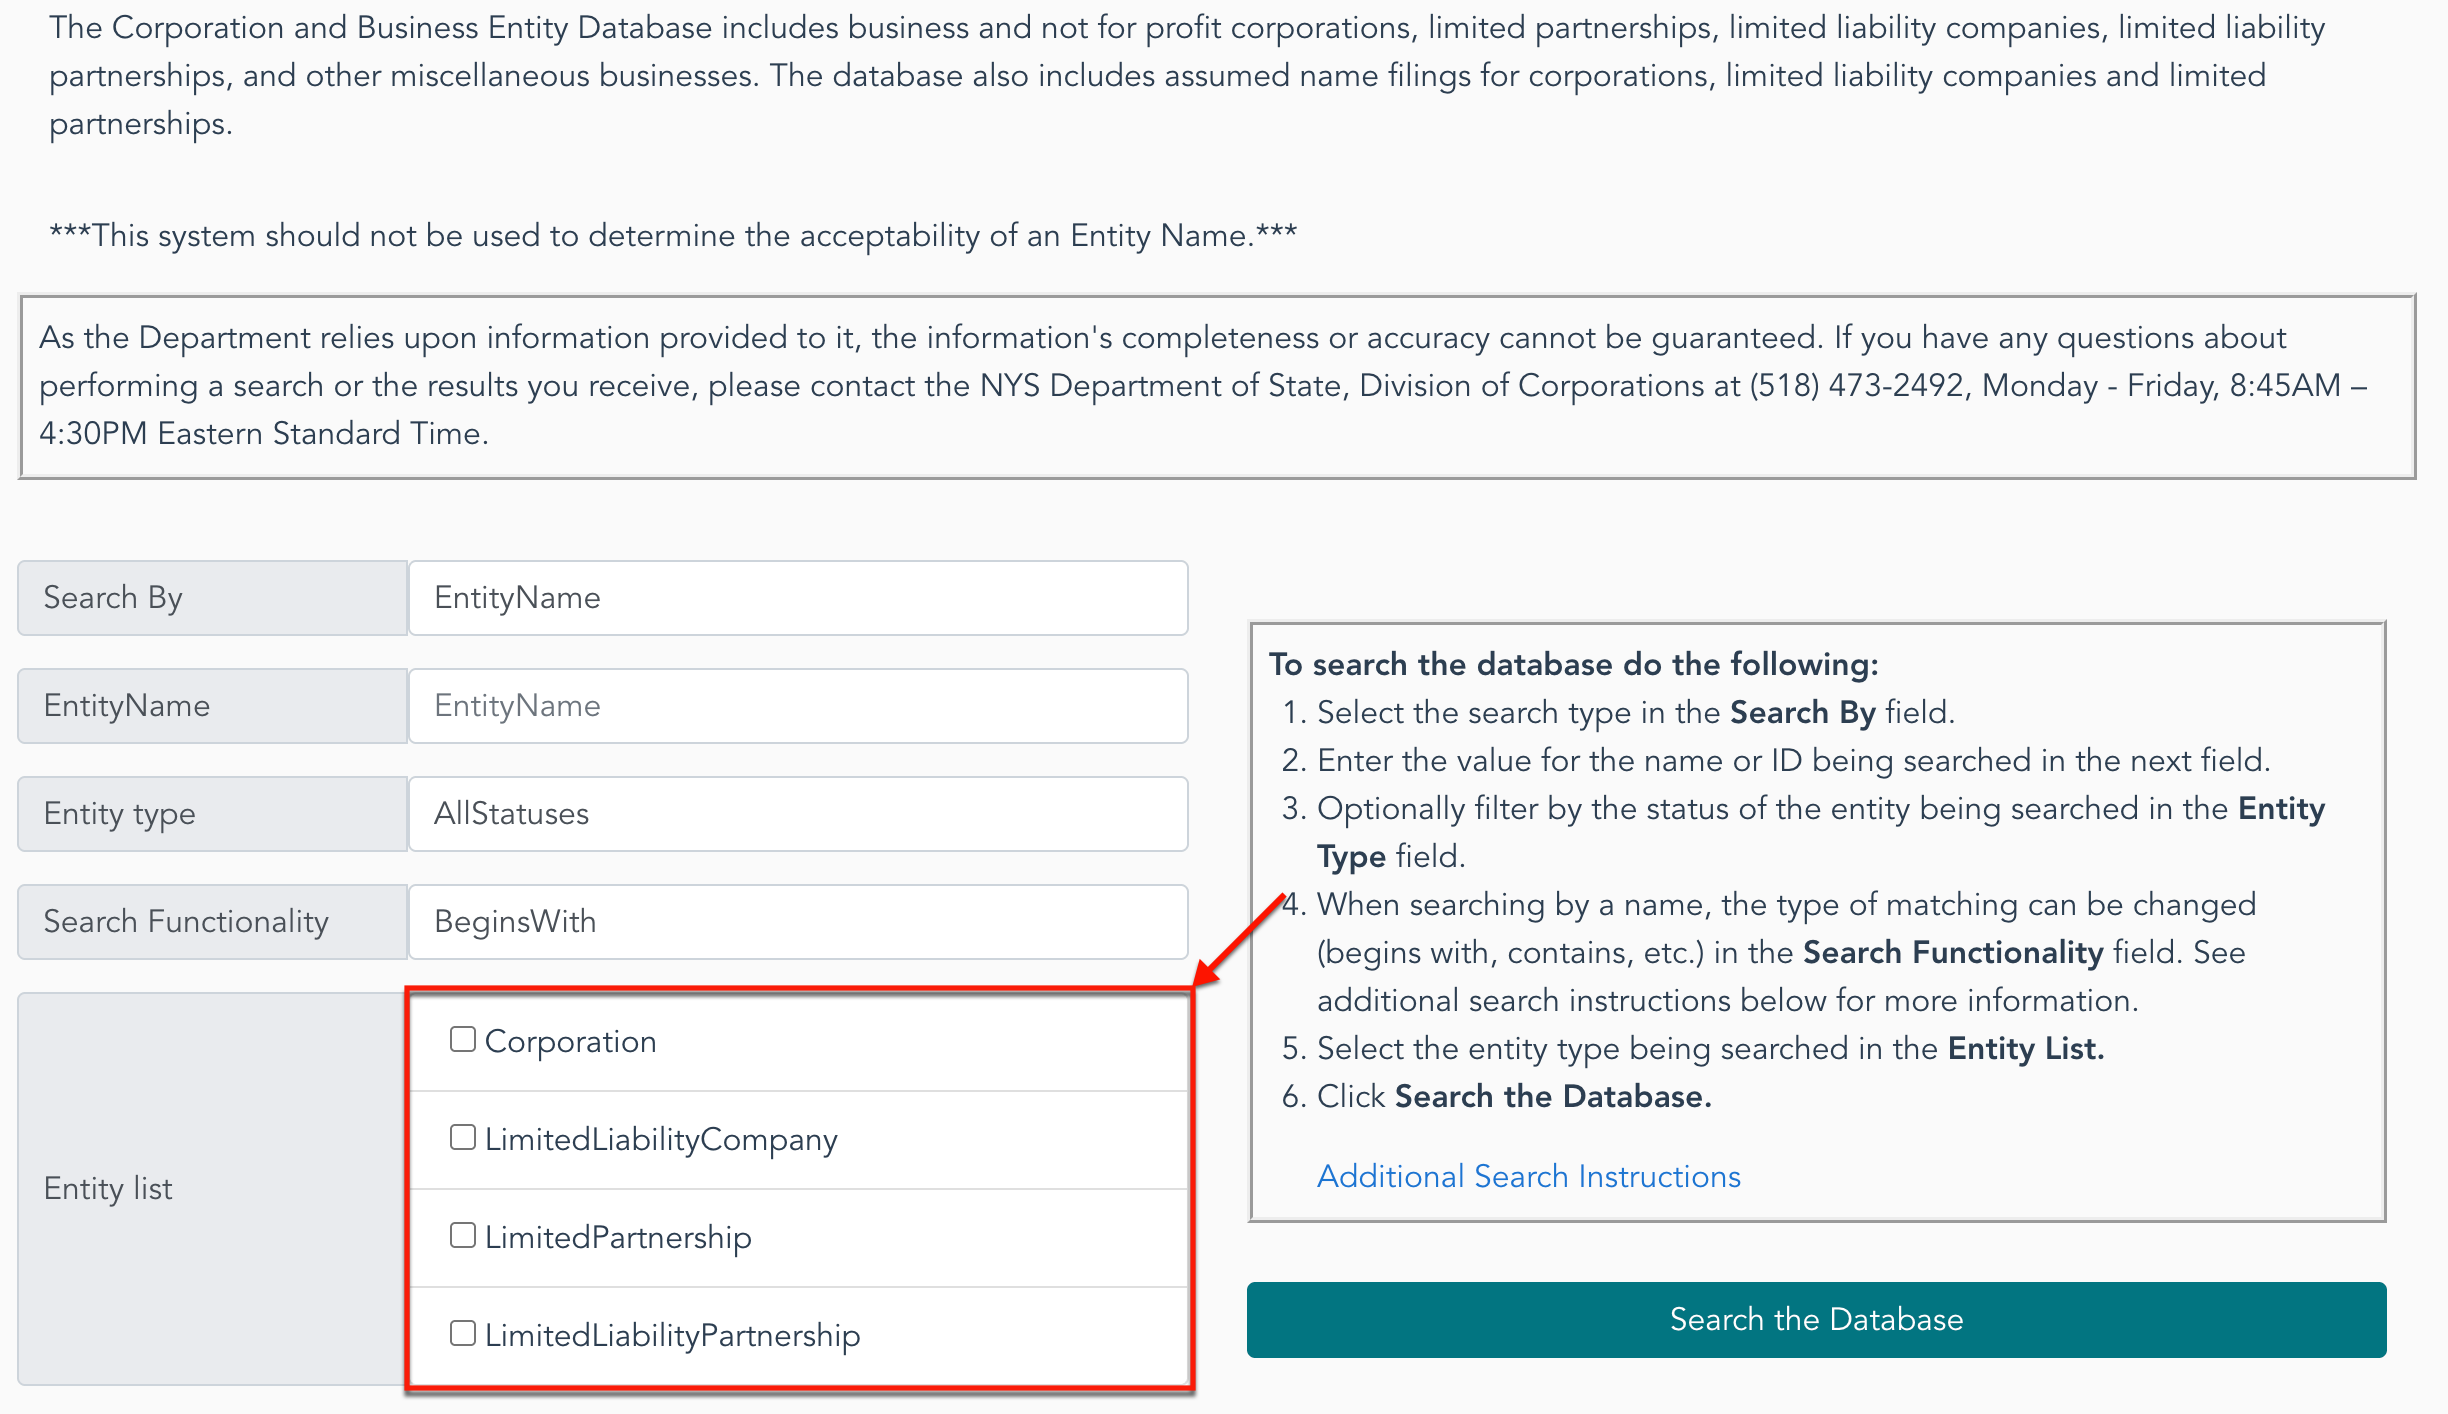
Step 6. Select an Entity Type to Find
Locate the entity list, then choose one of the checkboxes to indicate what type of entity the target is. This is mandatory to continue.
Step 7. Prompt The New York Business Entity Query Tool
Review your entries and selections since this may save time. After verifying their accuracy, select the “Search the Database” button.
Step 8. Viewing Entity Search Results
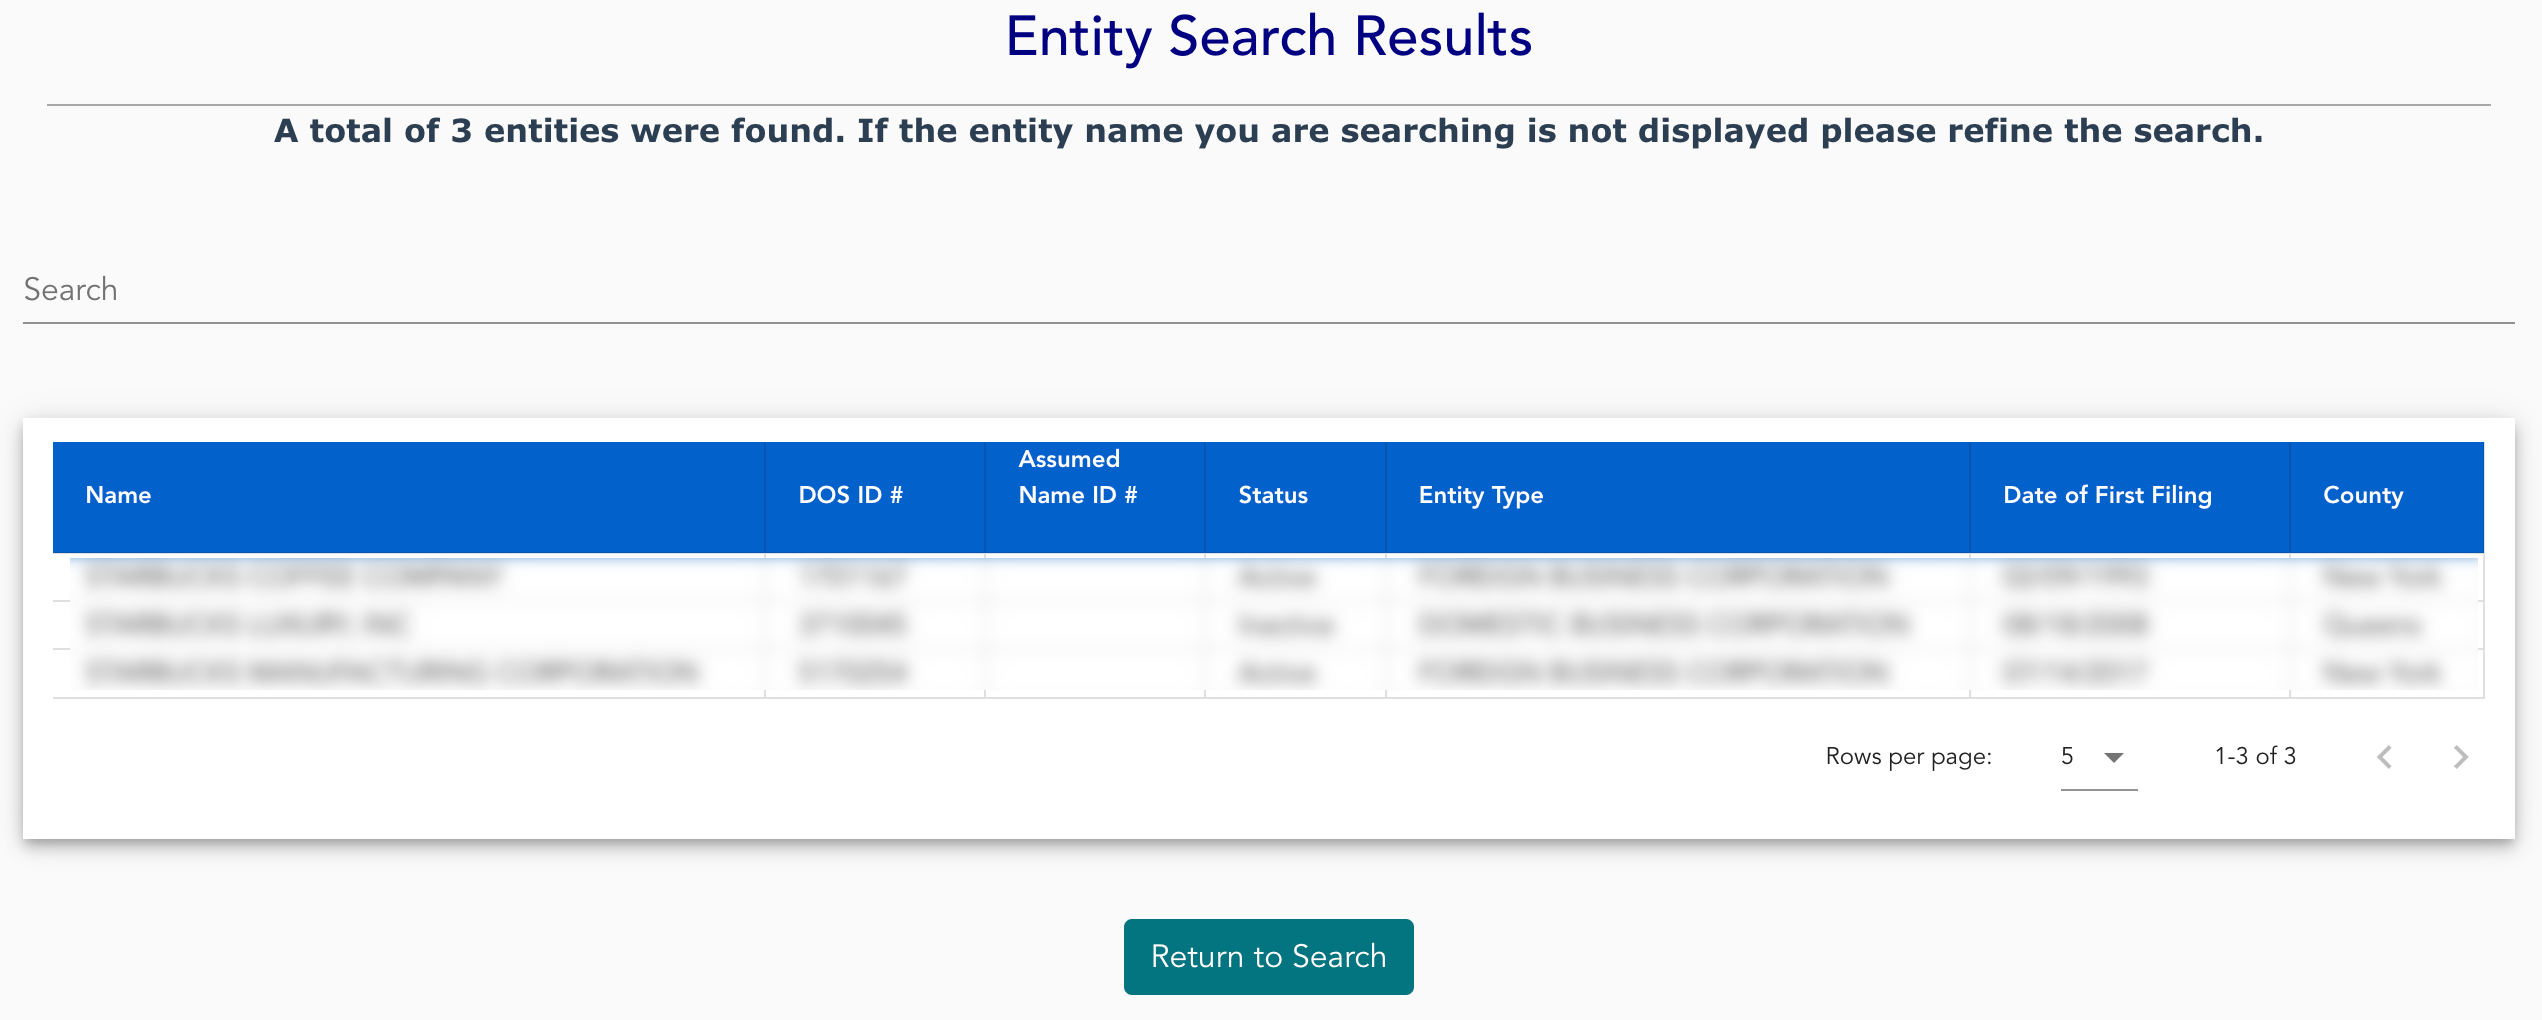
Take a moment to review the entities matching the criteria submitted earlier. Each column can be set to ascending or descending order by clicking its heading.
- Name
- DOS ID #
- Assumed Name ID #
- Status
- Entity Type
- Date of First Filing
- County
Step 9. Access the Target Entity’s Information Page
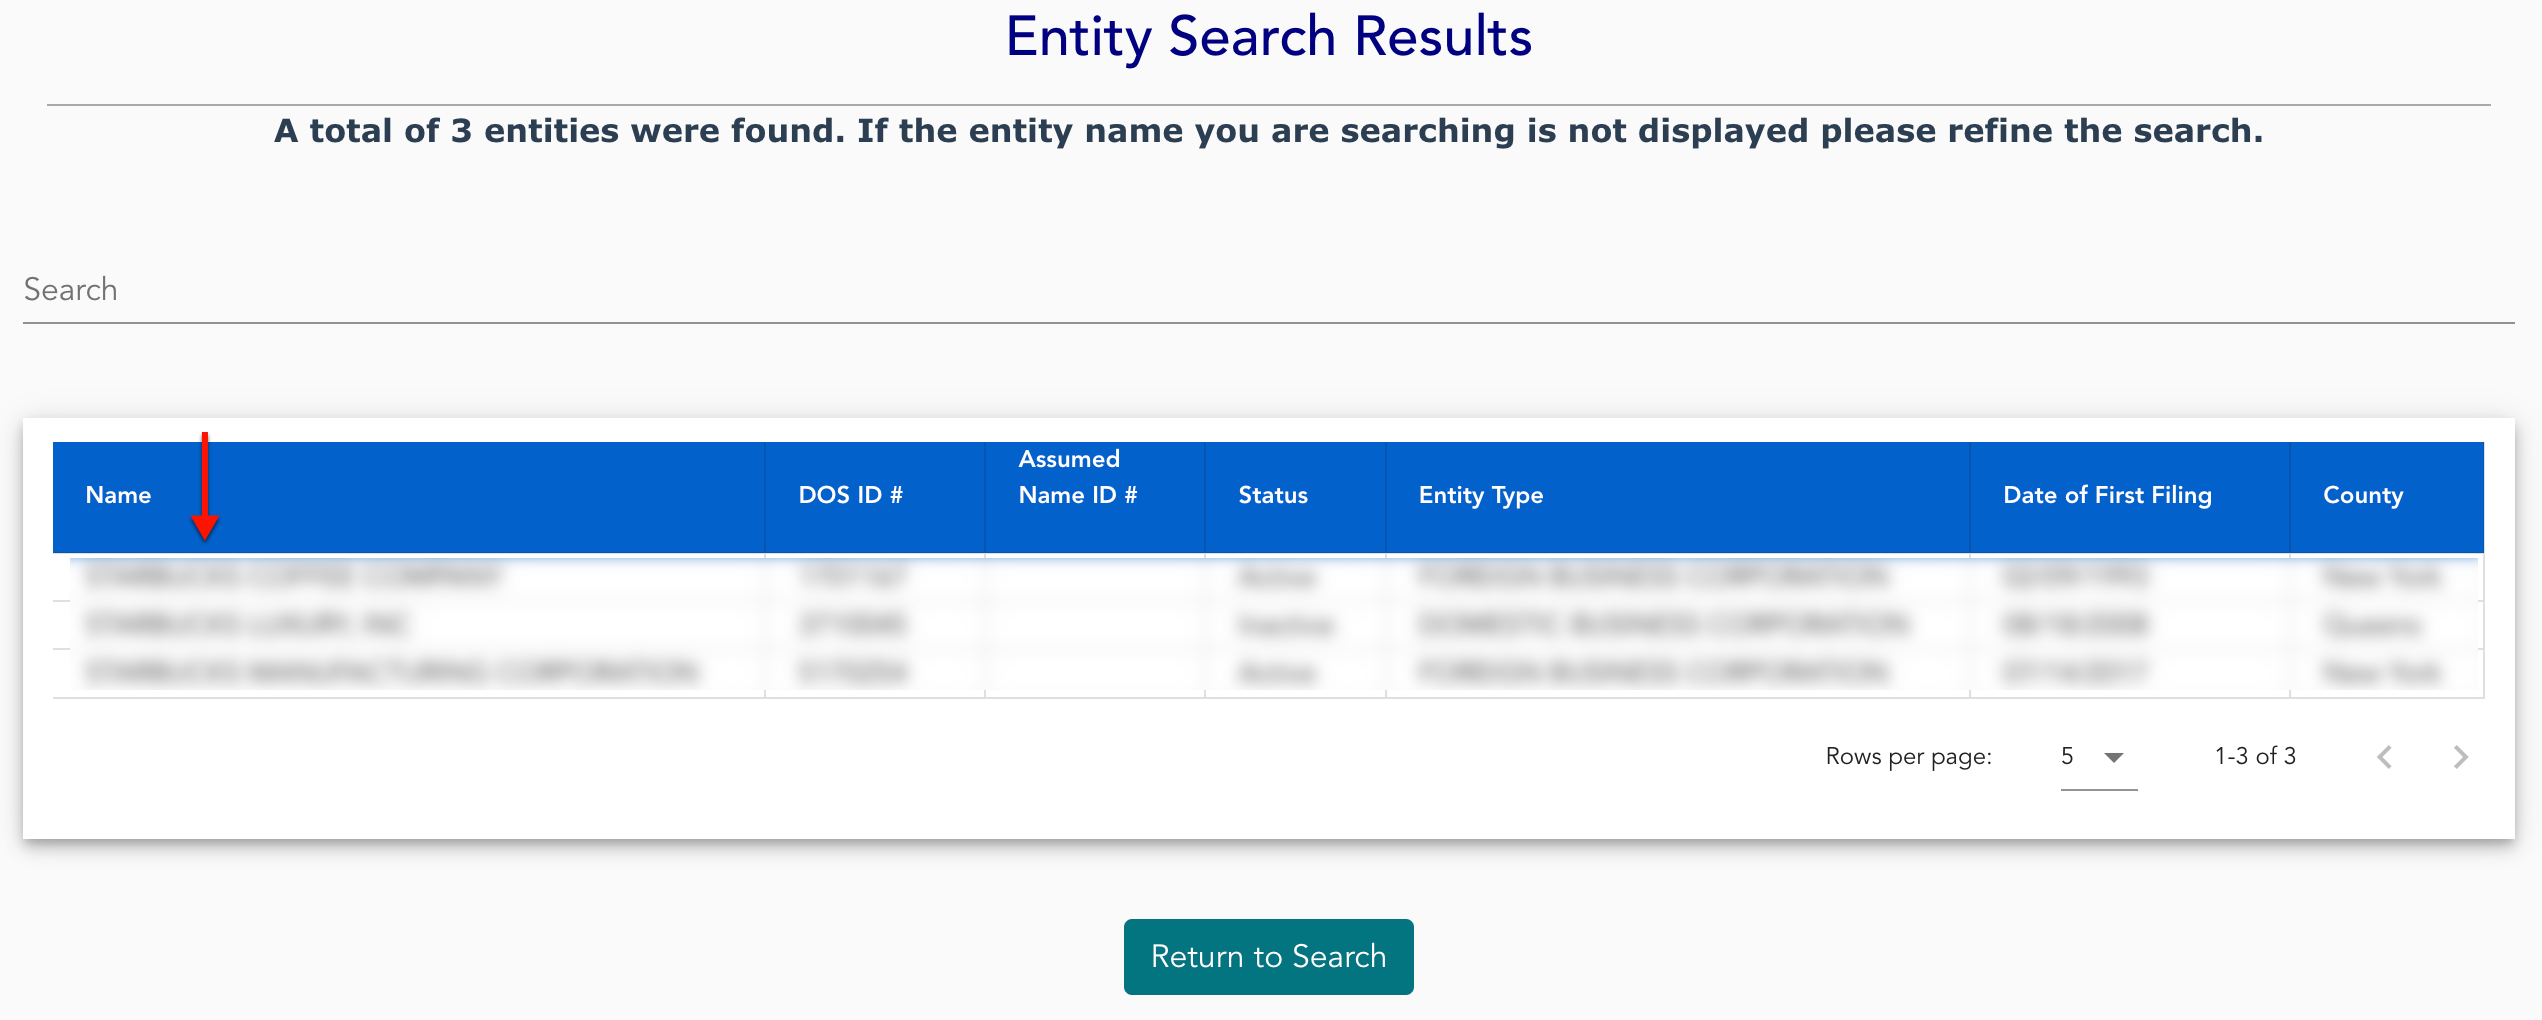
In order to view one of the entities on display, locate its name in the first column. Each name in this column will open that entity’s information page upon its selection.
Step 10. Review The New York Entity Information Page
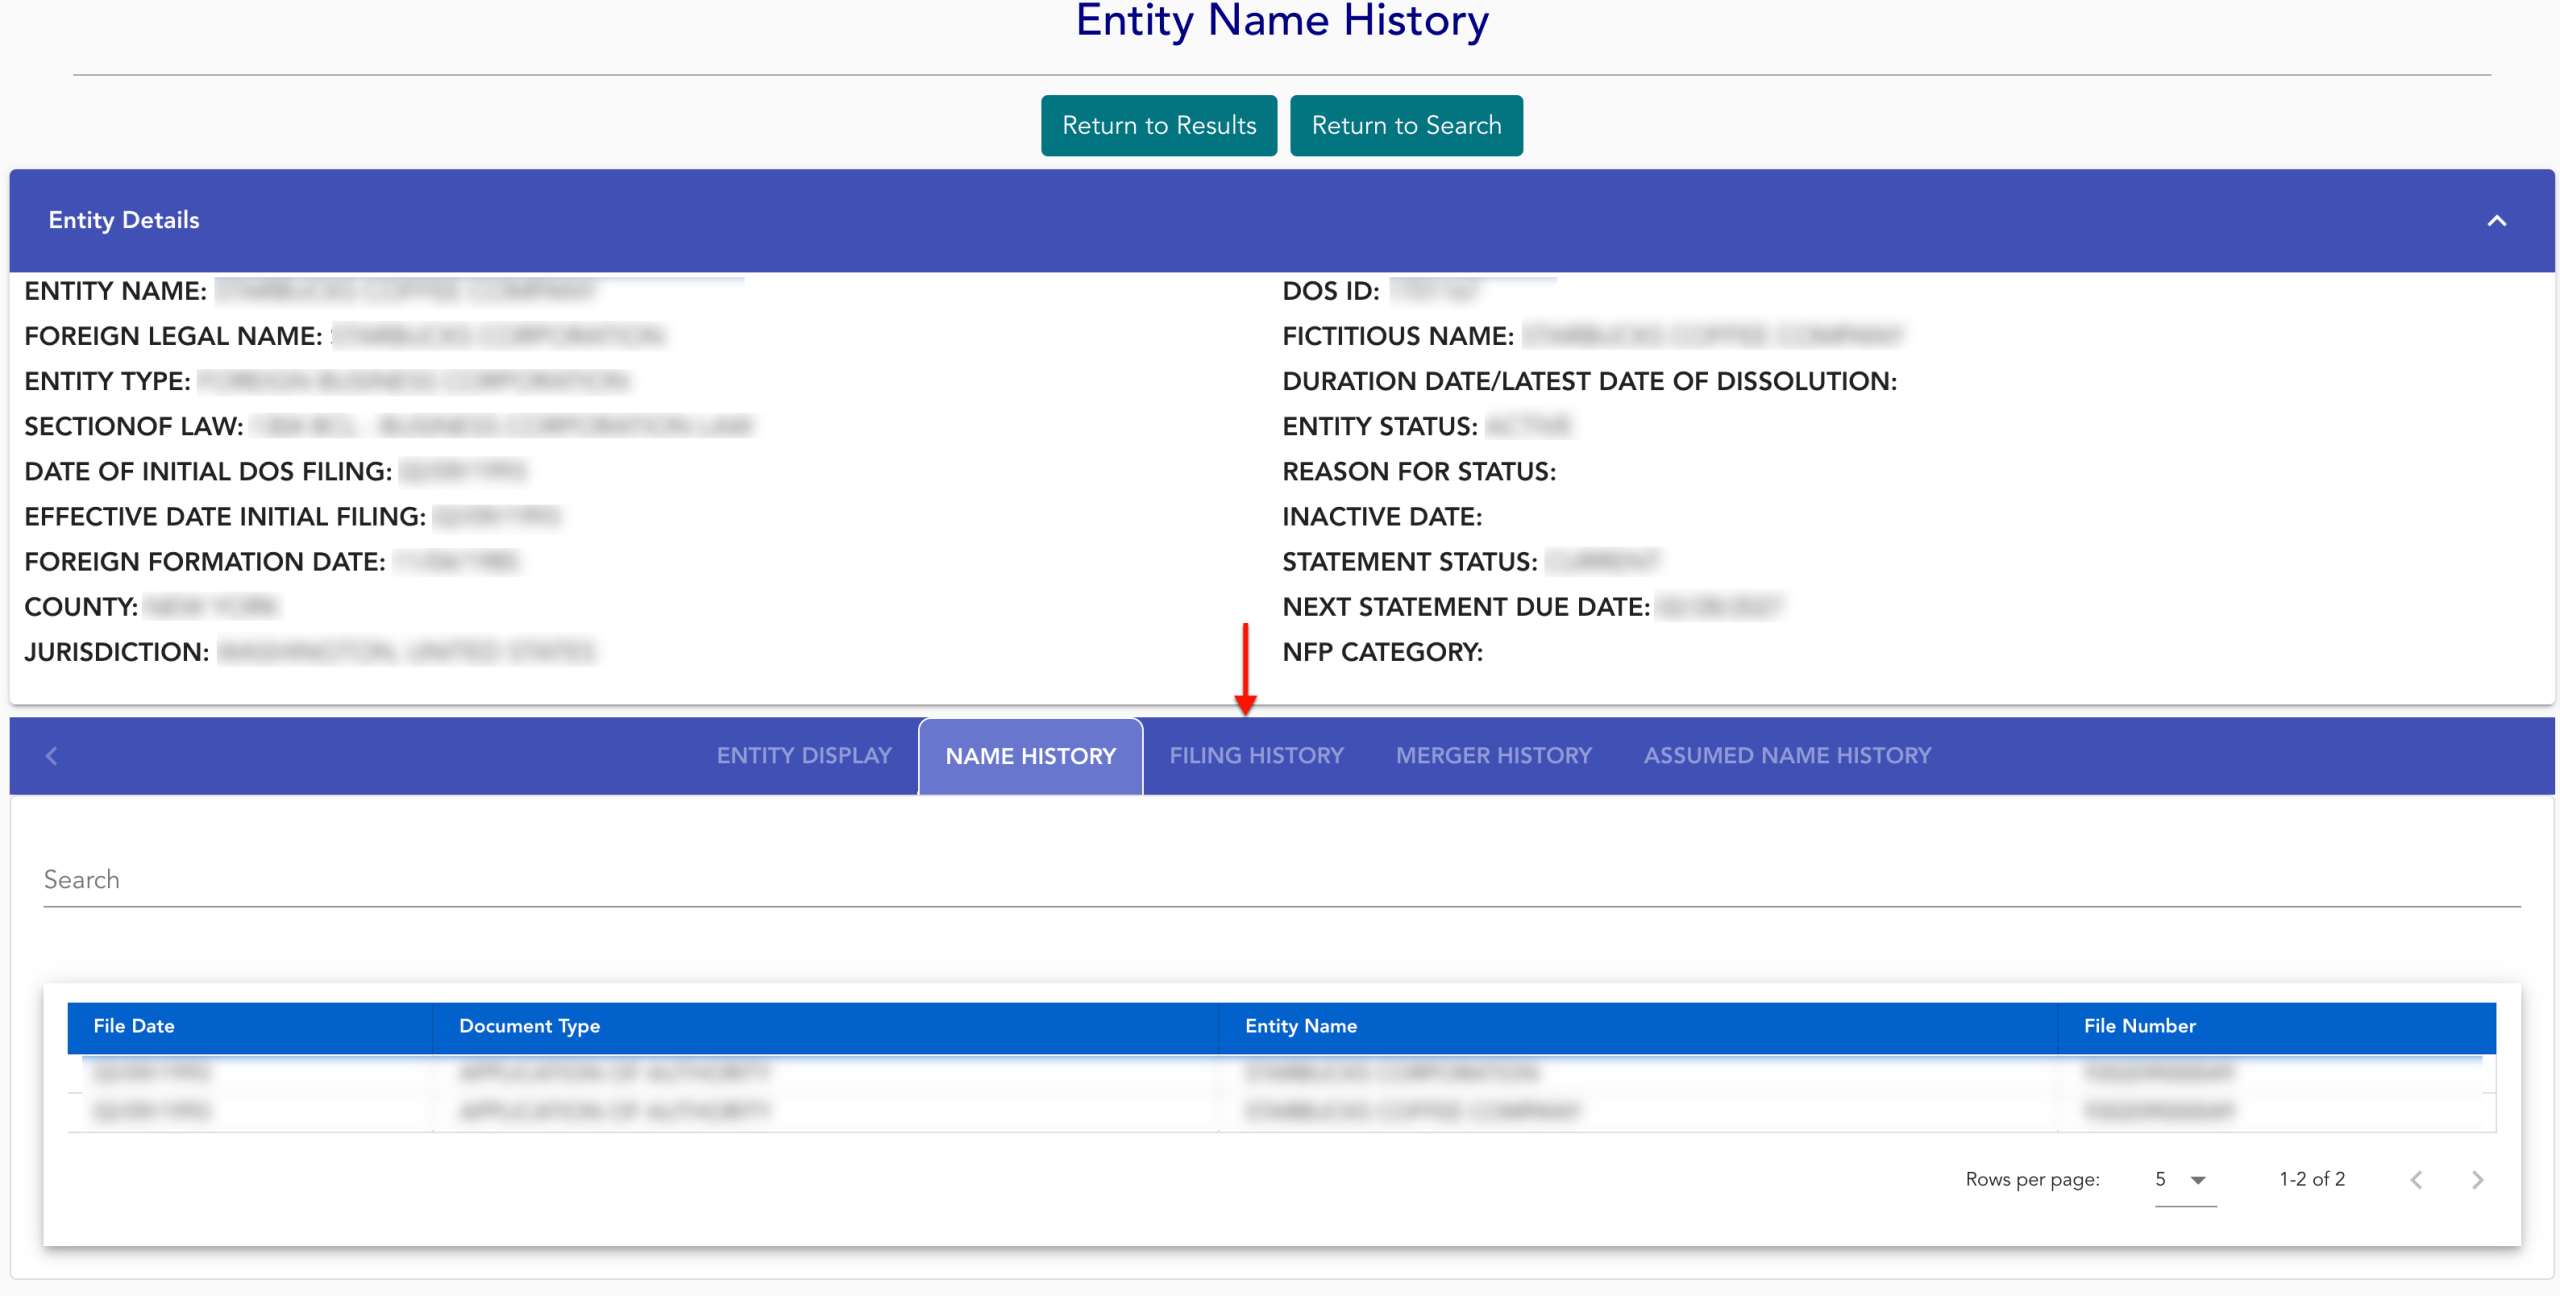
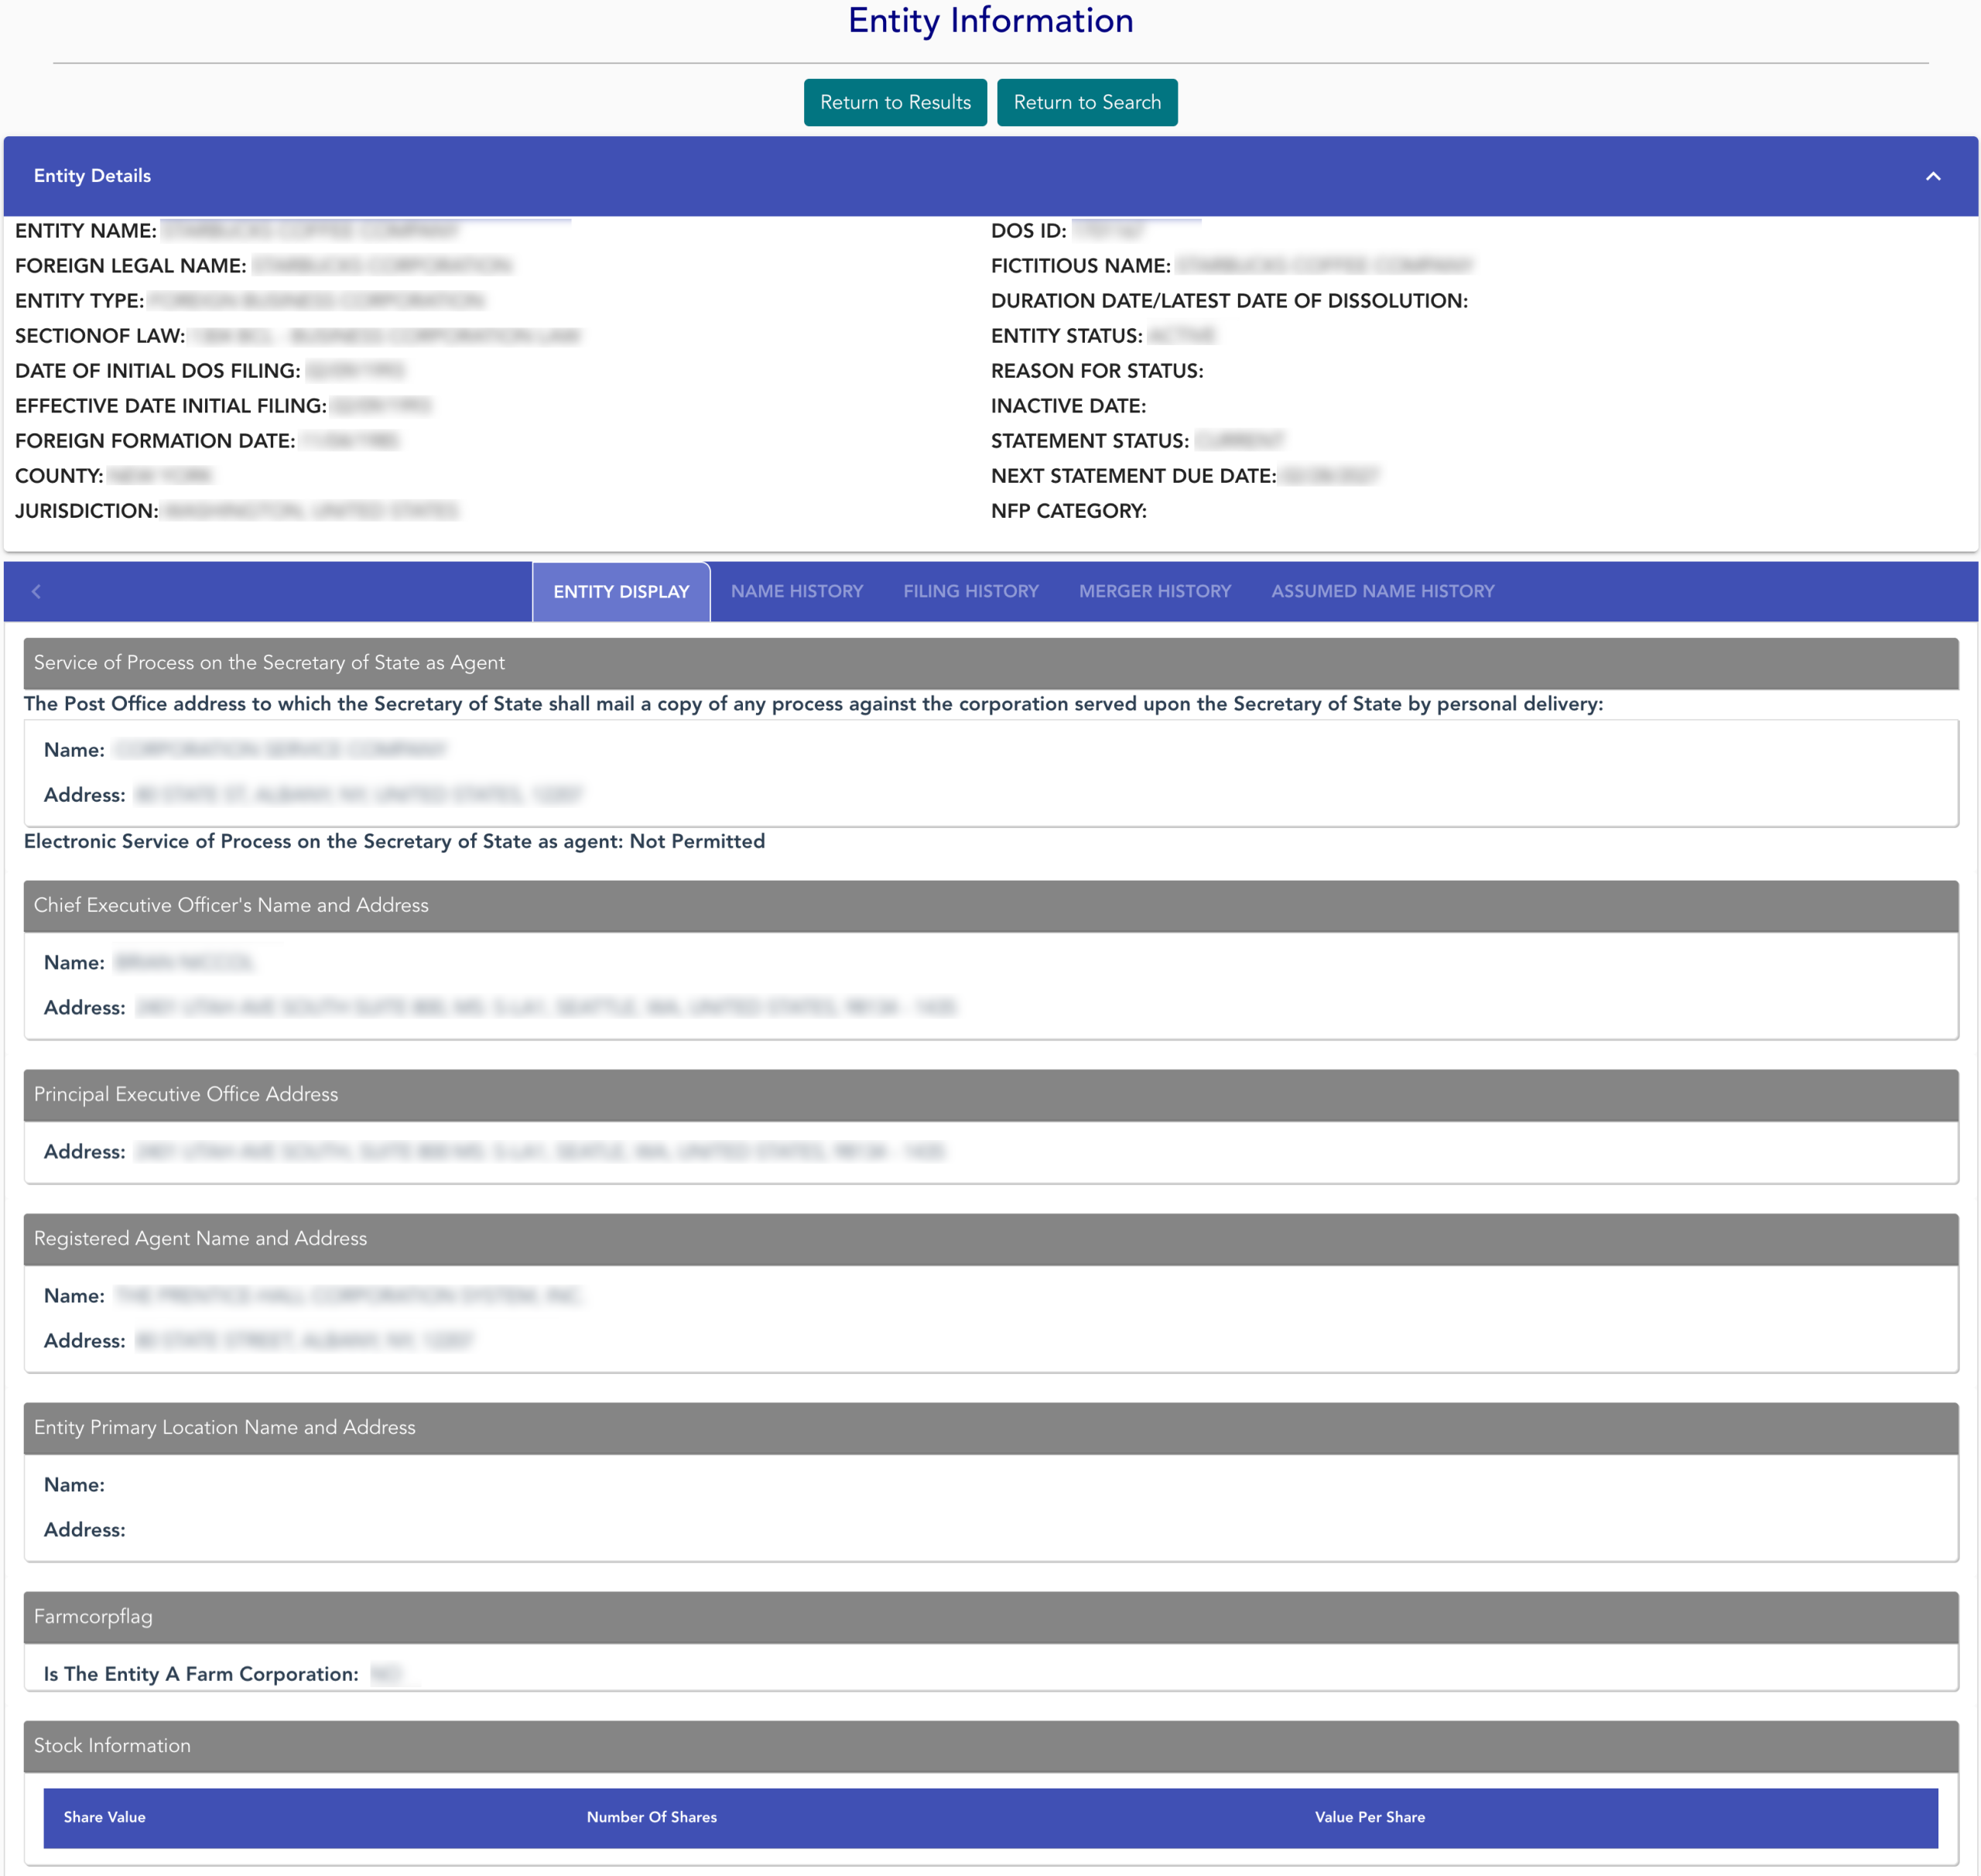
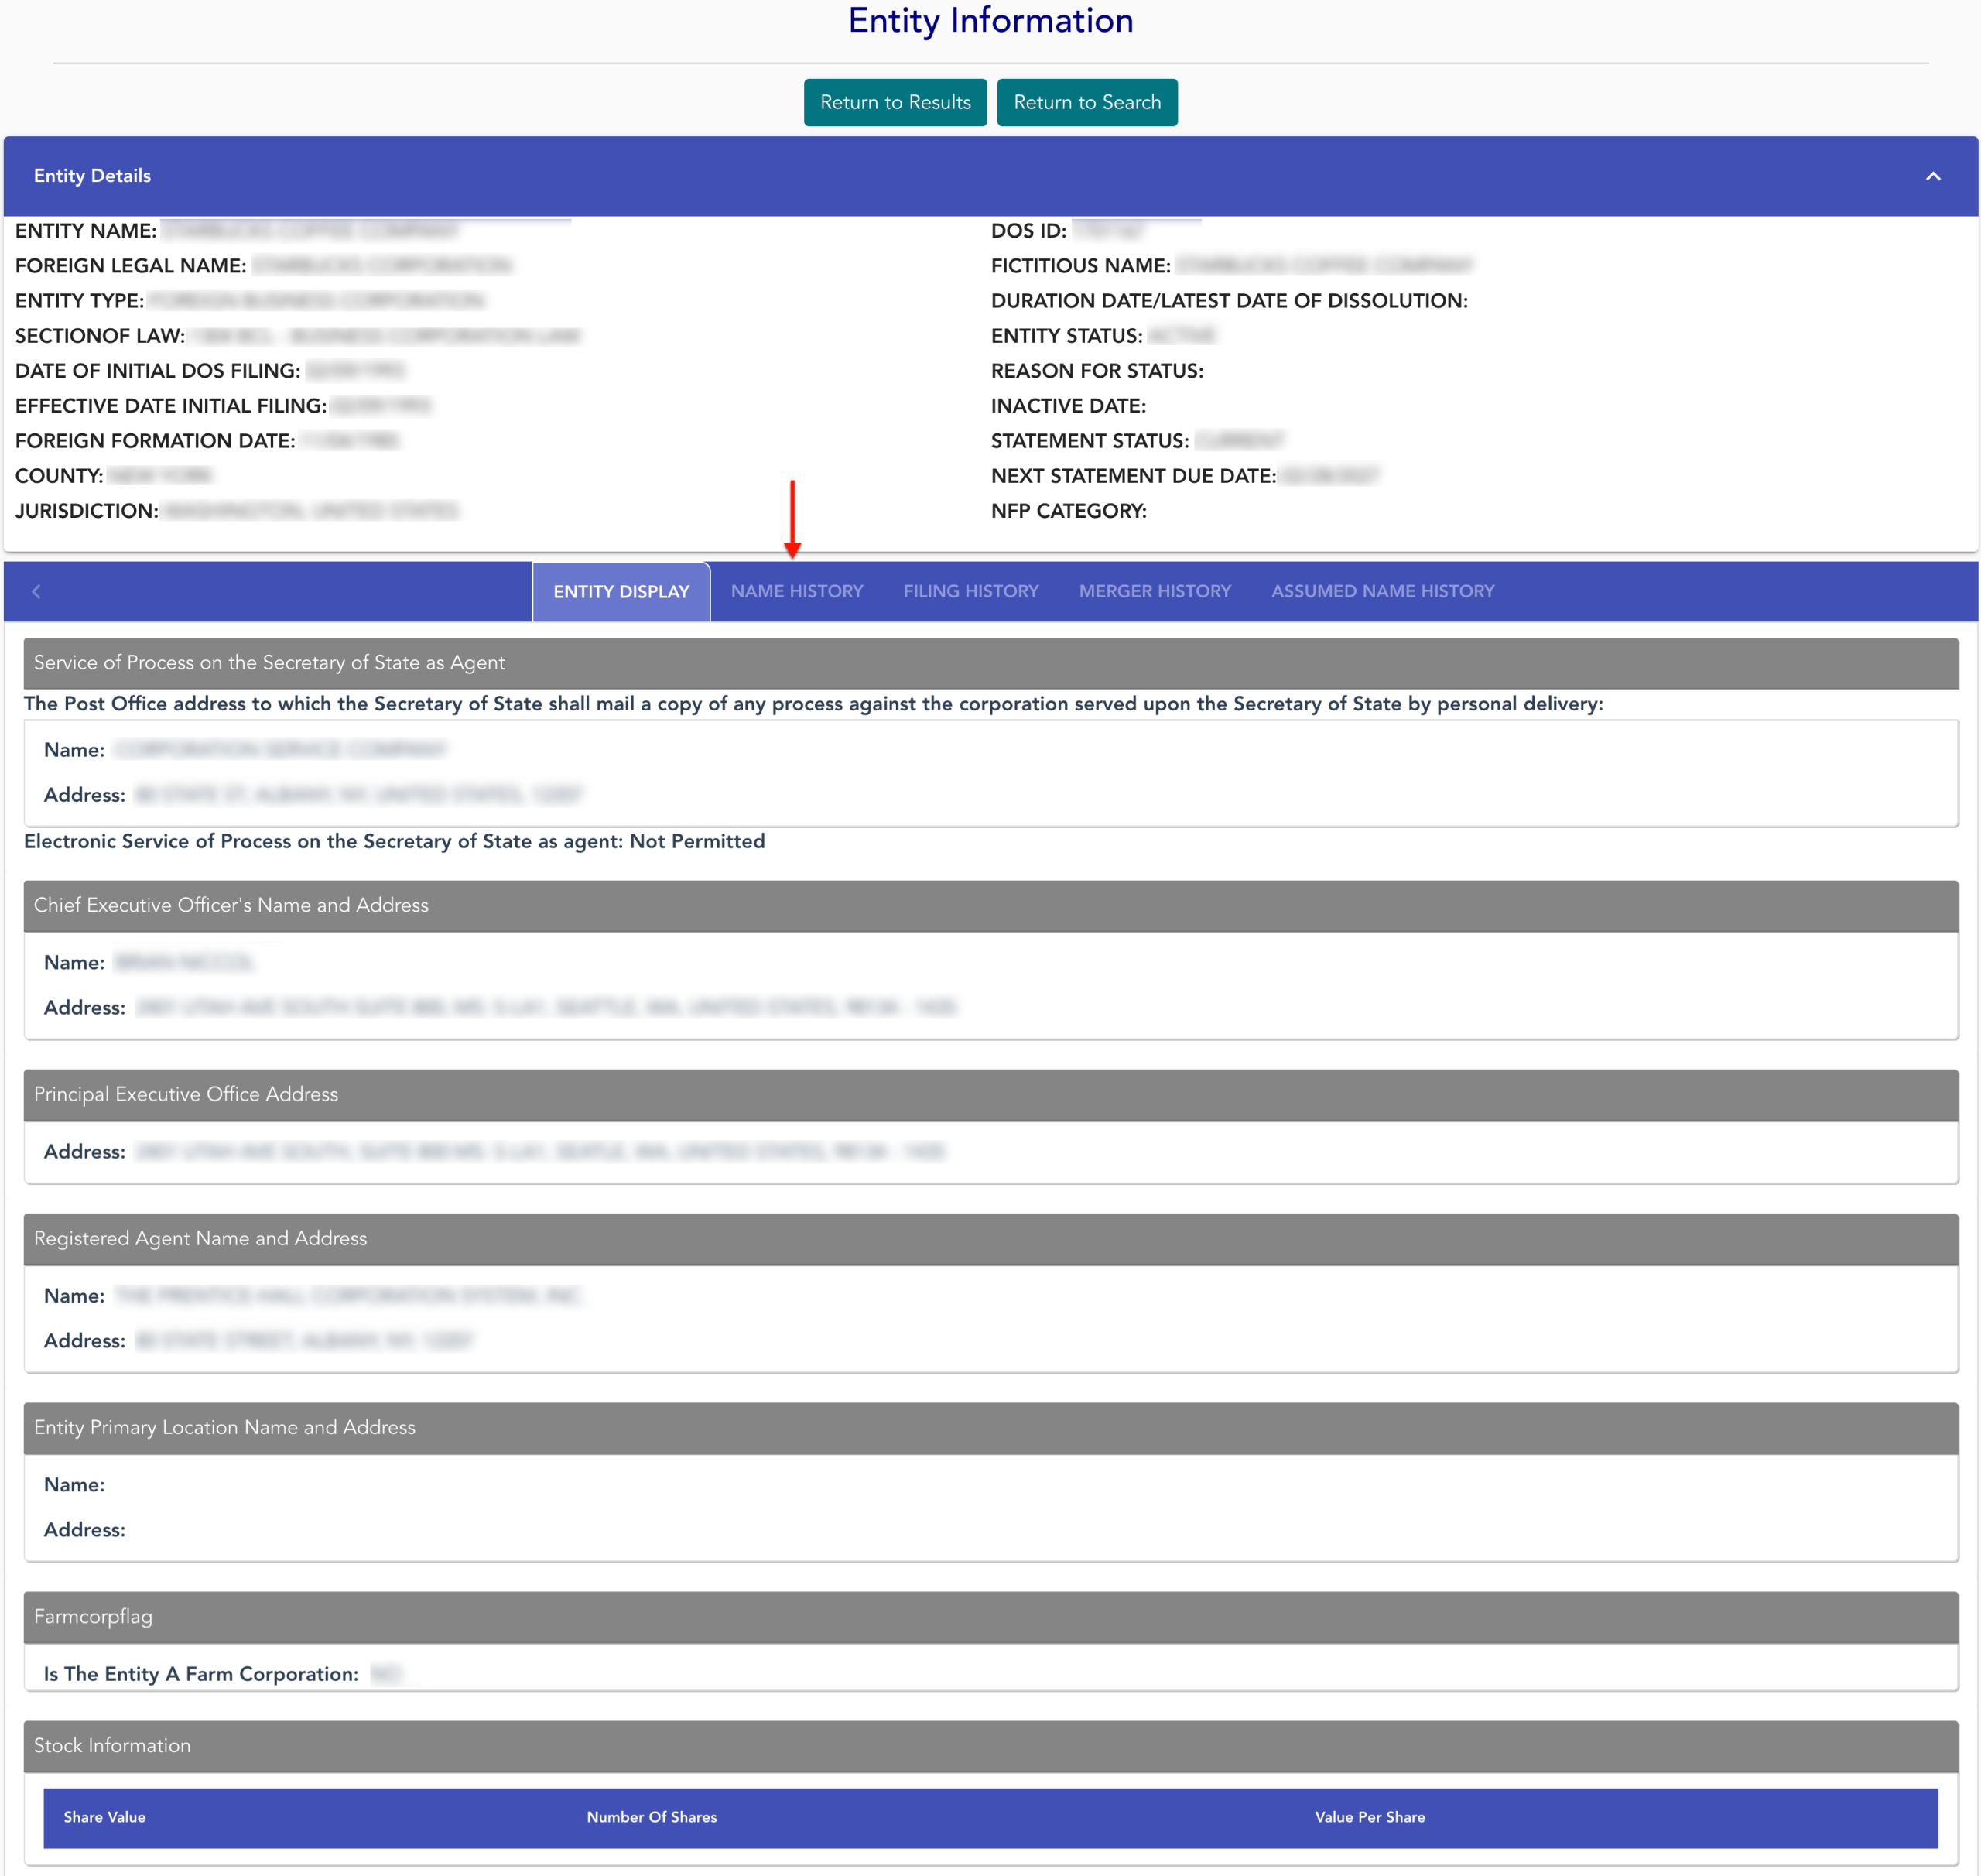
Scan the first section, “Entity Details,” for general public information. Notice the second area presents tabs with specific information.
- Entity Details
- Entity Name
- Foreign Legal Name
- Section of Law
- Date of Initial DOS Filing
- Foreign Formation Date
- County
- Jurisdiction
- DOS ID
- Fictitious Name
- Duration Date/Latest Date of Dissolution
- Entity Status
- Inactive Date
- Statement Status
- Next Statement Due Date
- NFP Category
- Entity Display
- Service of Process on Secretary of State As Agent
- Name
- Address
- Chief Executive Officer’s Name And Address
- Name
- Address
- Principal Executive Office Address
- Address
- Registered Agent Name and Address
- Name
- Address
- Entity Primary Location Name and Address
- Name
- Address
- Farmcorpflag
- Is the Entity a Farm Corporation
- Stock Information
- Share Value
- Number of Shares
- Value Per Share
- Service of Process on Secretary of State As Agent
- Name History
- Filing History
- Merger History
- Assumed Name History
Step 11. Obtain The Entity’s Name History
While the “Entity Display” tab opens by default below “Entity Details,” additional information is available in the ones that follow. Select the next tab, “Name History.”
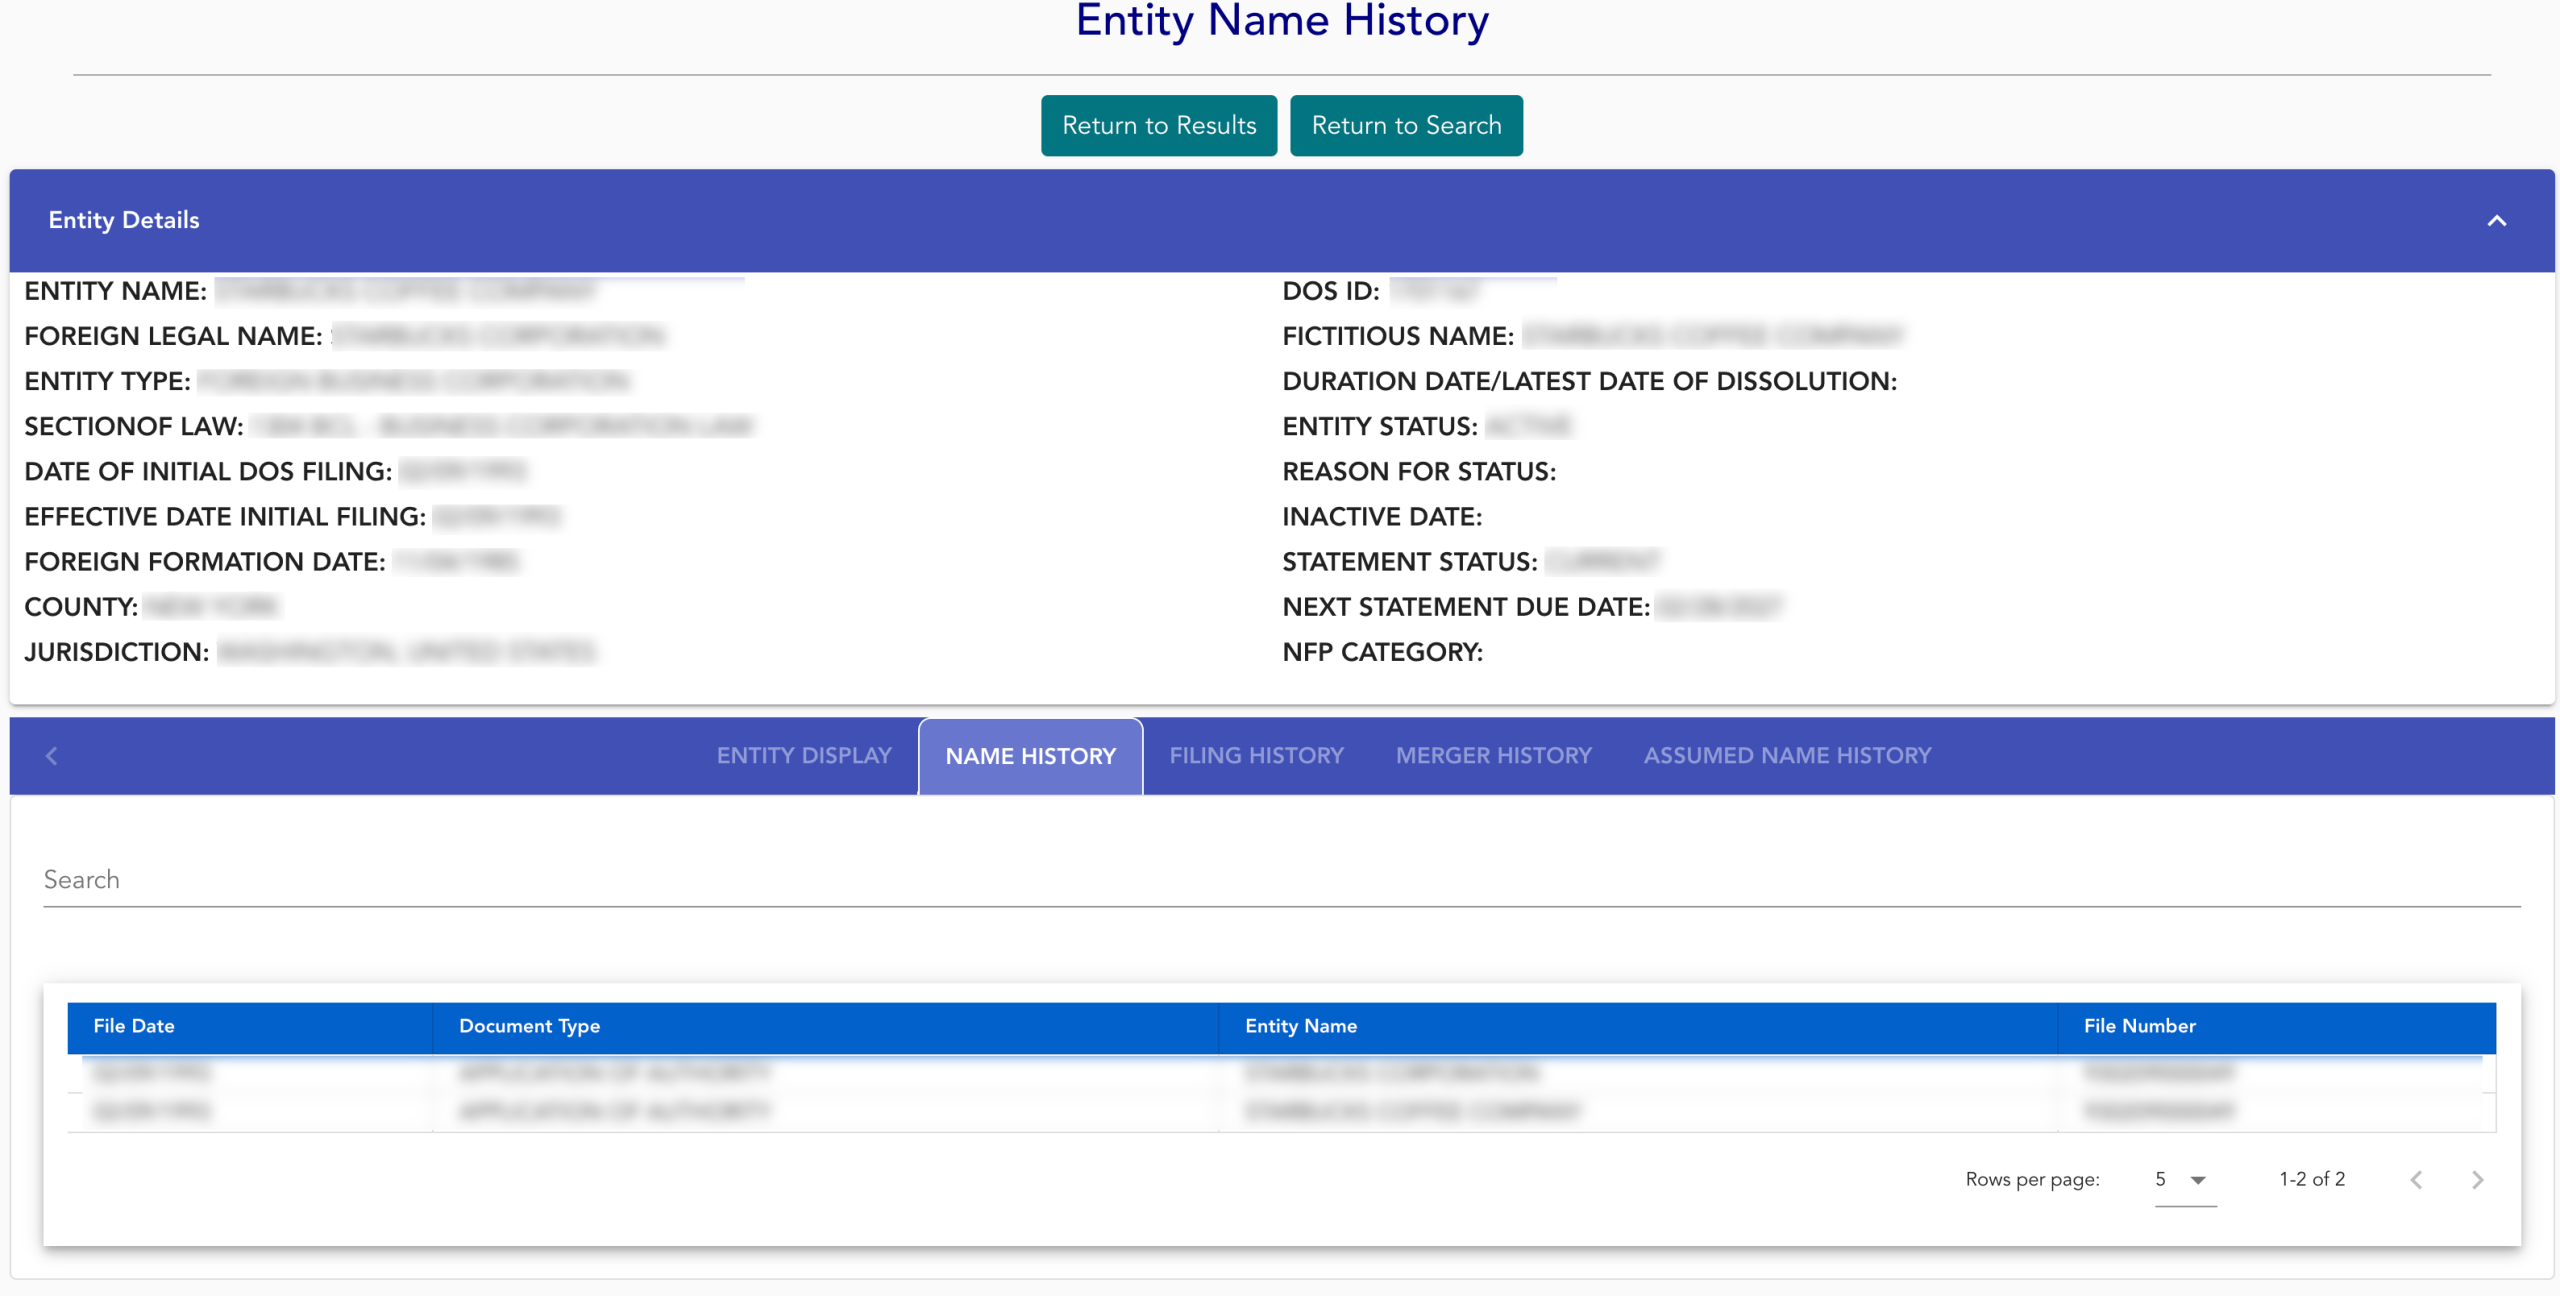
Step 12. Examine the Name History Table
Look through the “Name History” table’s information. Each column displays the relevant filing information as of a specific date. When ready, continue to “Filing History” (see image).
- File Date
- Document Type
- Entity Name
- File Number
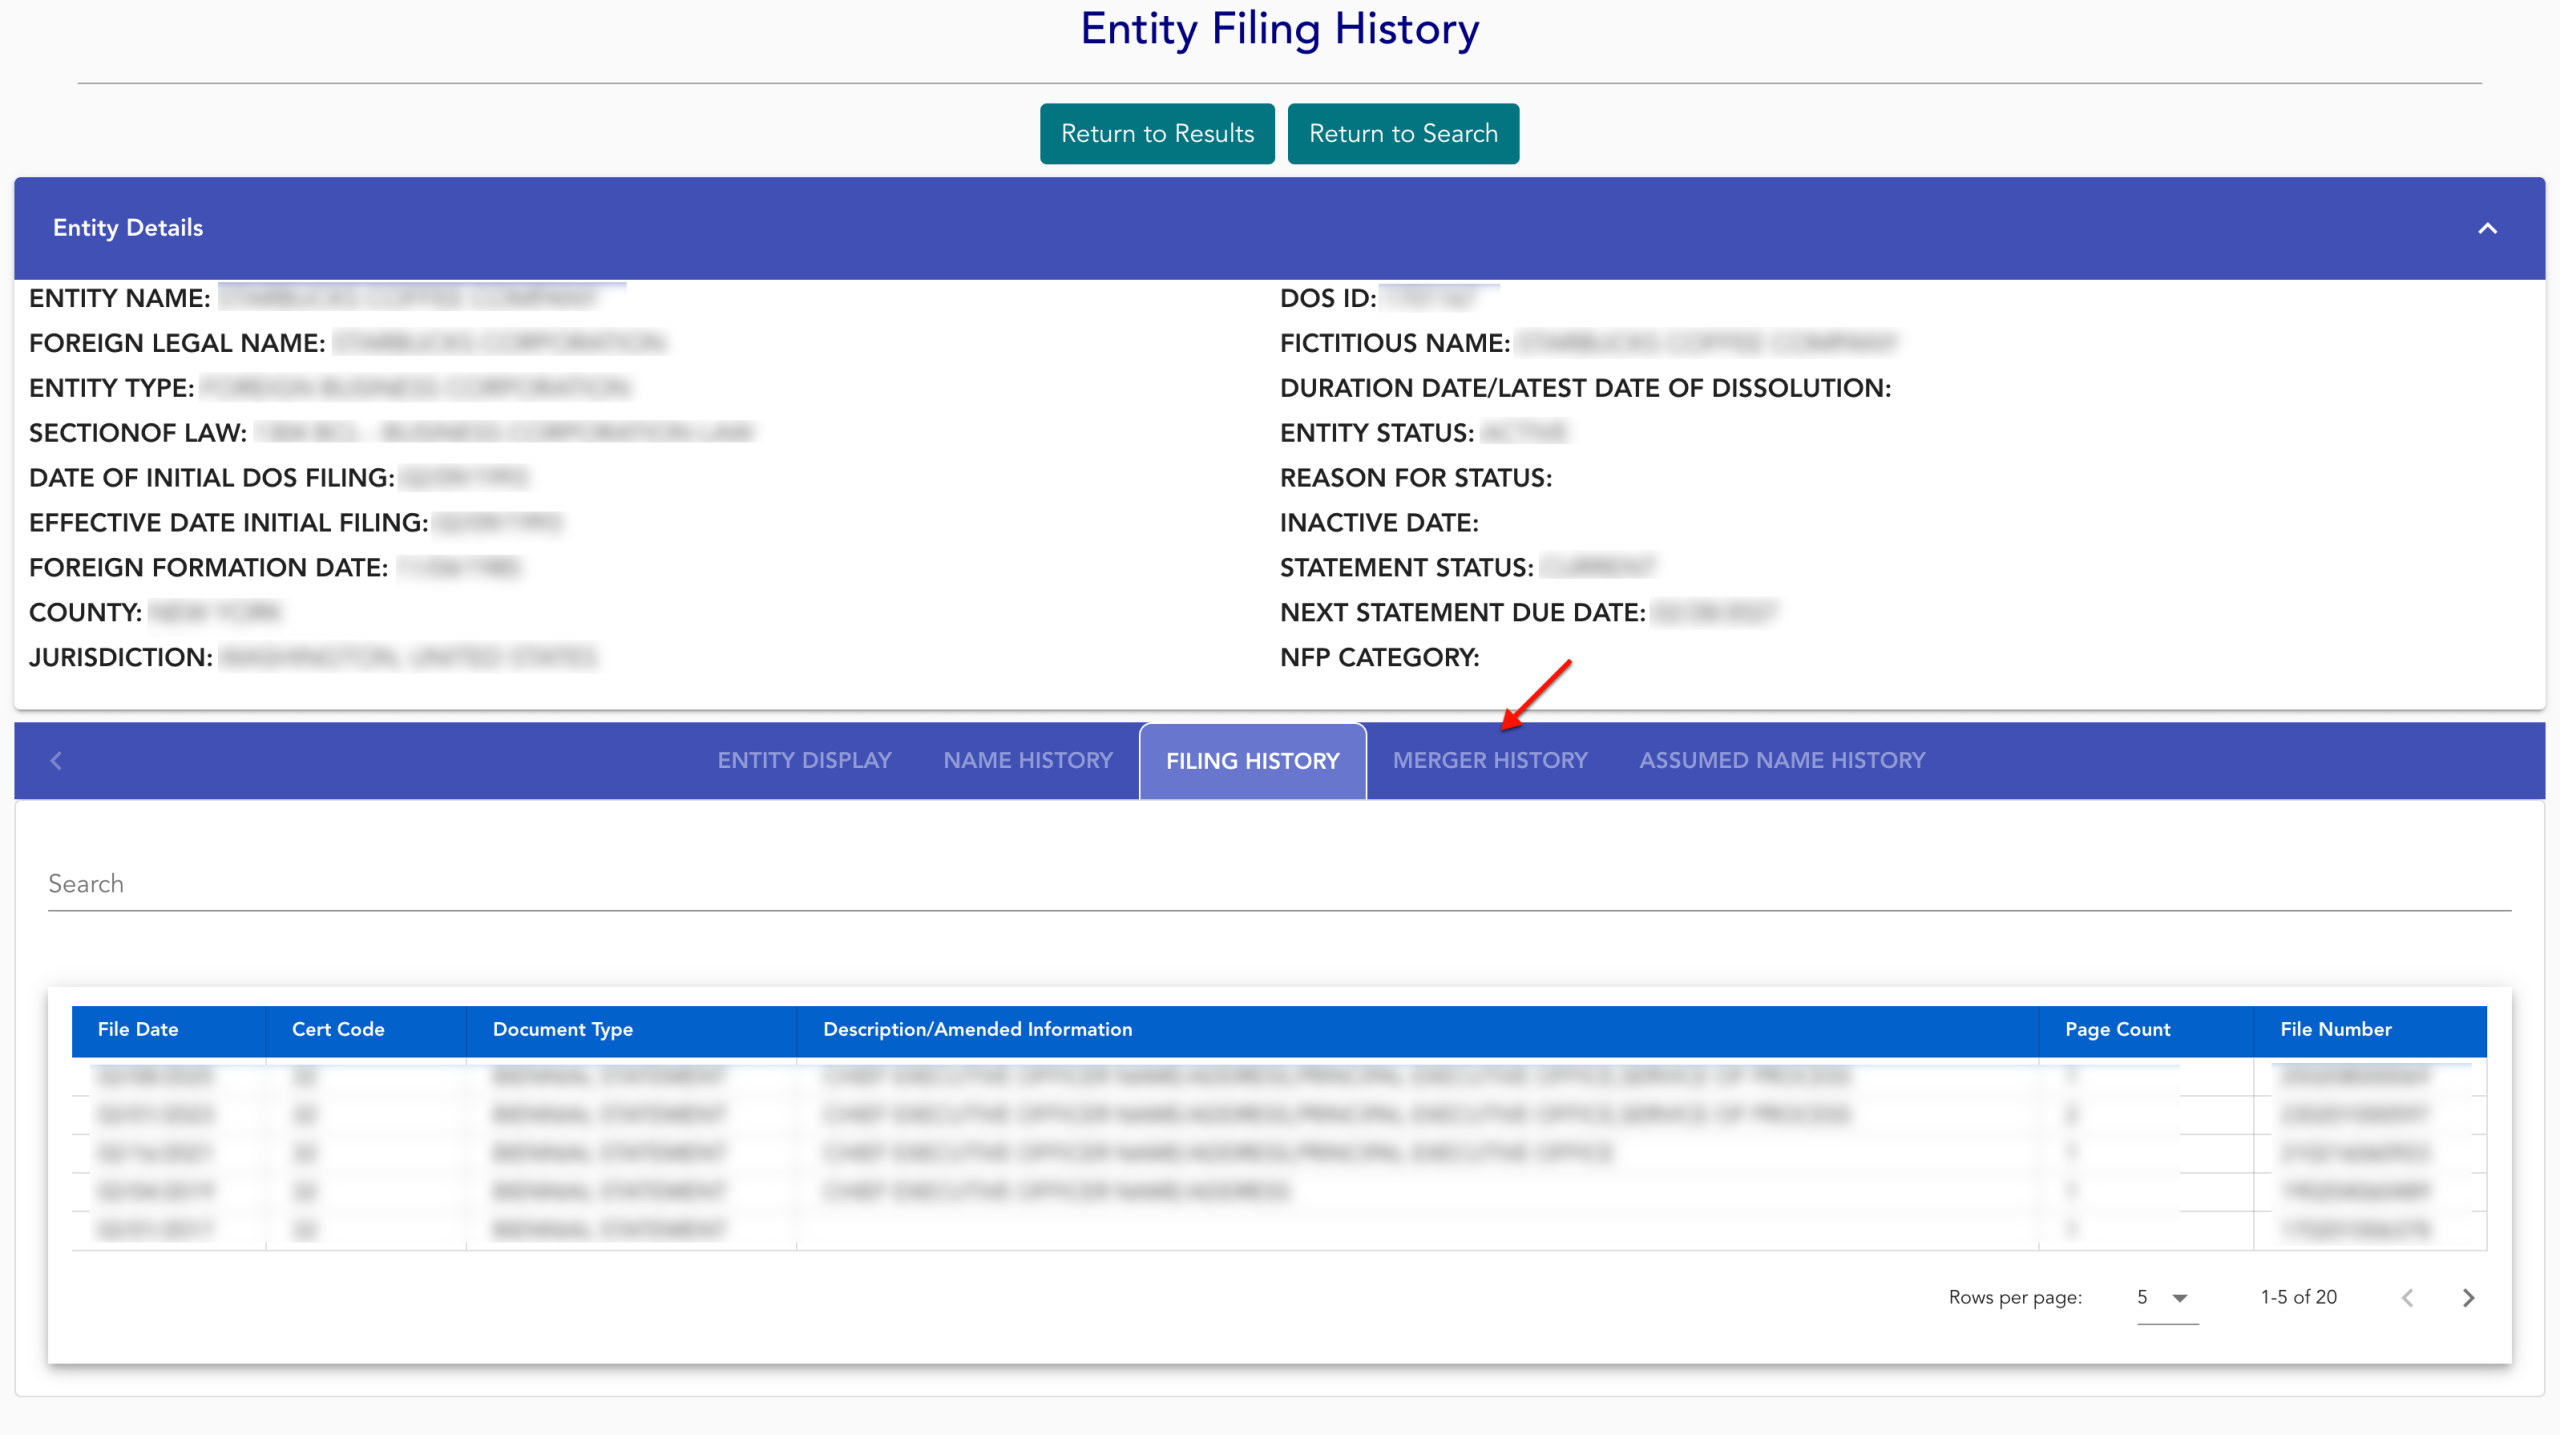
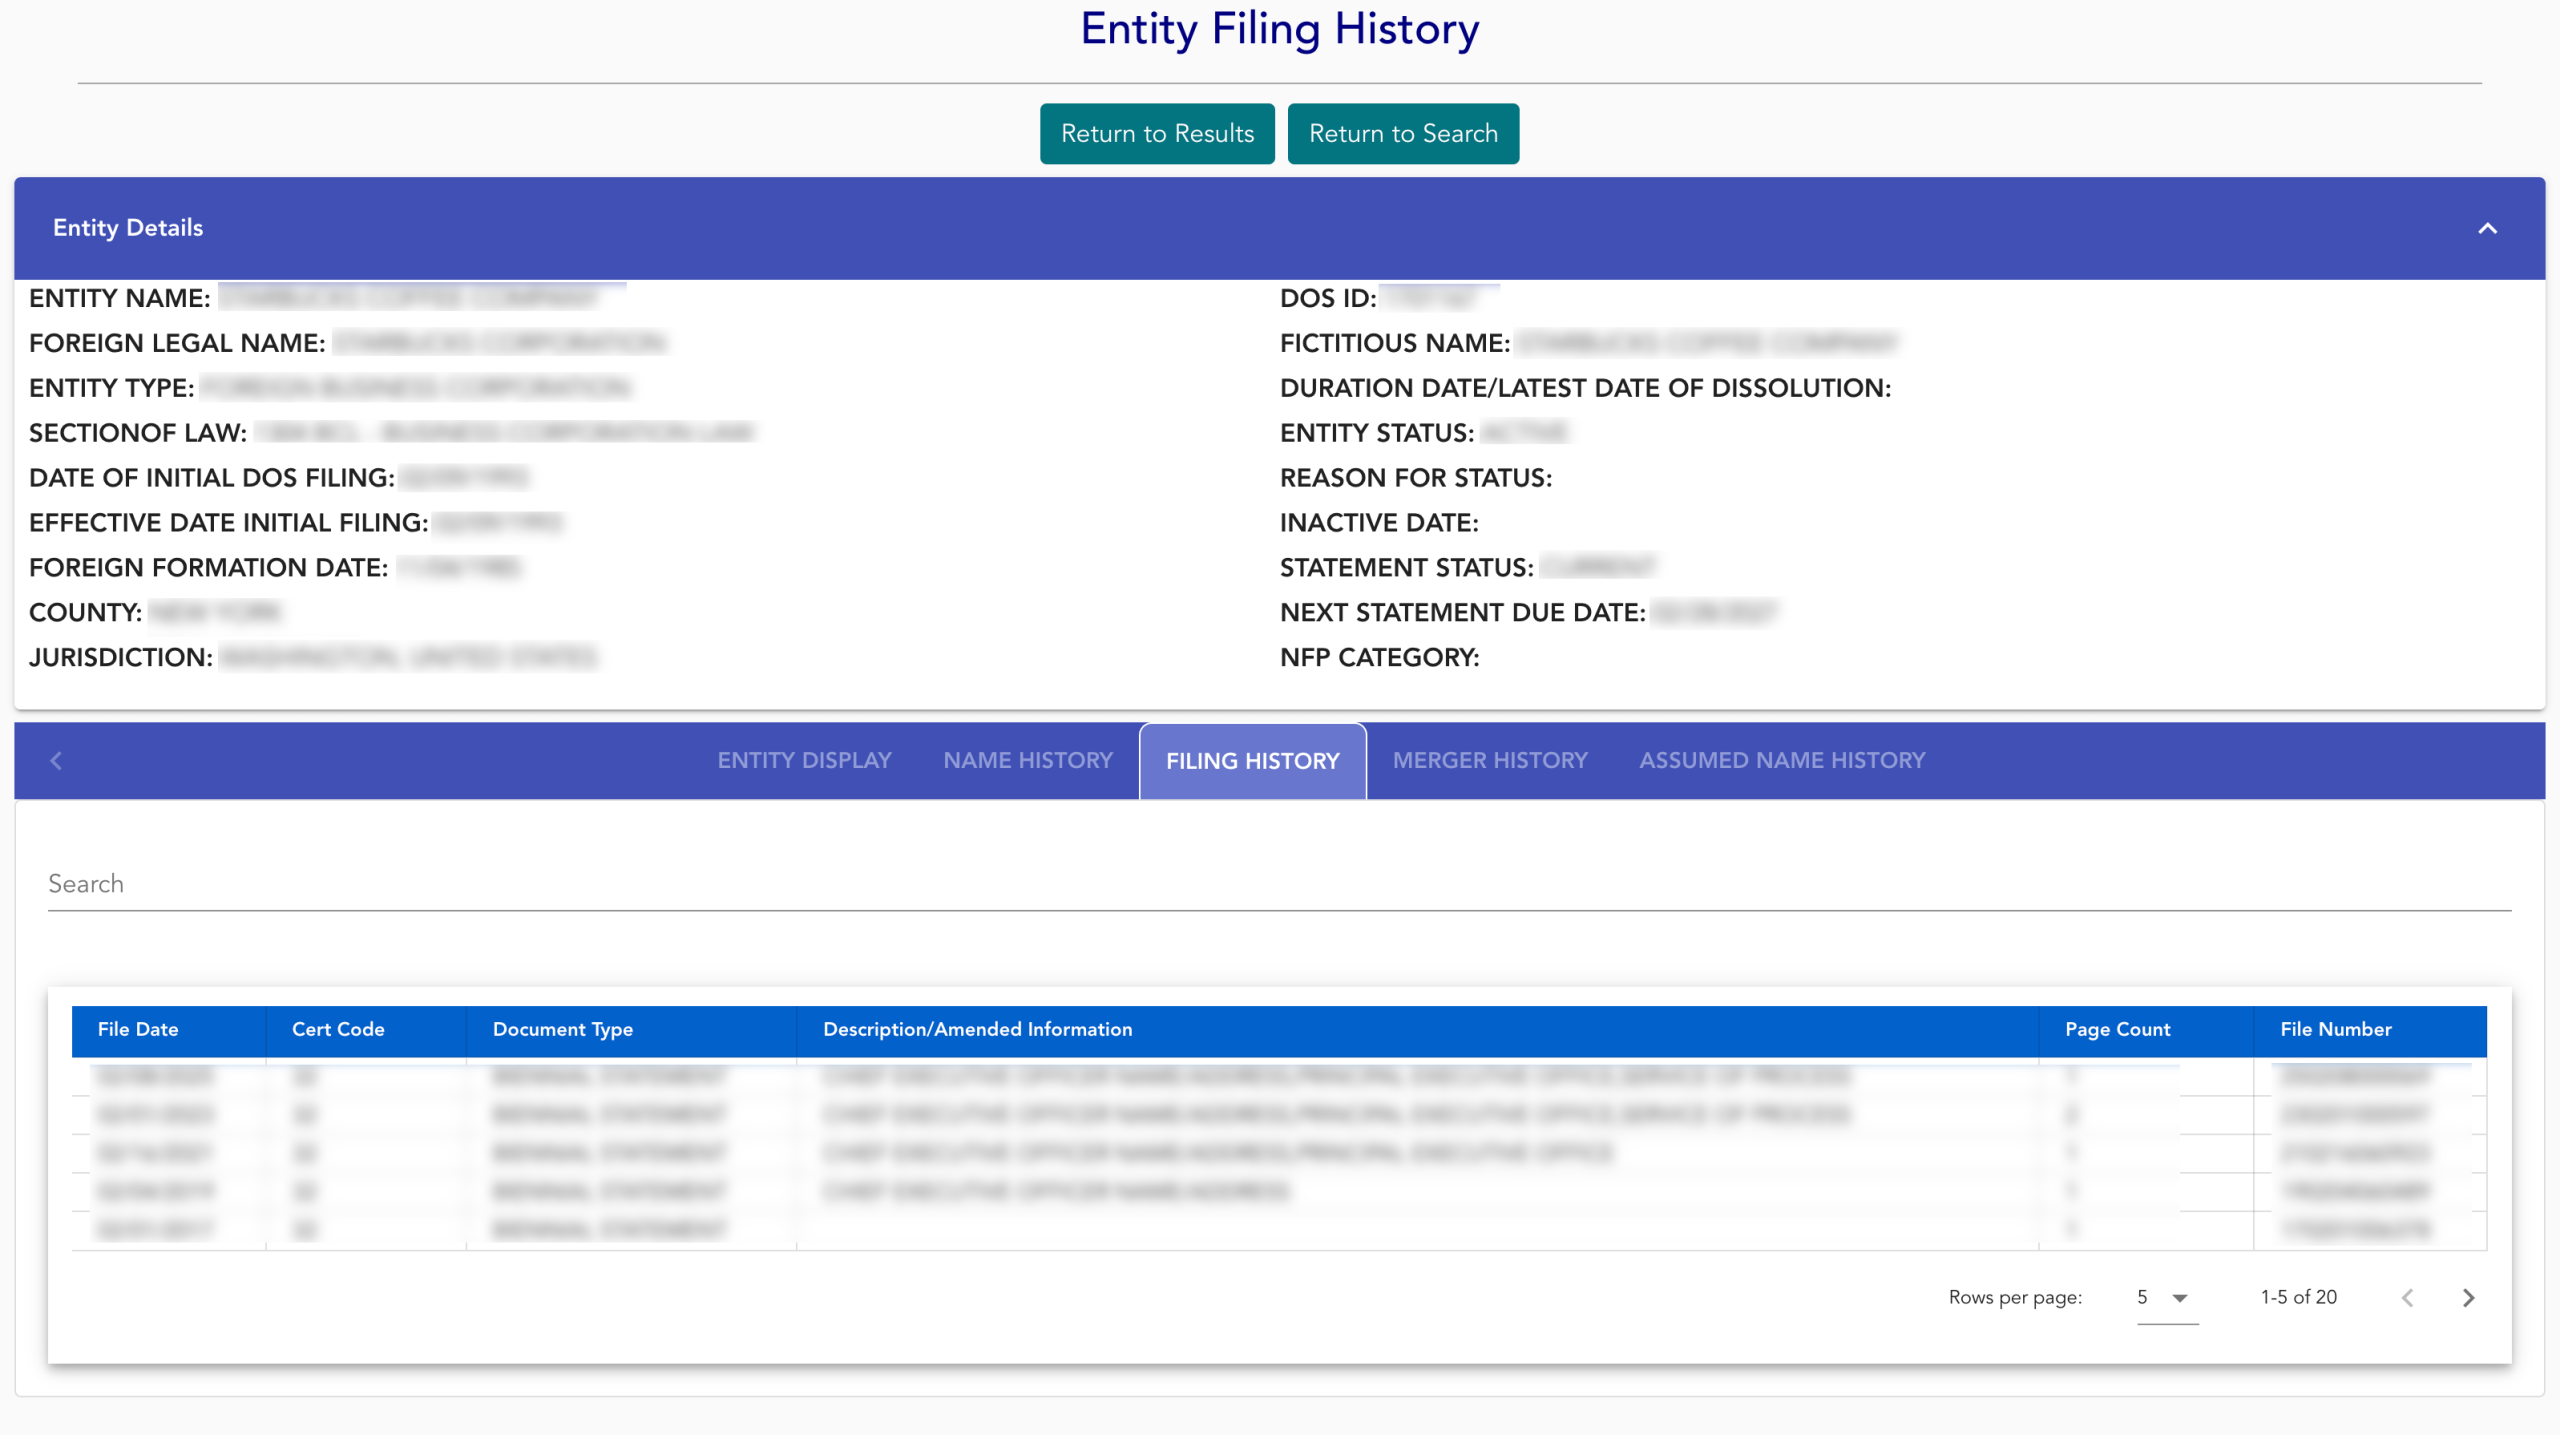
Step 13. Investigate Entity Filing History
This area reports the number of entity documents submitted to the state by filing date. To continue, choose the “Merger History” tab (see image).
- File Date
- Cert Code
- Document Type
- Description/Amended Information
- Page Count
- File Number
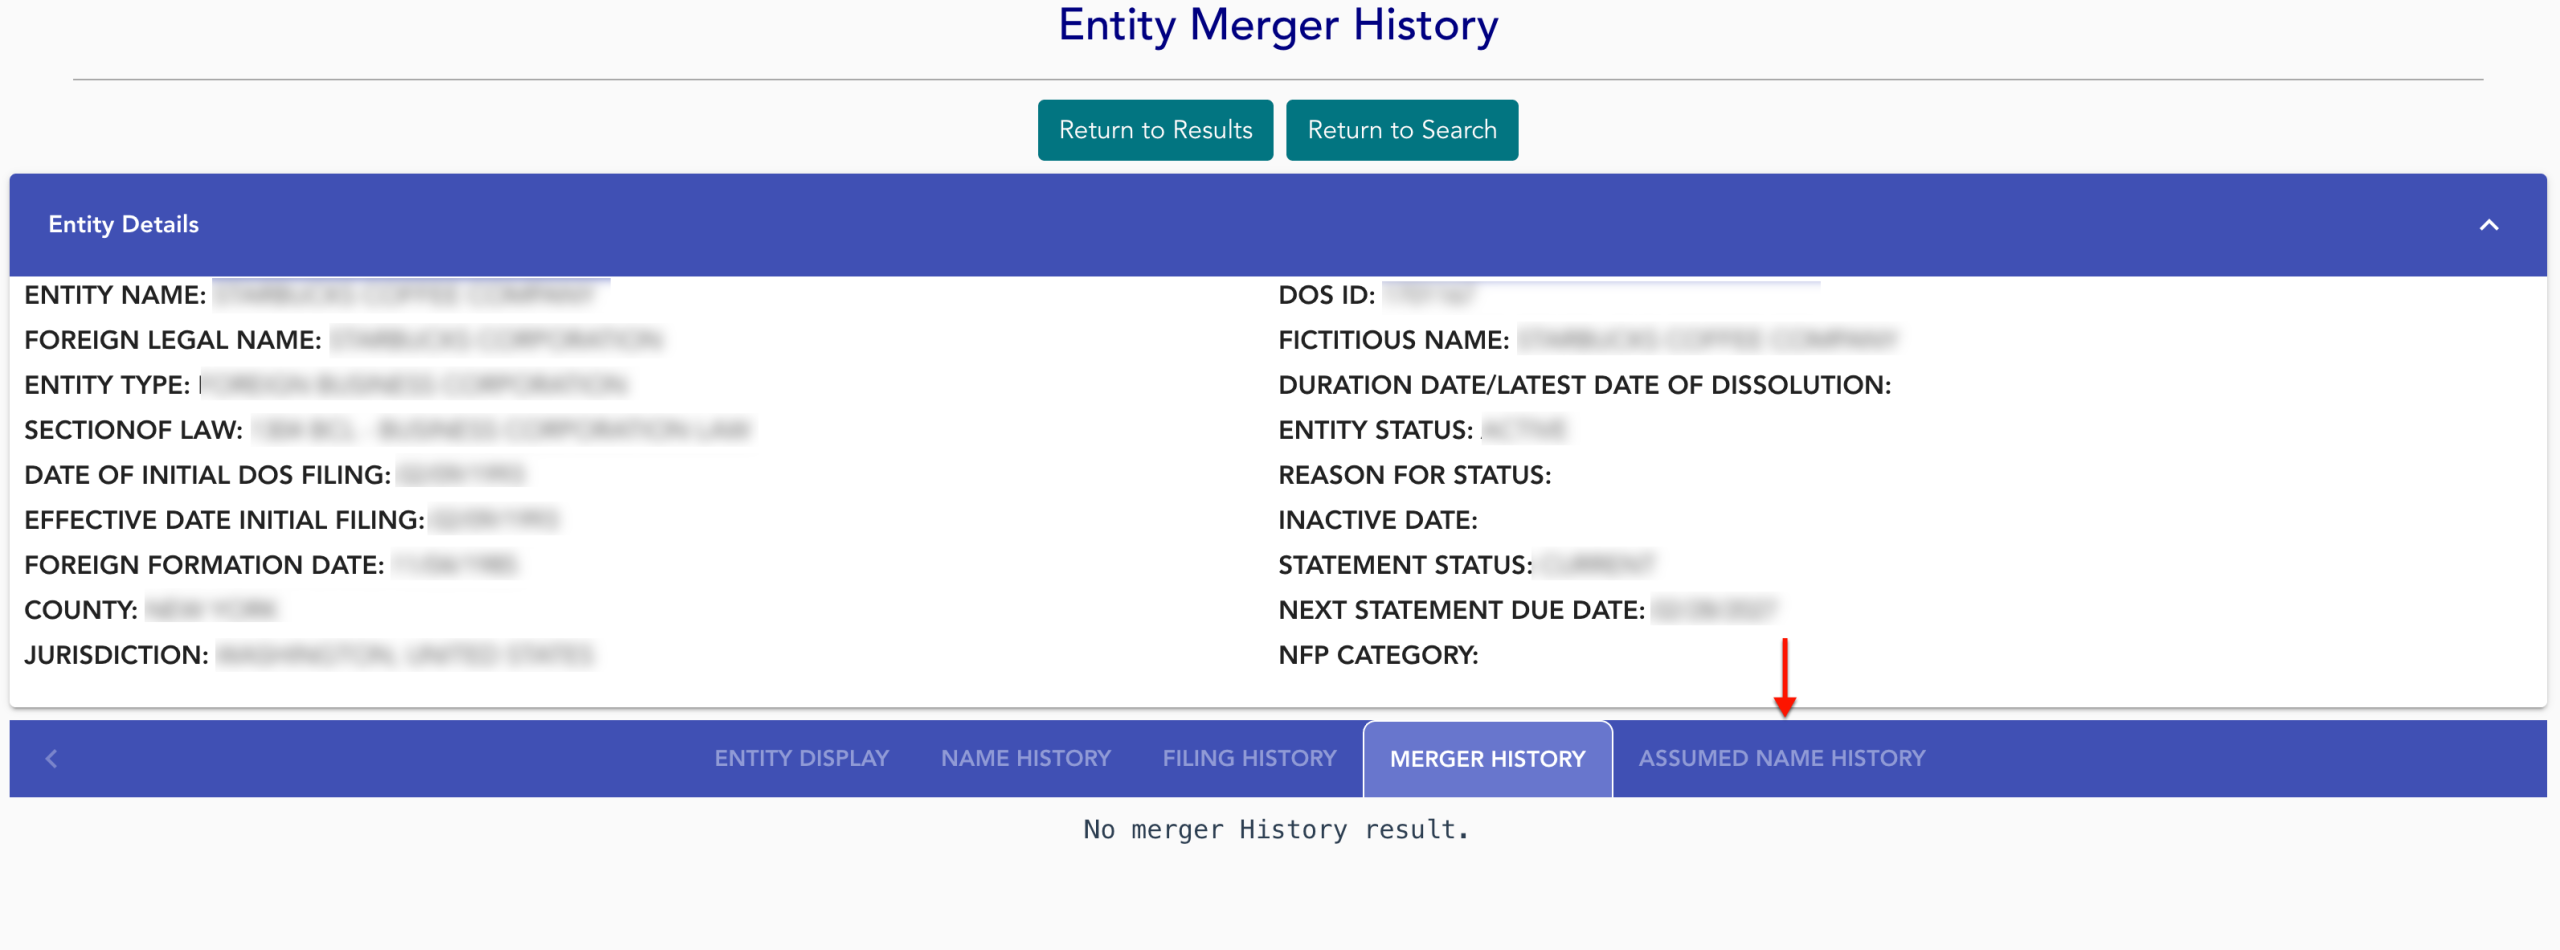
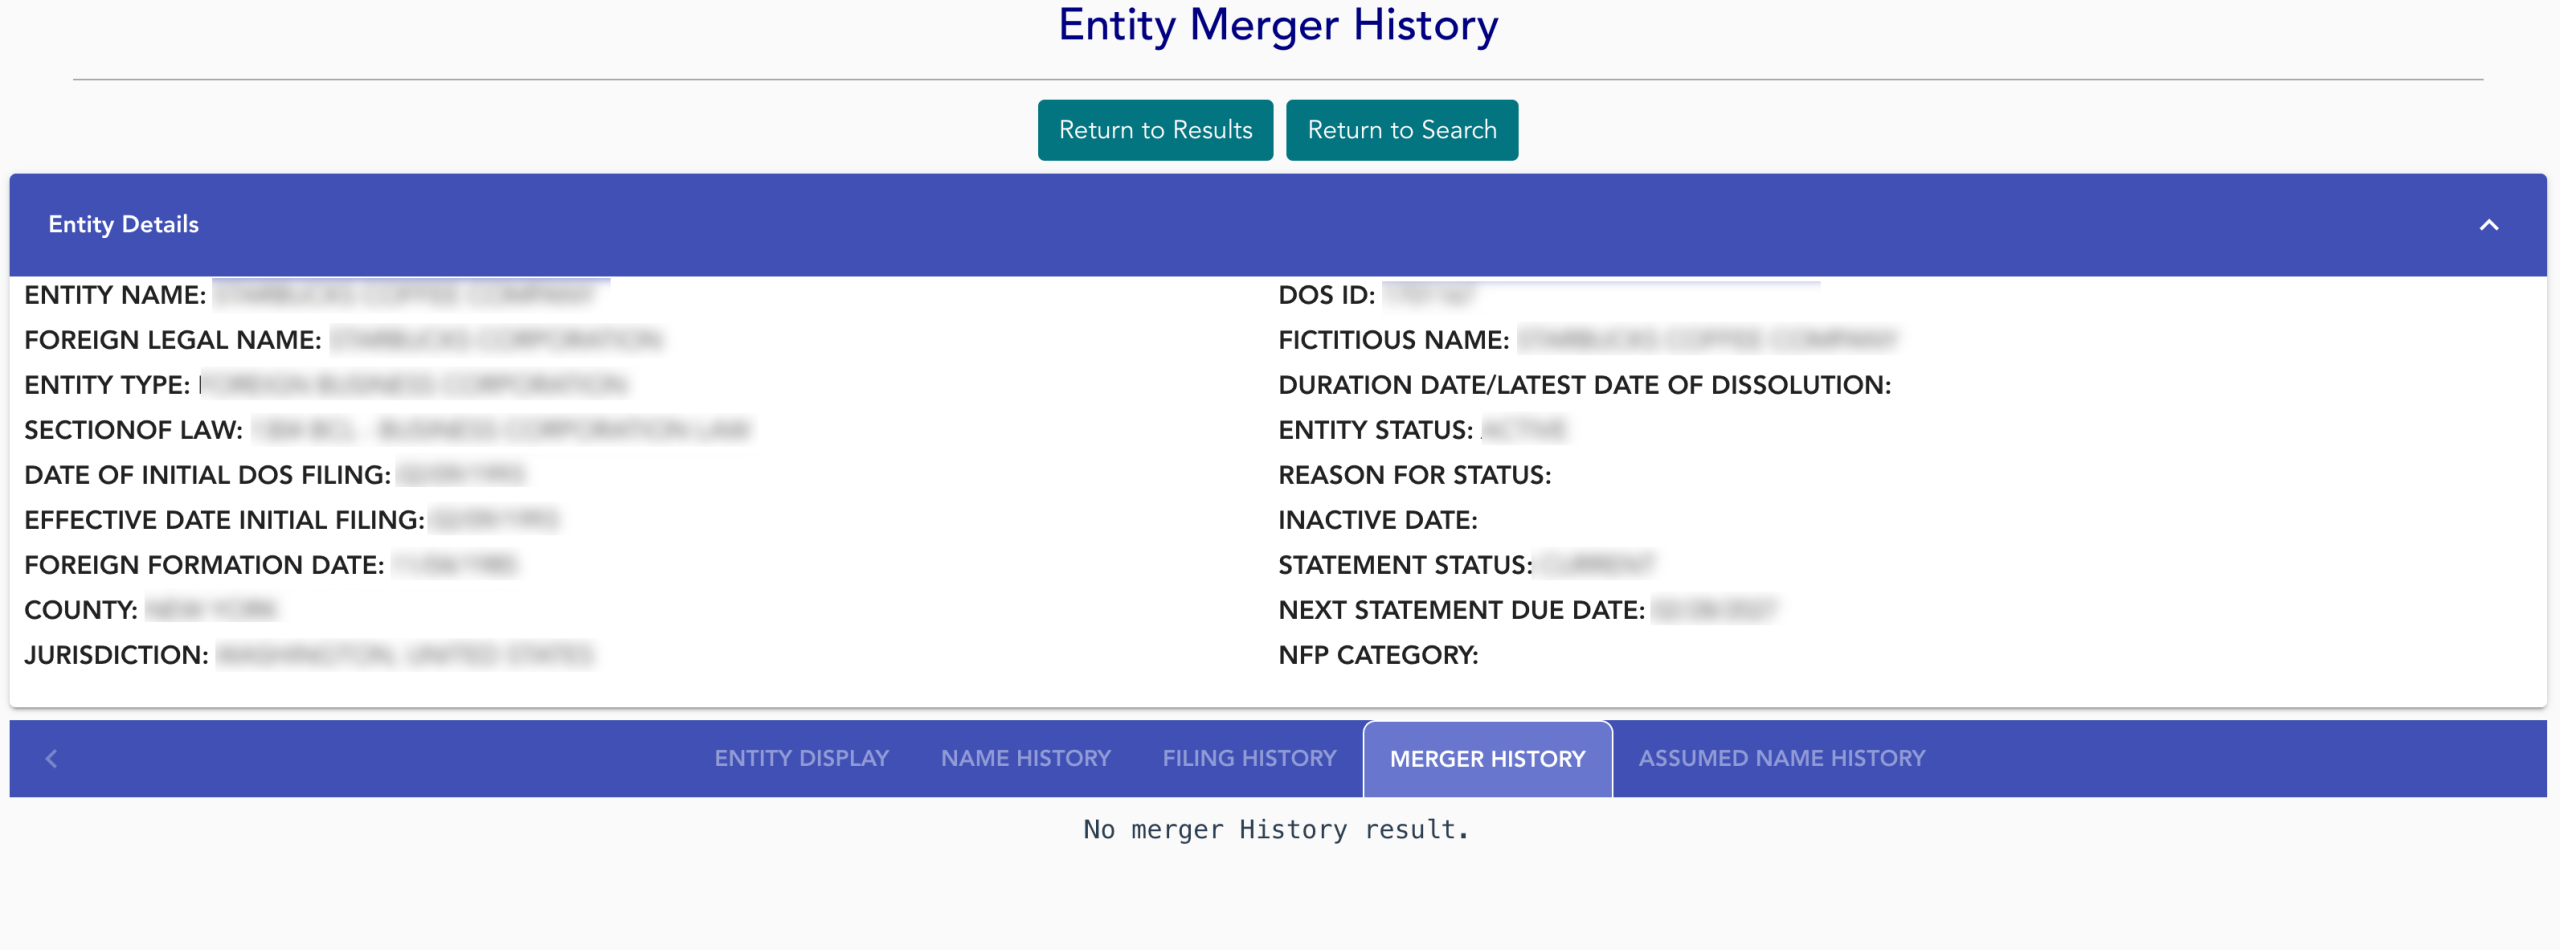
Step 14. View The Merger History of the Entity
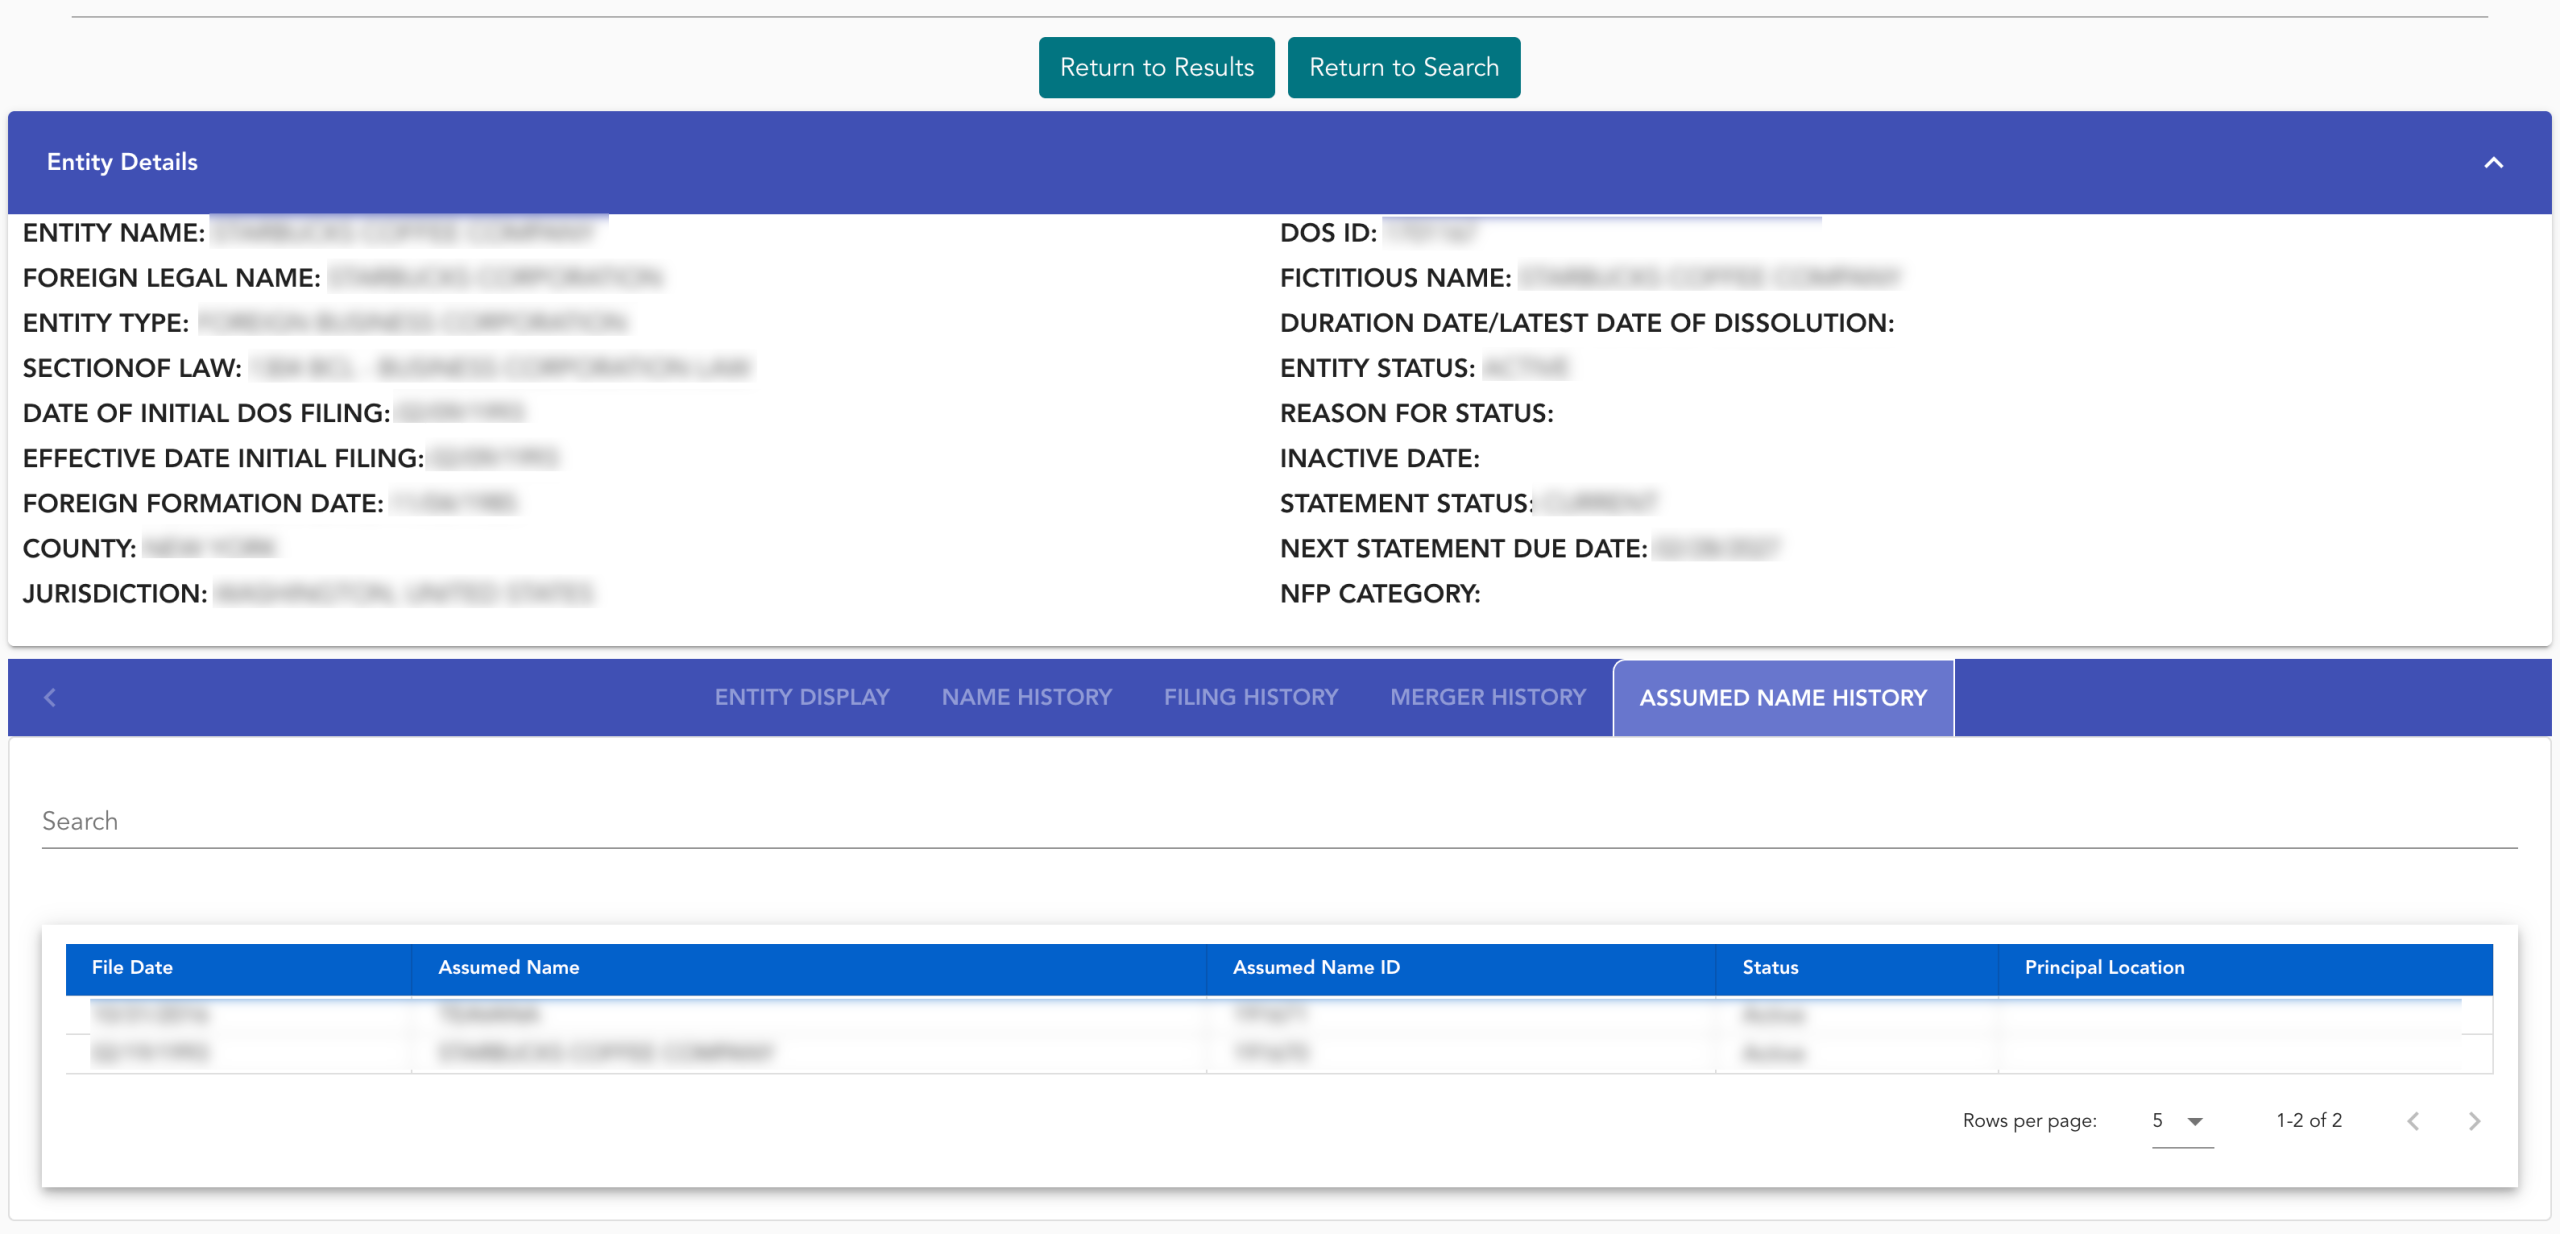
If the entity is the result of or engaged in a merger, obtain its on-file information from the “Merger History” tab. Locate the next tab, then select it to view the entity’s past assumed names (see image).
Step 15. Access the Entity’s Assumed Name History
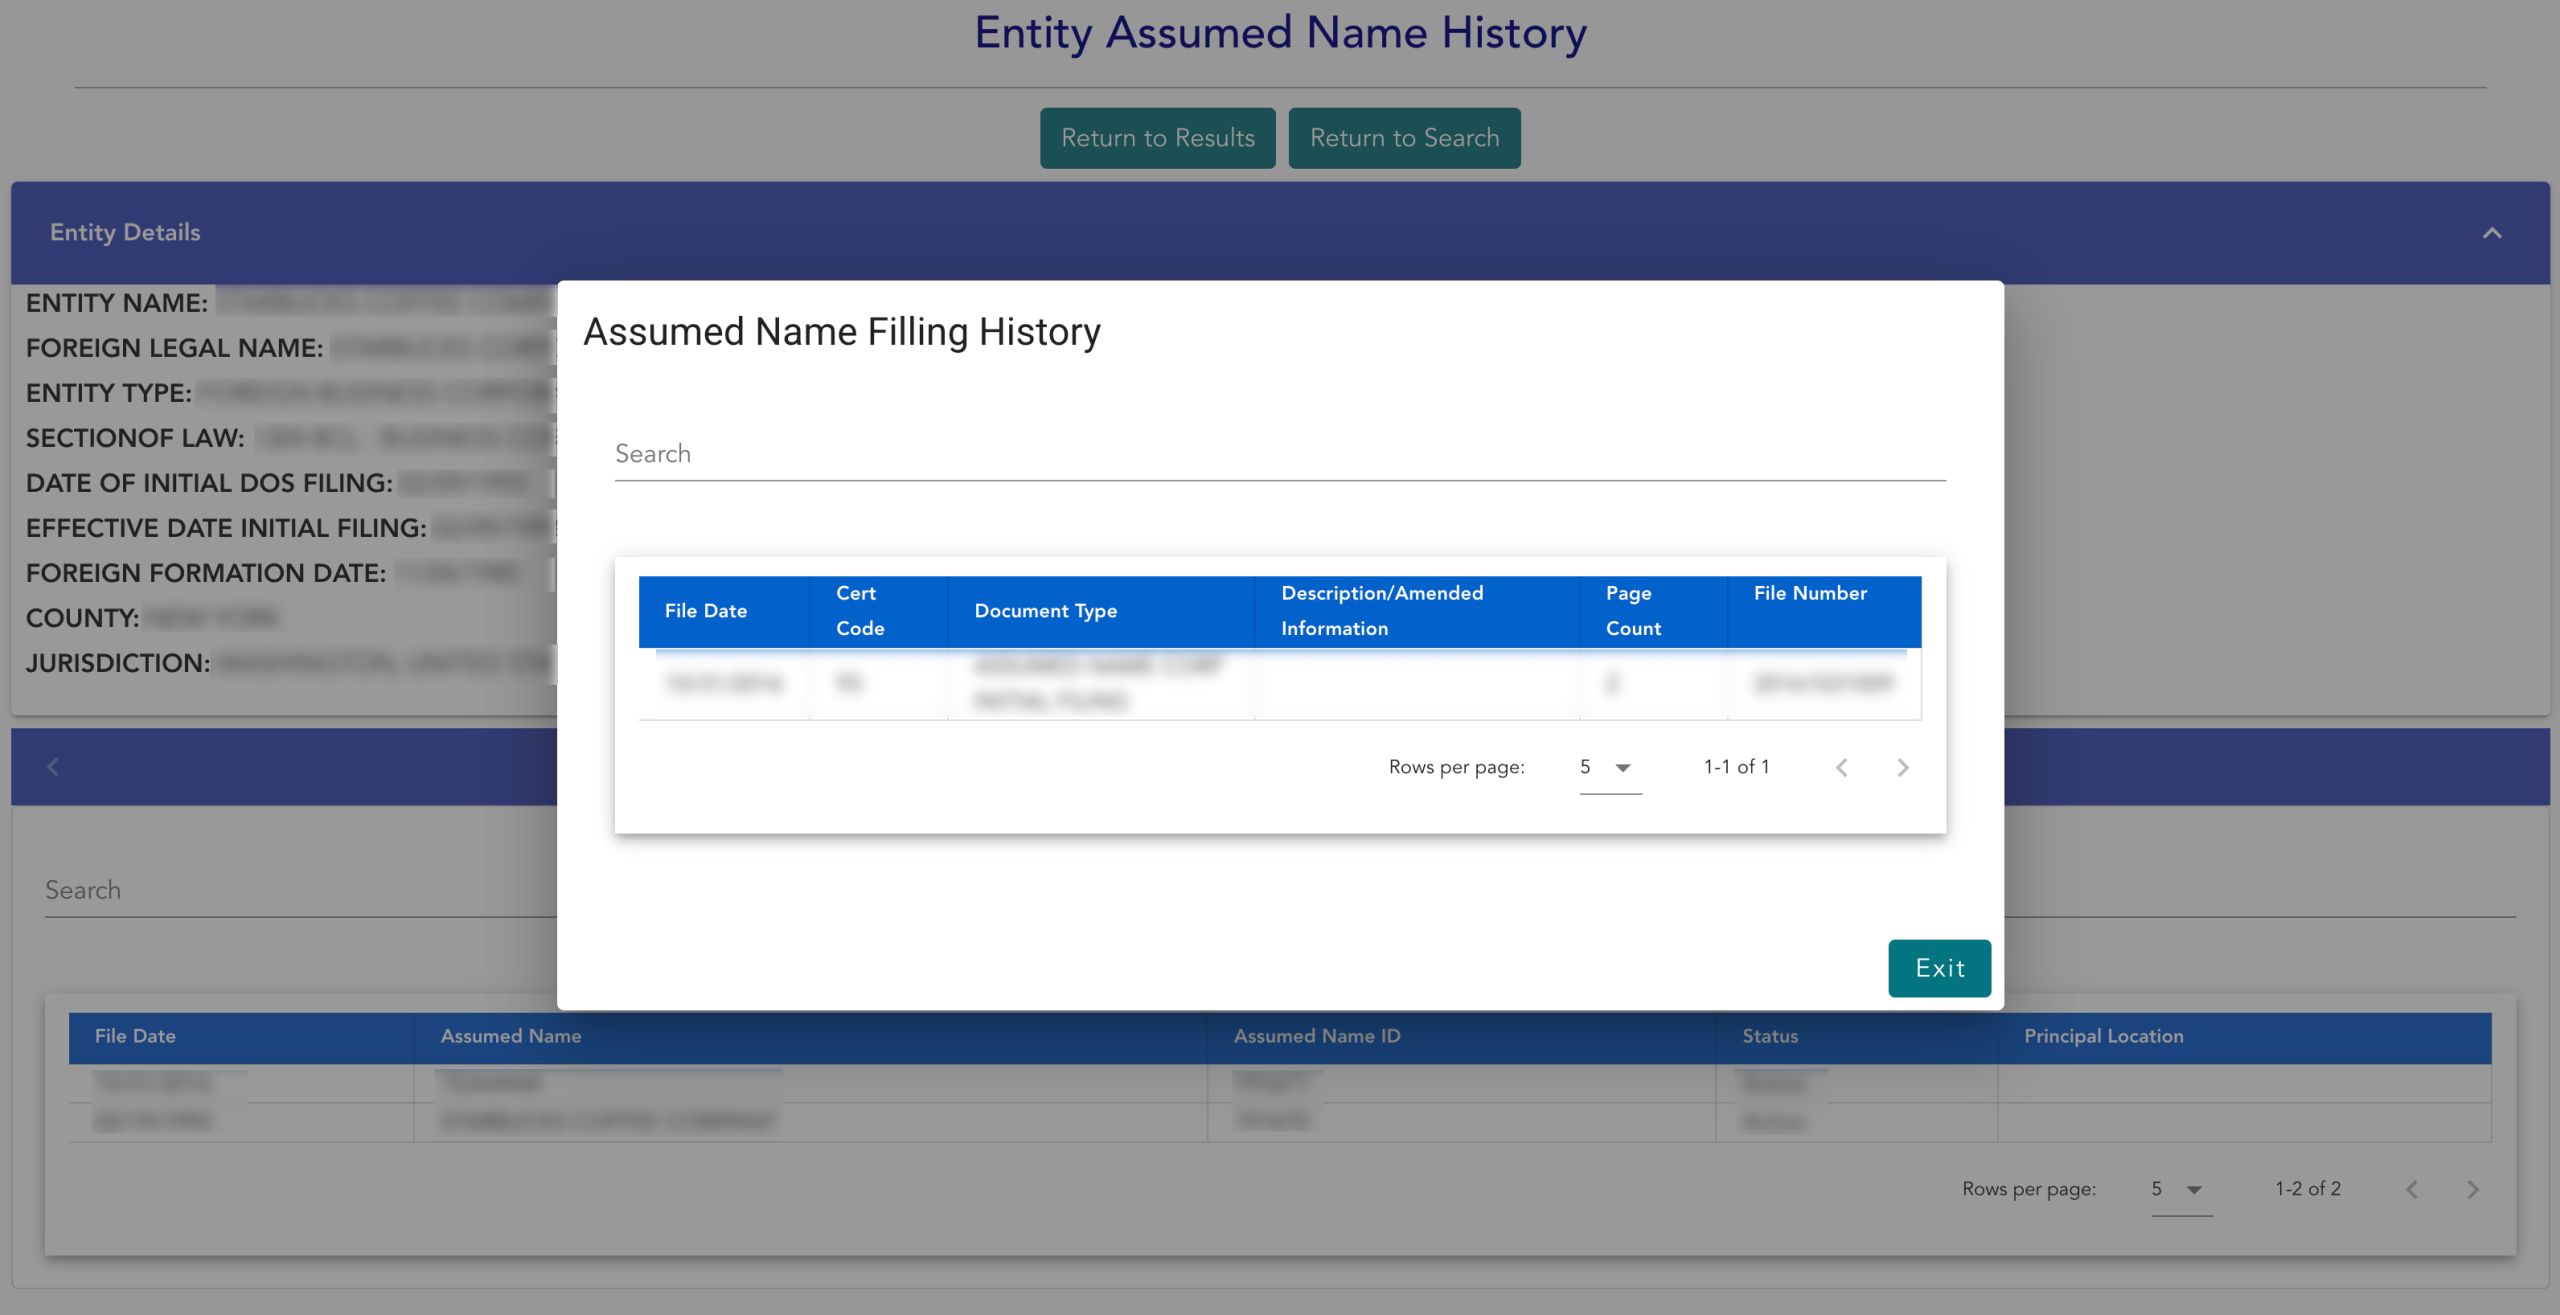
Review the columns detailing the paperwork for the entity’s past assumed names. Select an assumed name from the second column to view the filing (as a PDF).
- File Date
- Assumed Name
- Assumed Name ID
- Status
- Principal Location
Step 16. Review Assumed Name Filing Information
Read through the pop-up window upon file selection. When you have gathered any relevant information, select “Exit” to return.
- File Date
- Cert Code
- Document Type
- Description/Amended Information
- Page Count
- File Number