The Nevada Secretary of State Silverflume business entity search page is available to users seeking information regarding an entity. Here, an entity’s public information is available for review once it is located. Additionally, as a matter of convenience, visitors can access an entity’s historical (as well as current) information on file on-screen.
Business Name Availability Check
State of Nevada

Business Entity Search
Step 1. Visit Nevada’s Silverflume Business Search
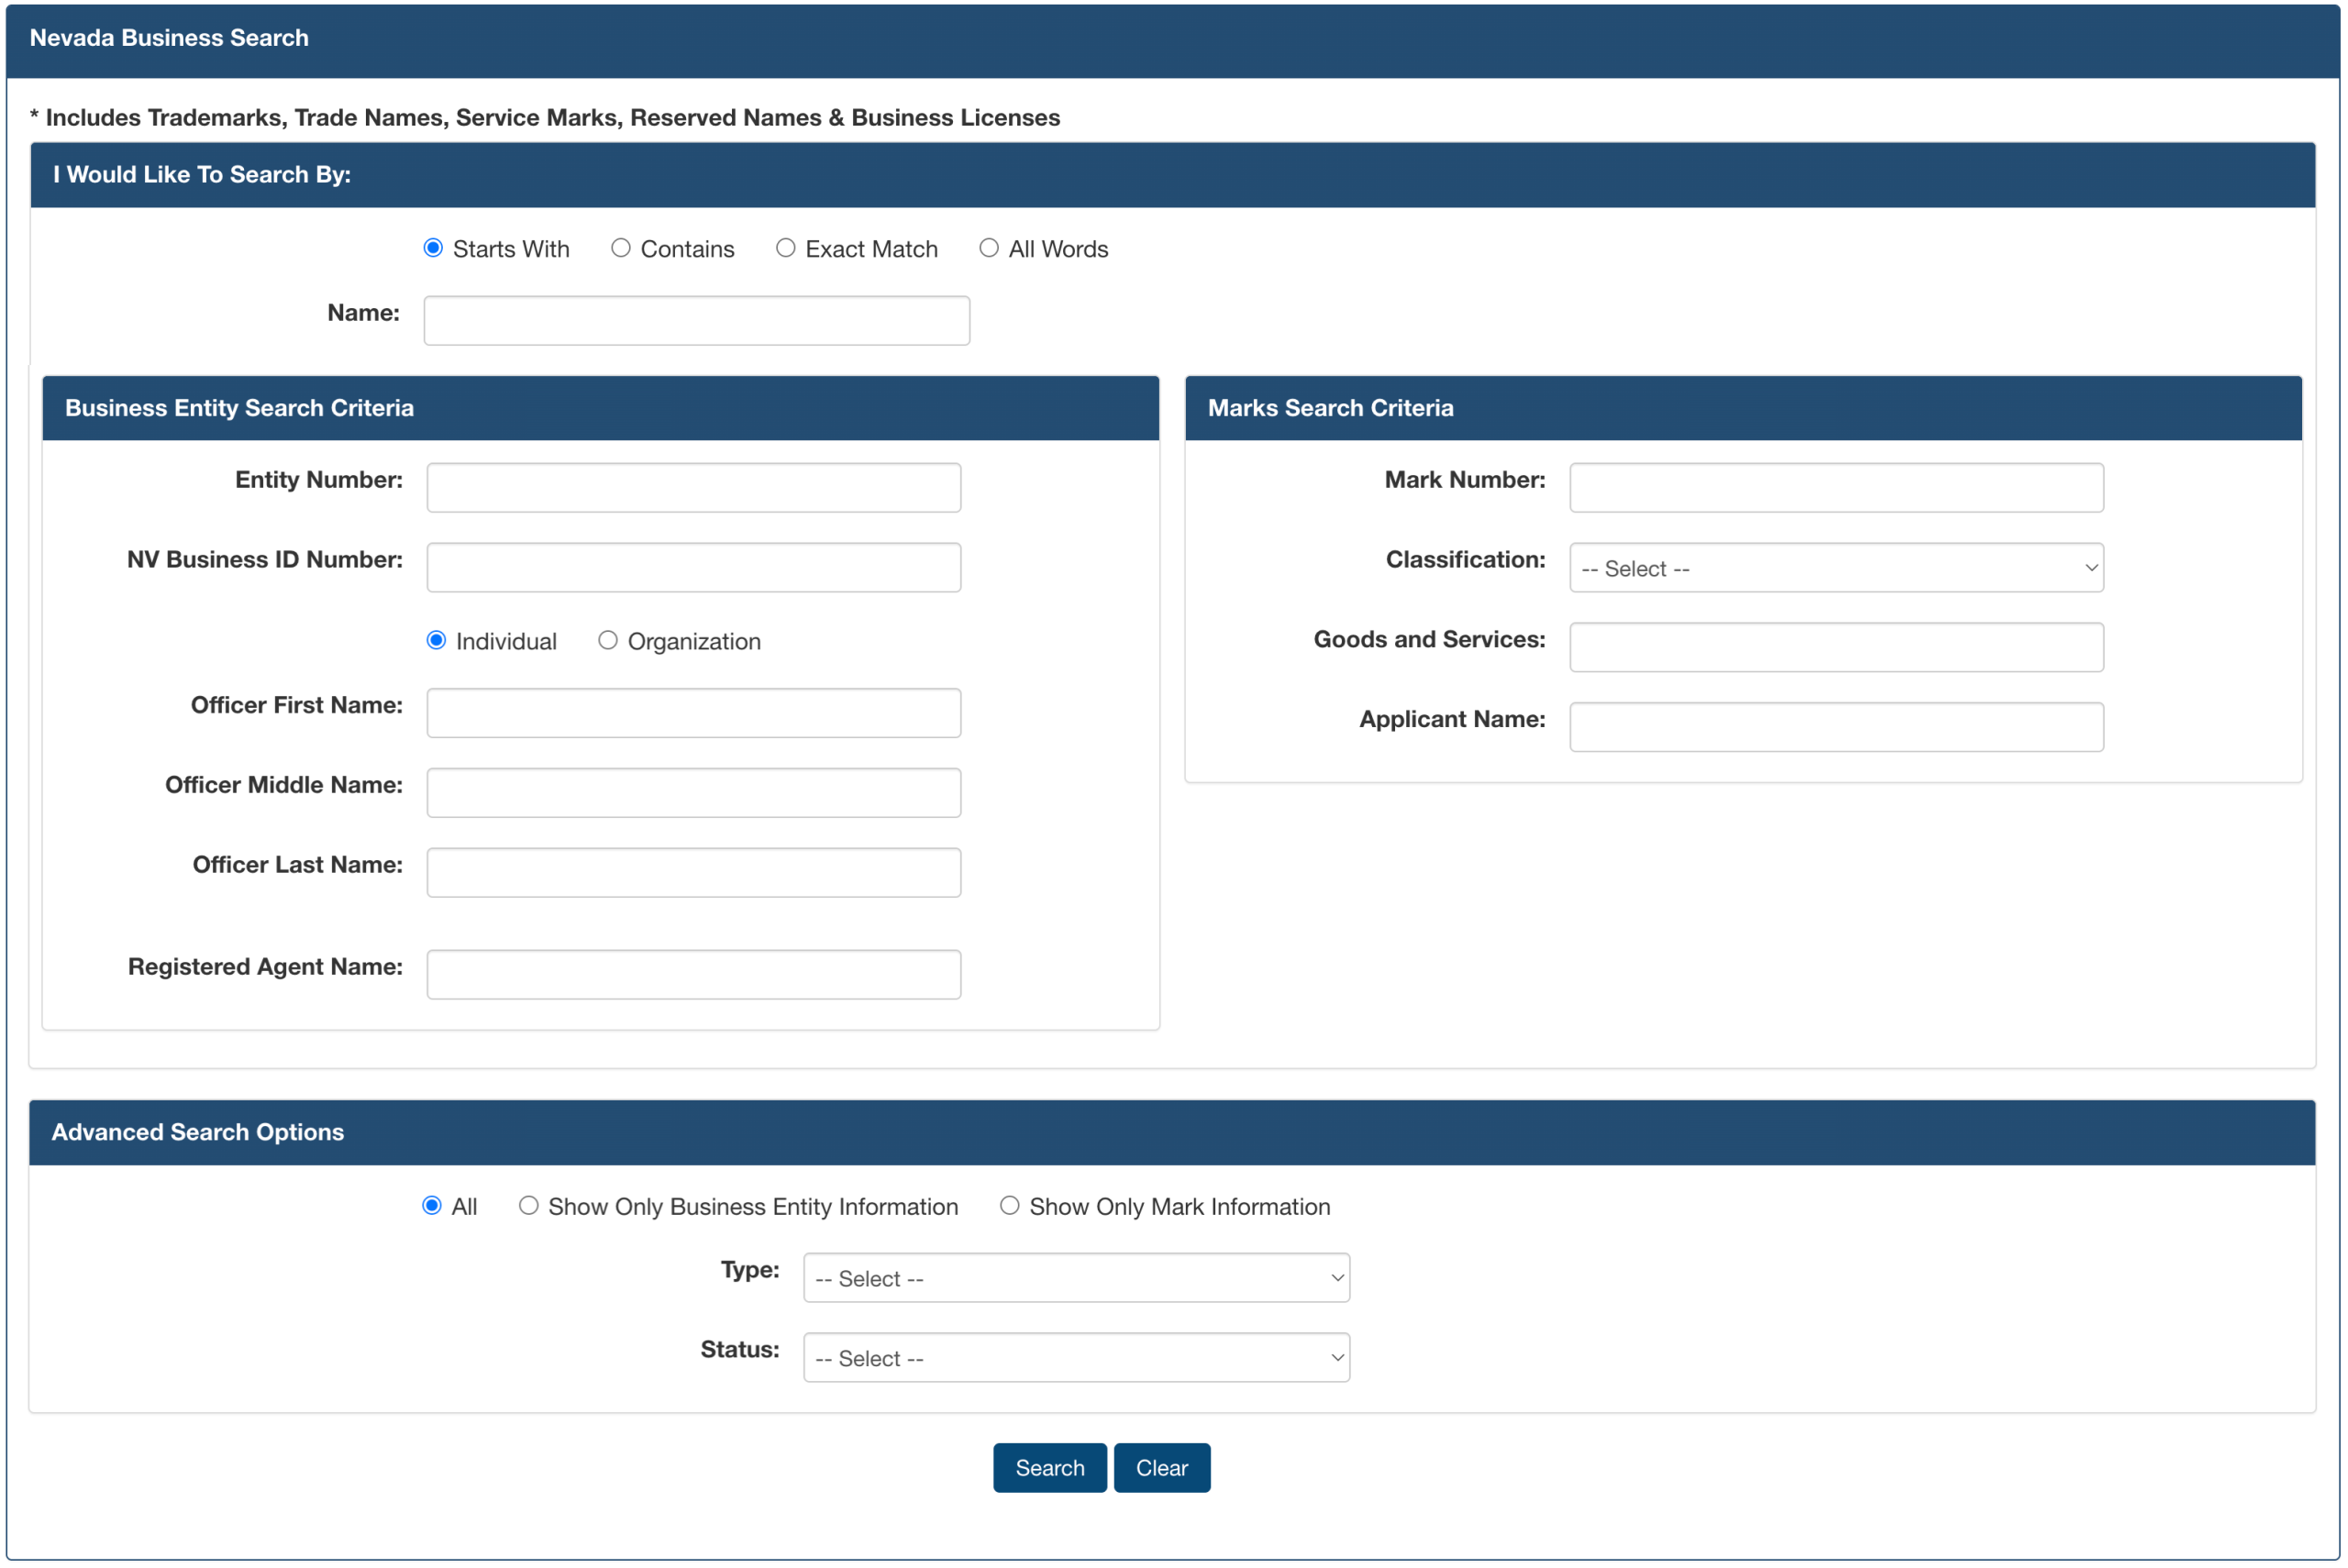
Access Silverflume’s business entity search tool and review the options provided. Query results are limited to 500 names; thus, it is best to narrow results as much as possible.
Step 2. Select the Method the Query Uses
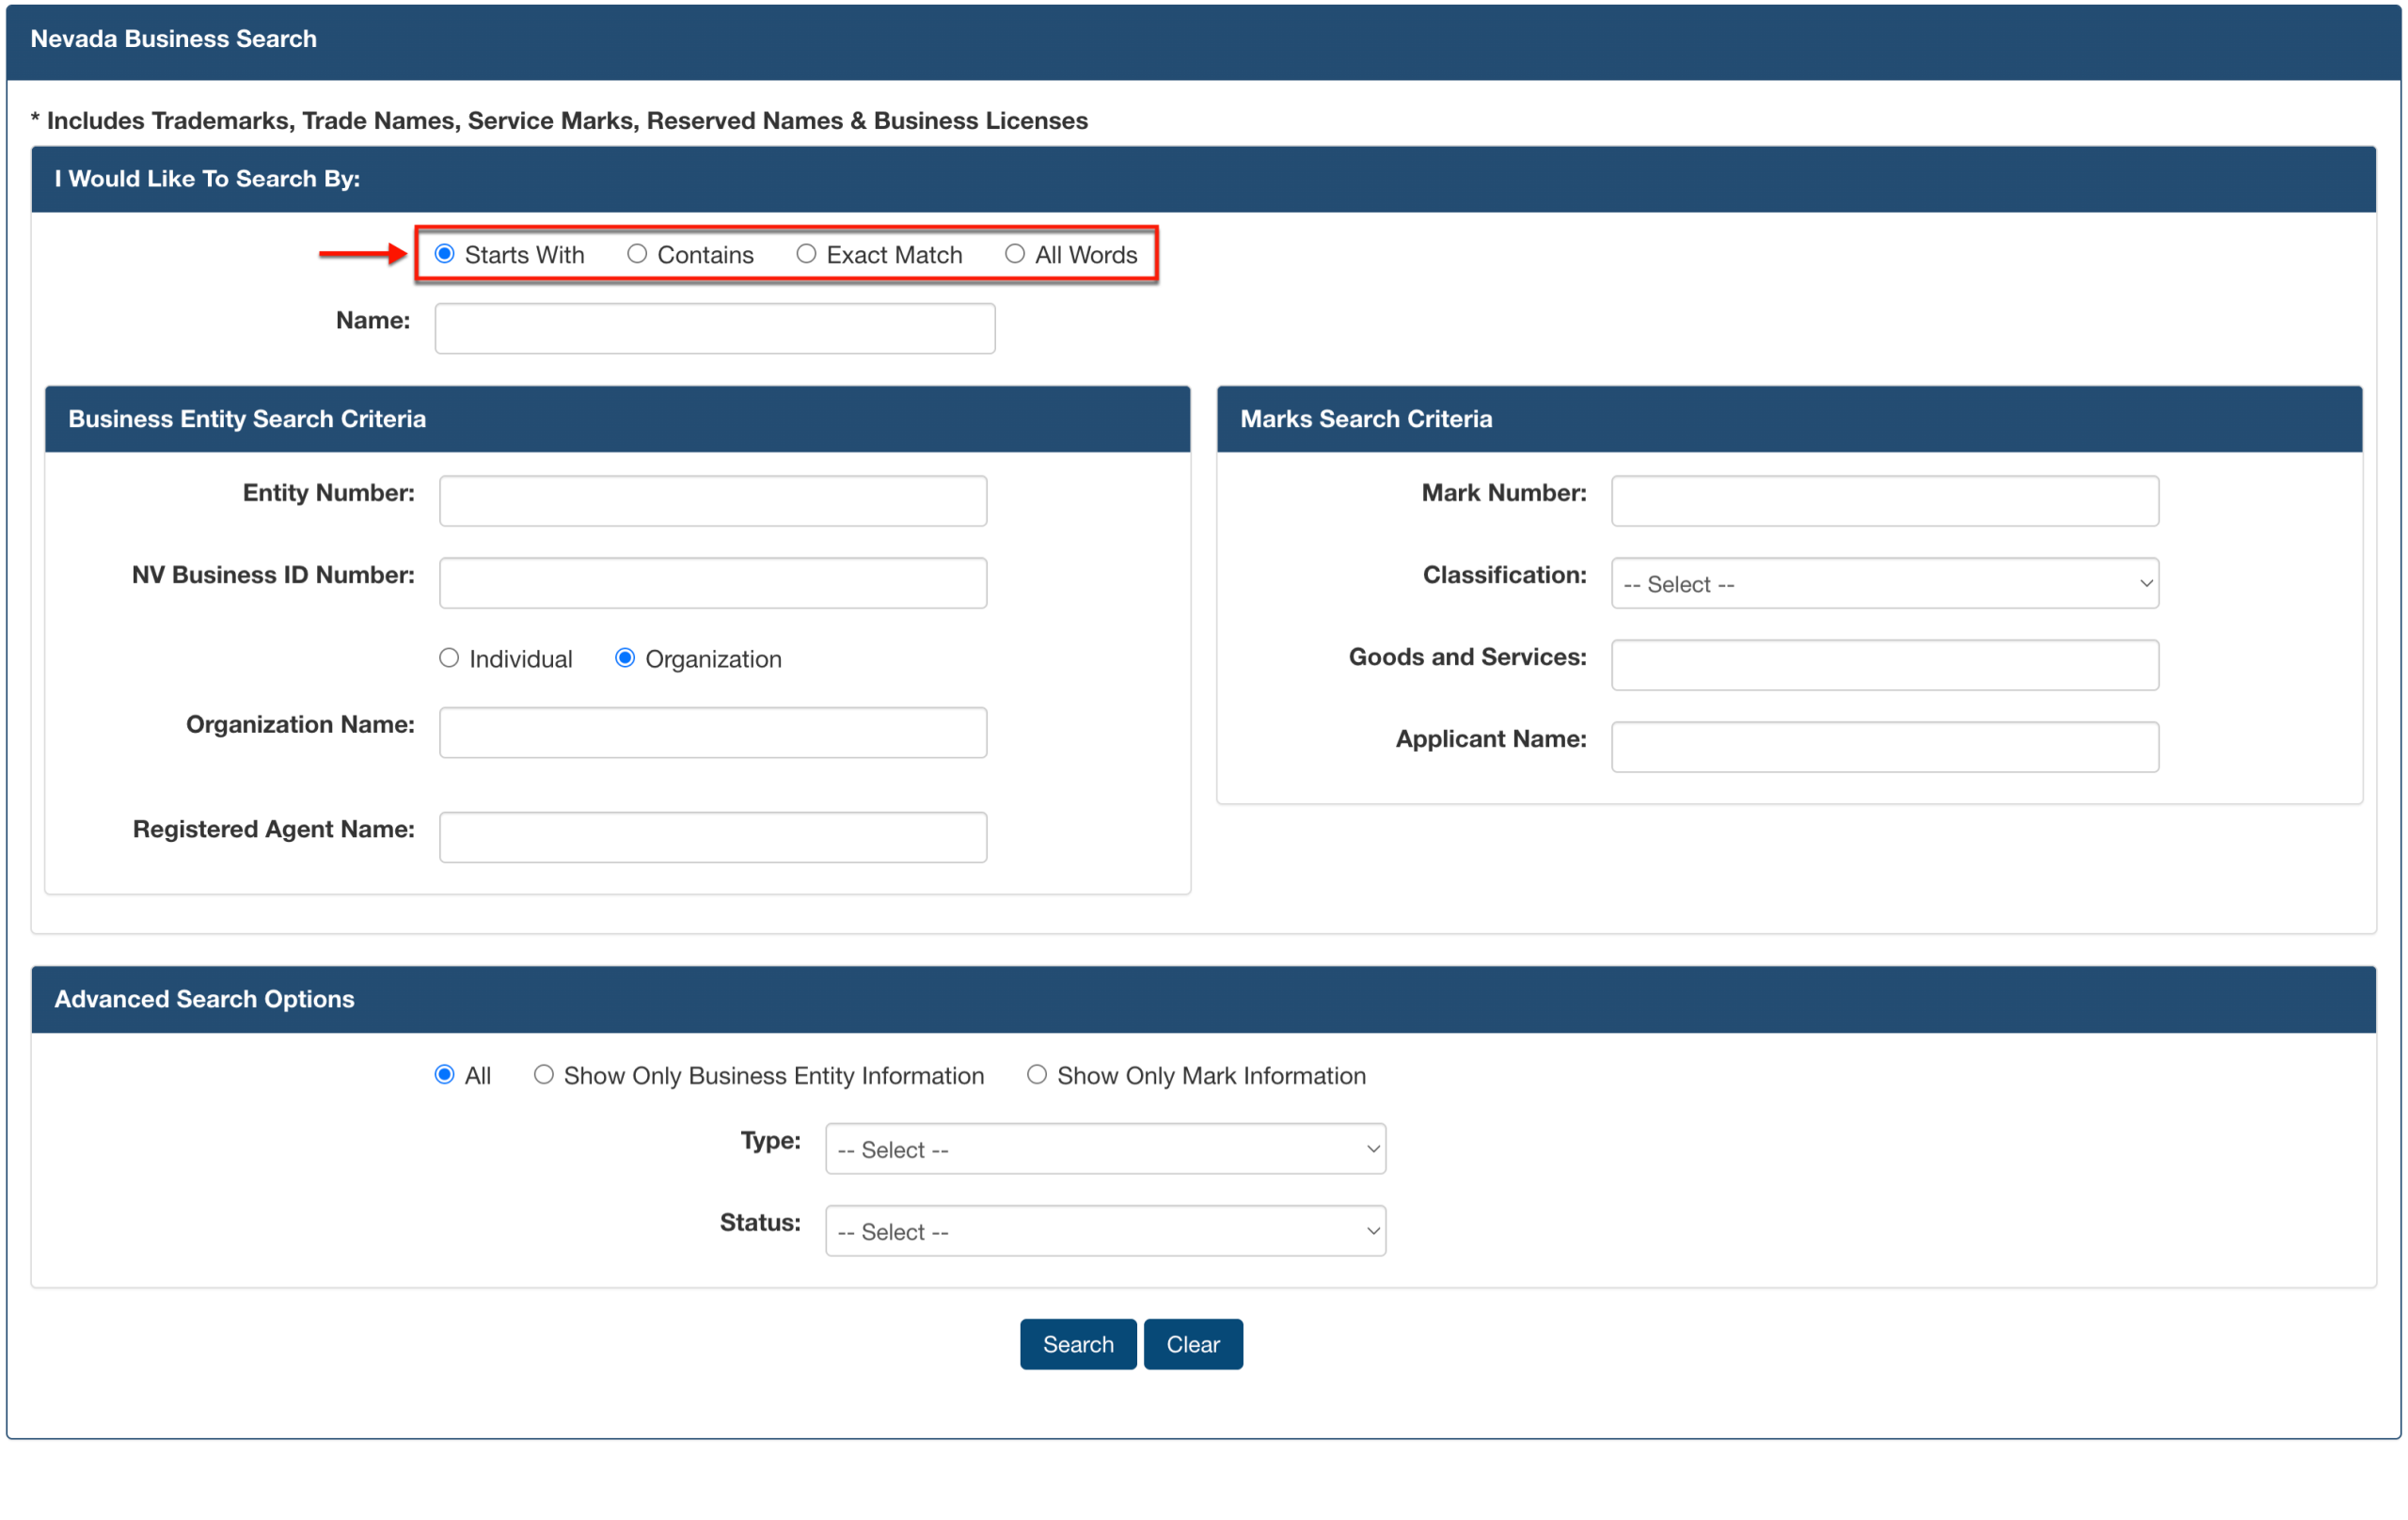
Begin by reviewing the query options. Choose one way the query should perform the search from the radio buttons introducing the tool.
- Starts With
- Contains
- Exact Match
- All Words
Step 3. Supply the Search Item
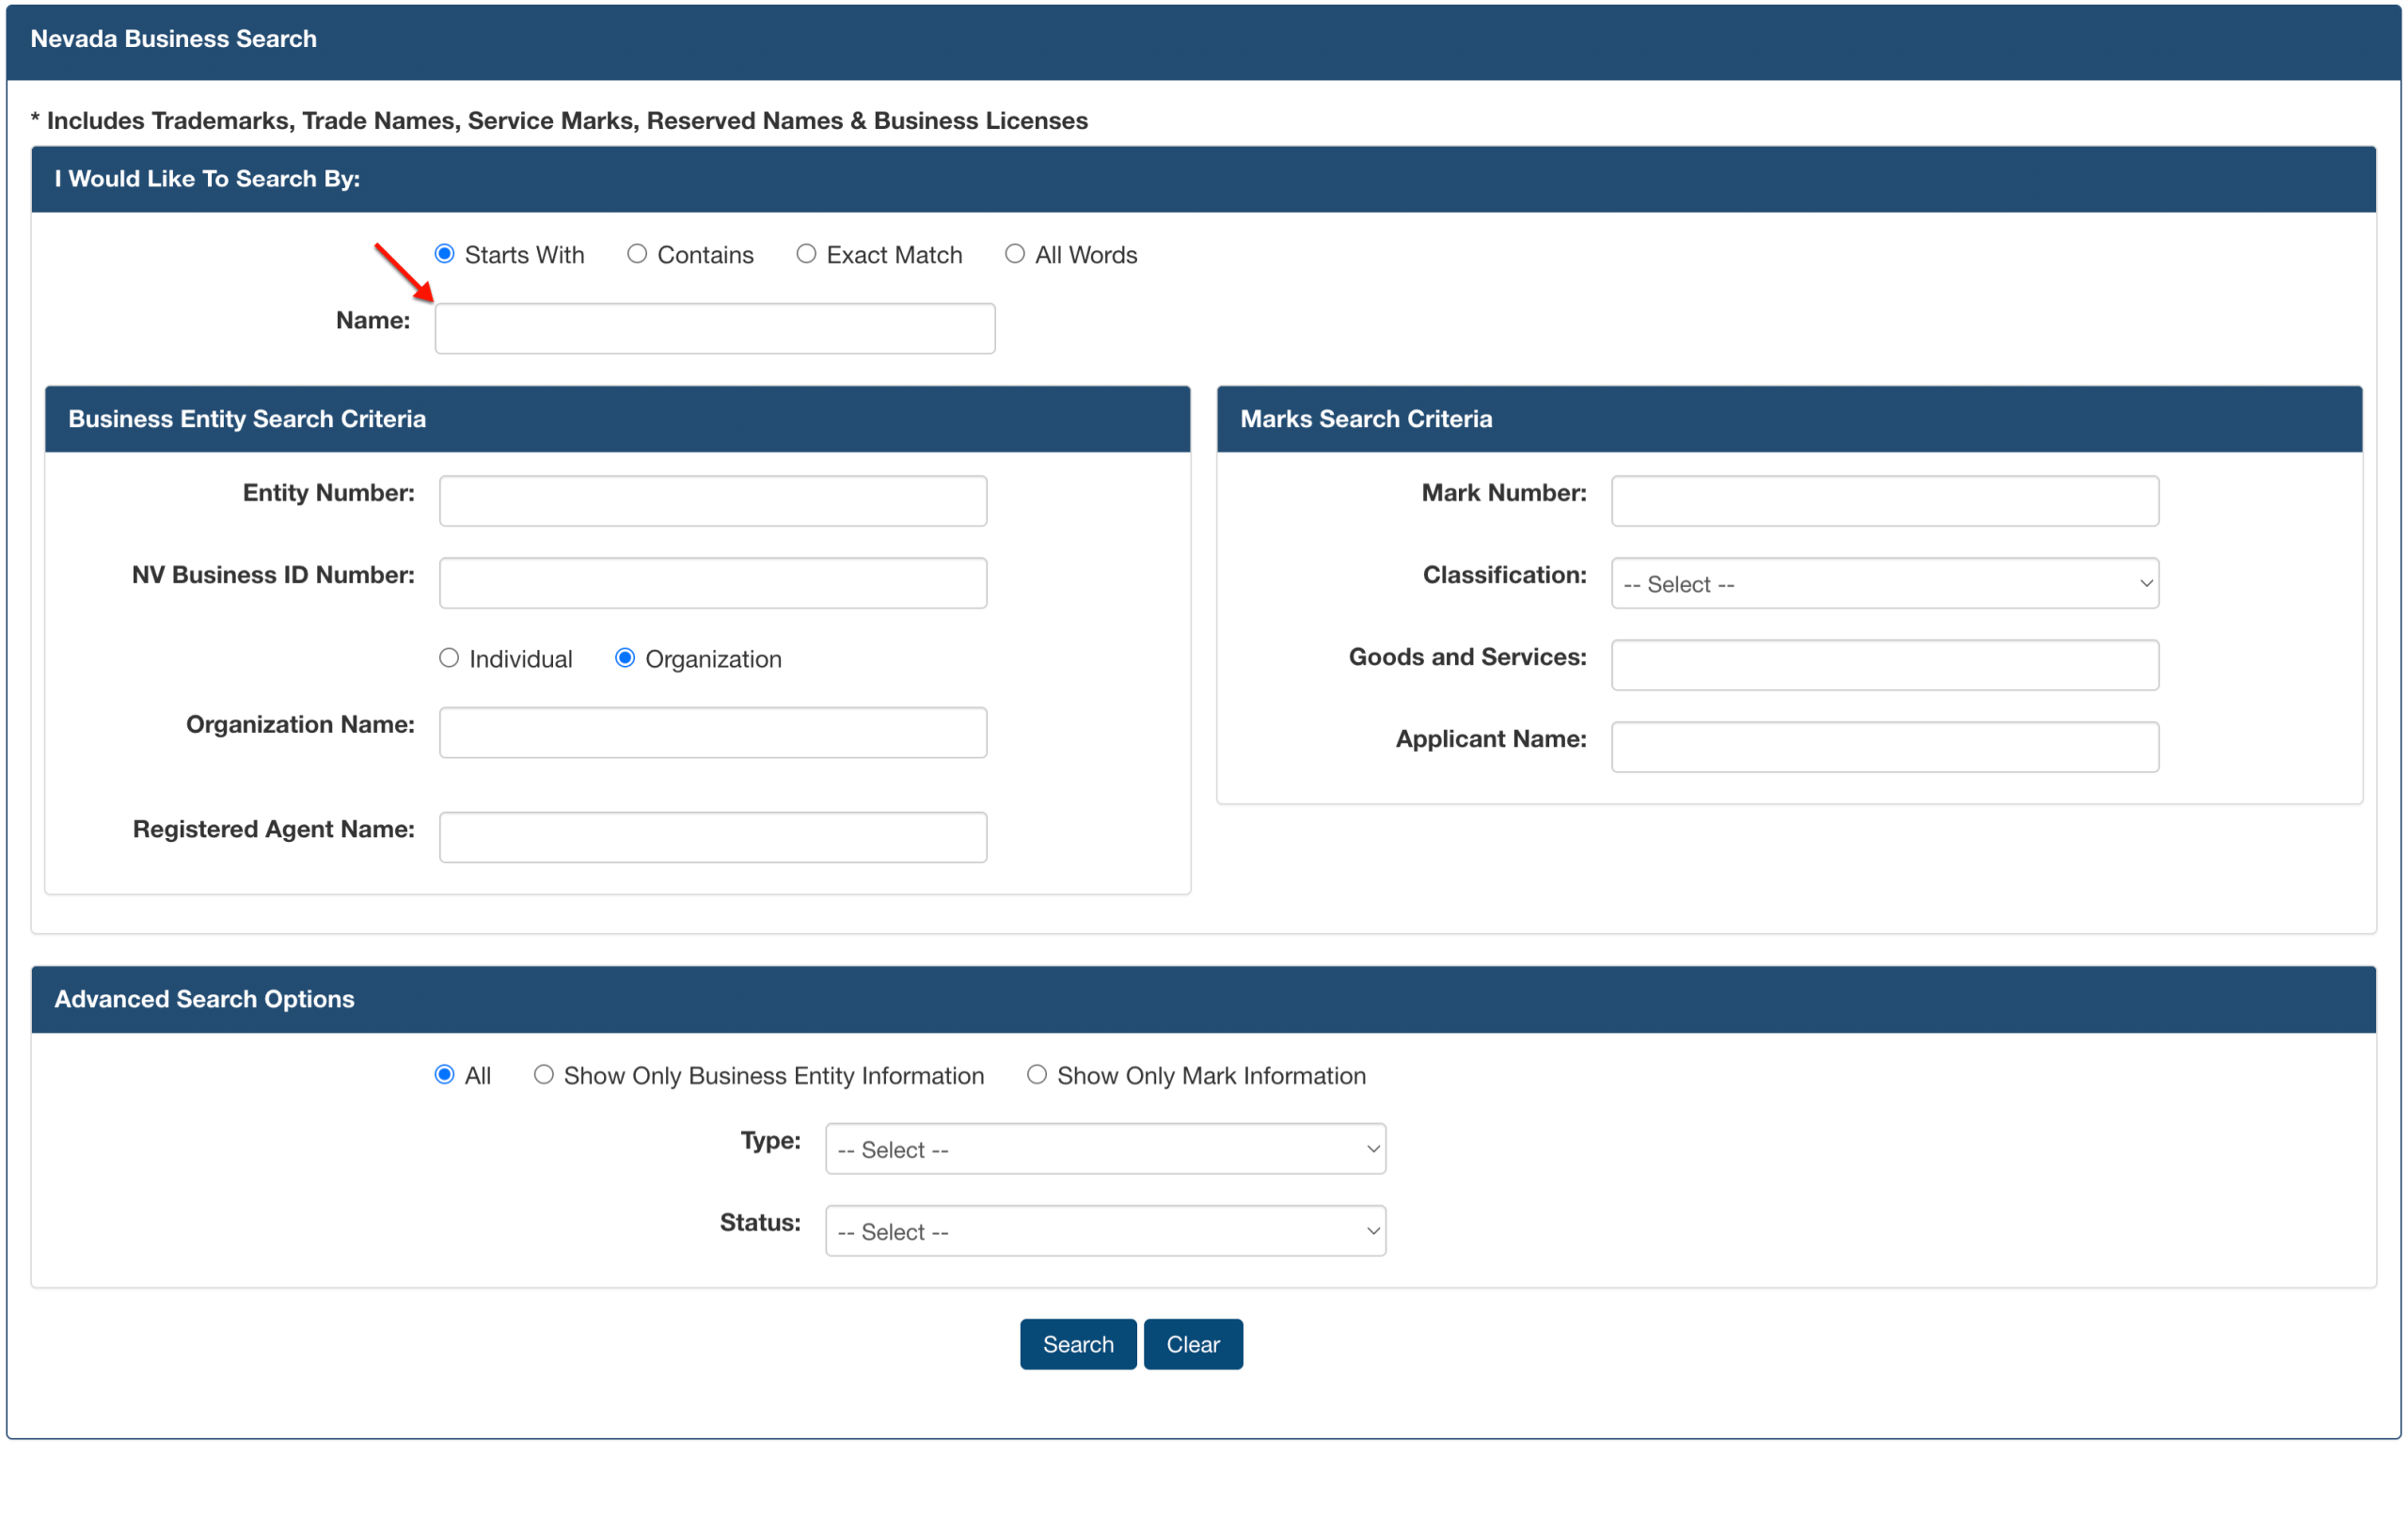
Since we will search for a business name, enter the full or partial name in the “Name” box. If this is not possible, then produce a keyword for the search.
Step 4. Include Additional Search Criteria (Optional)
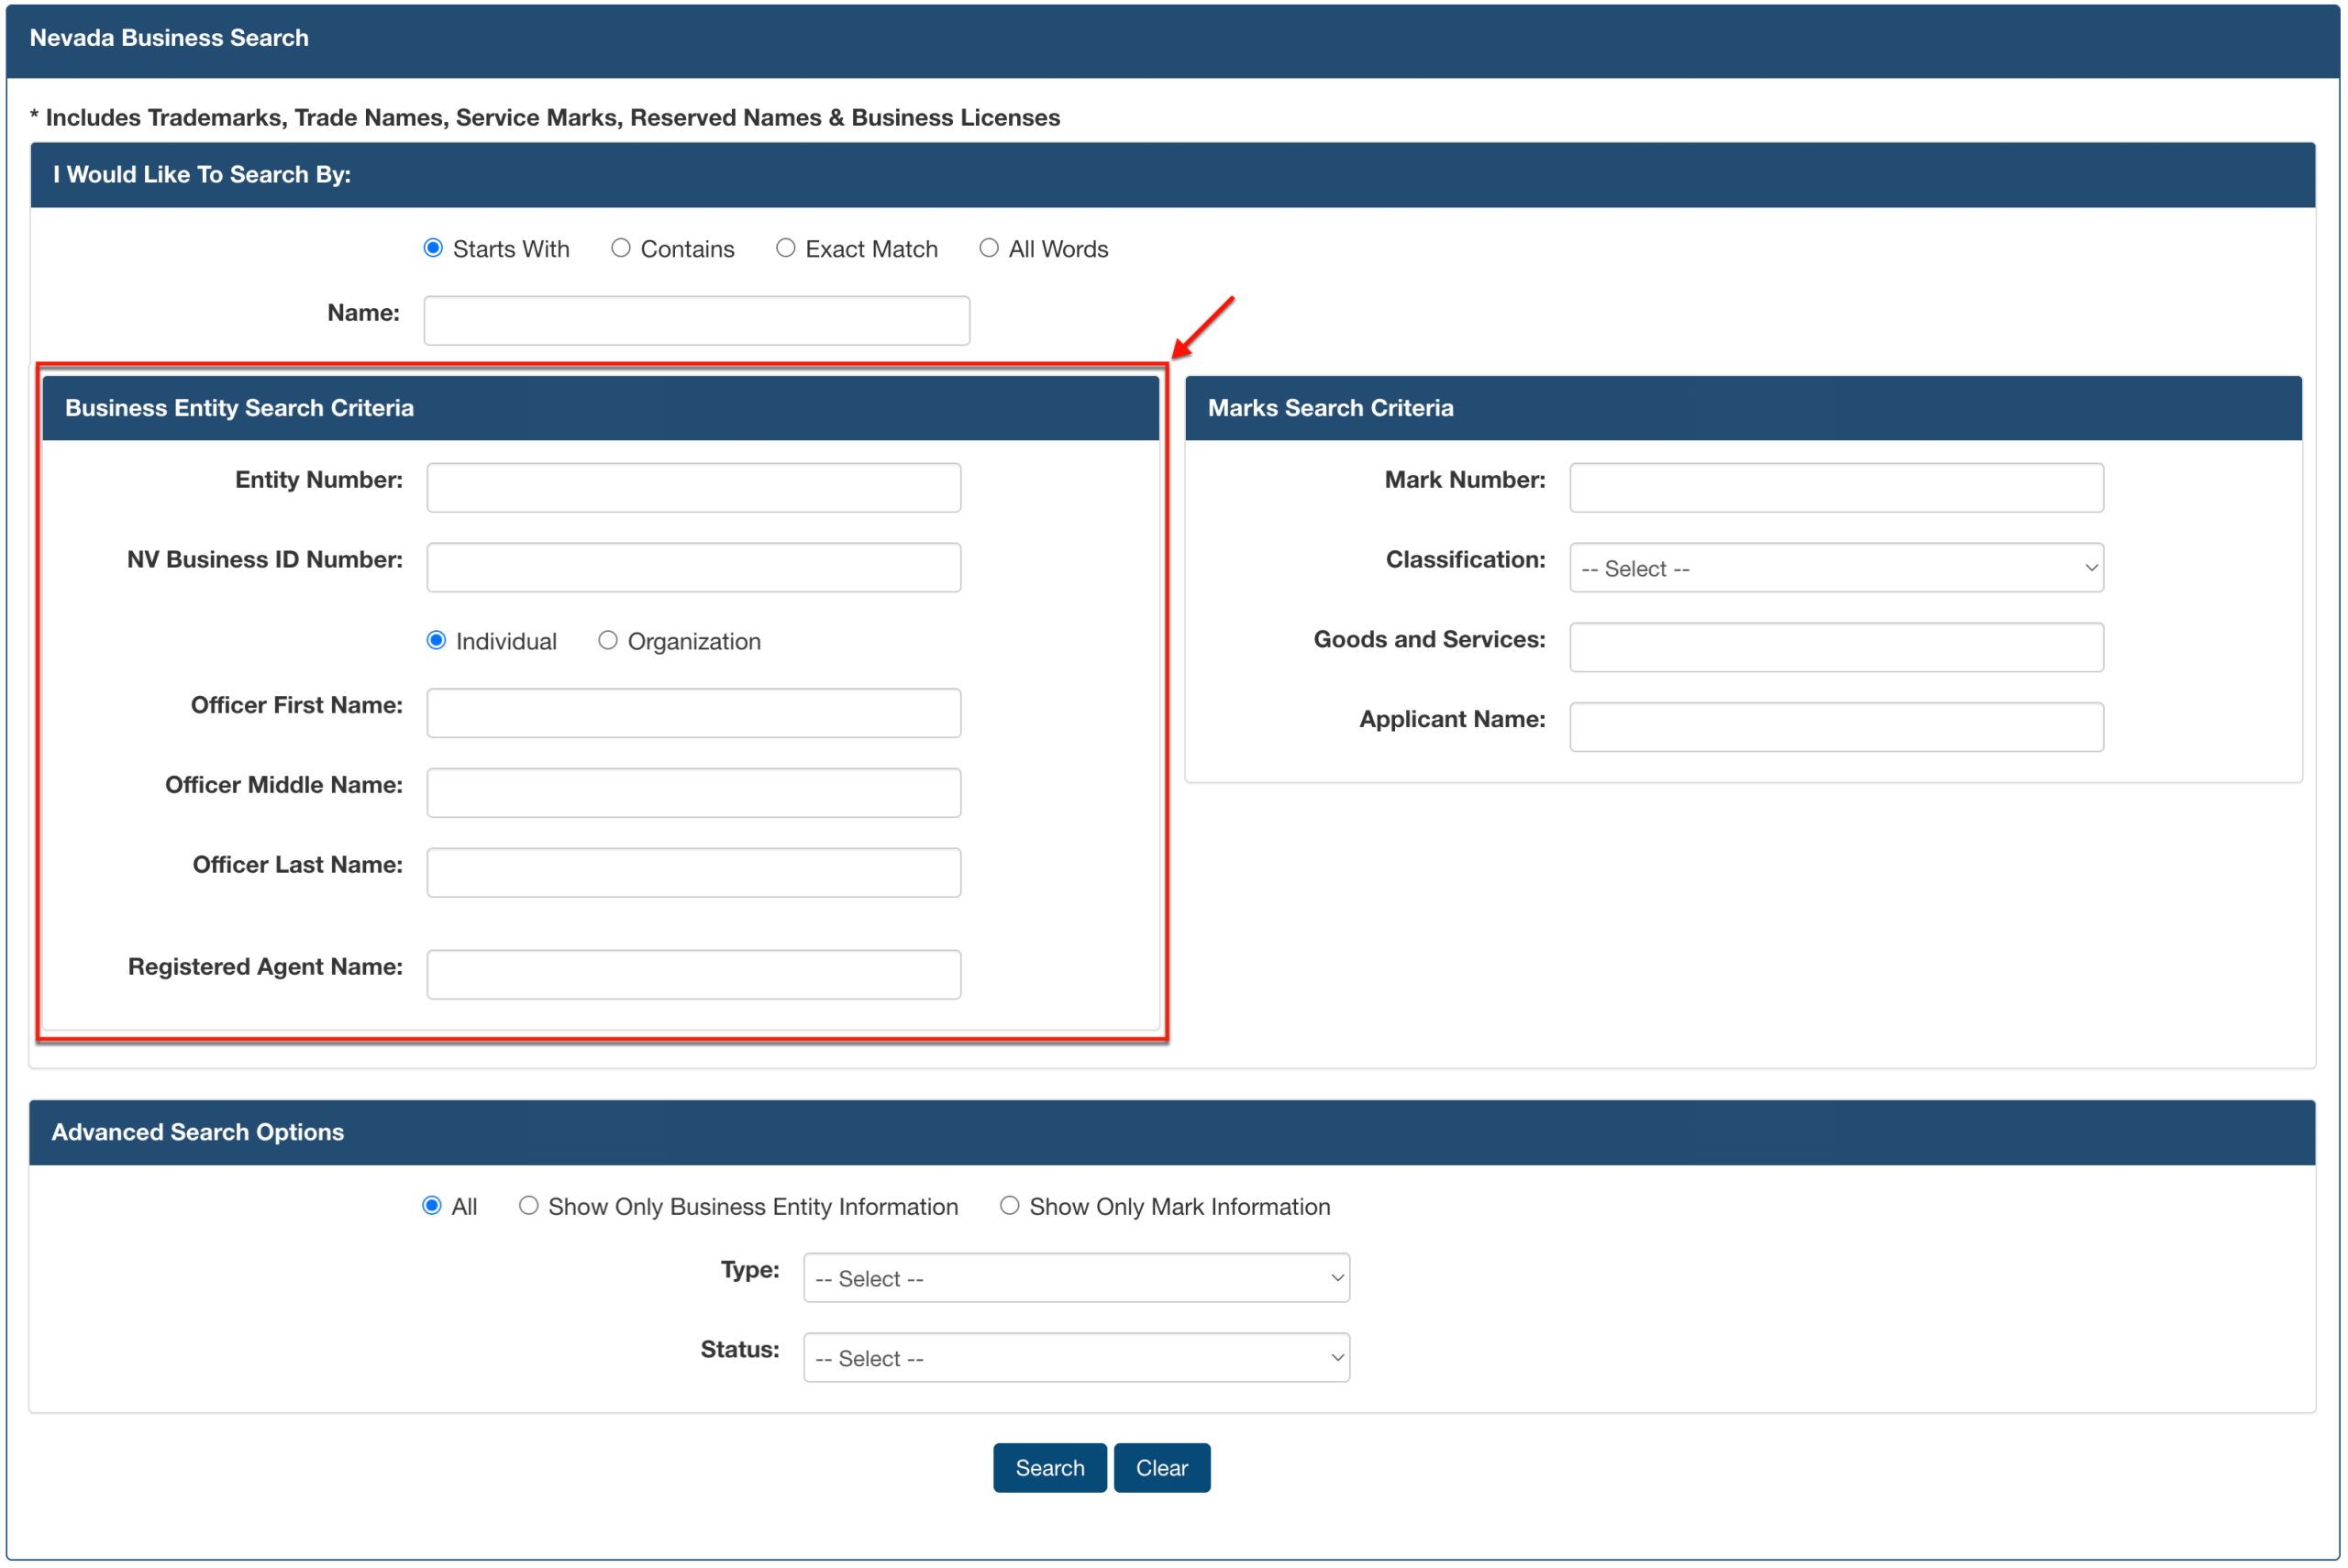
Direct your attention to the “Business Entity Search Criteria.” Here, additional information that narrows the results may be input.
- Entity Number
- NV Business ID Number
- Individual
- Organization
- Registered Agent Name
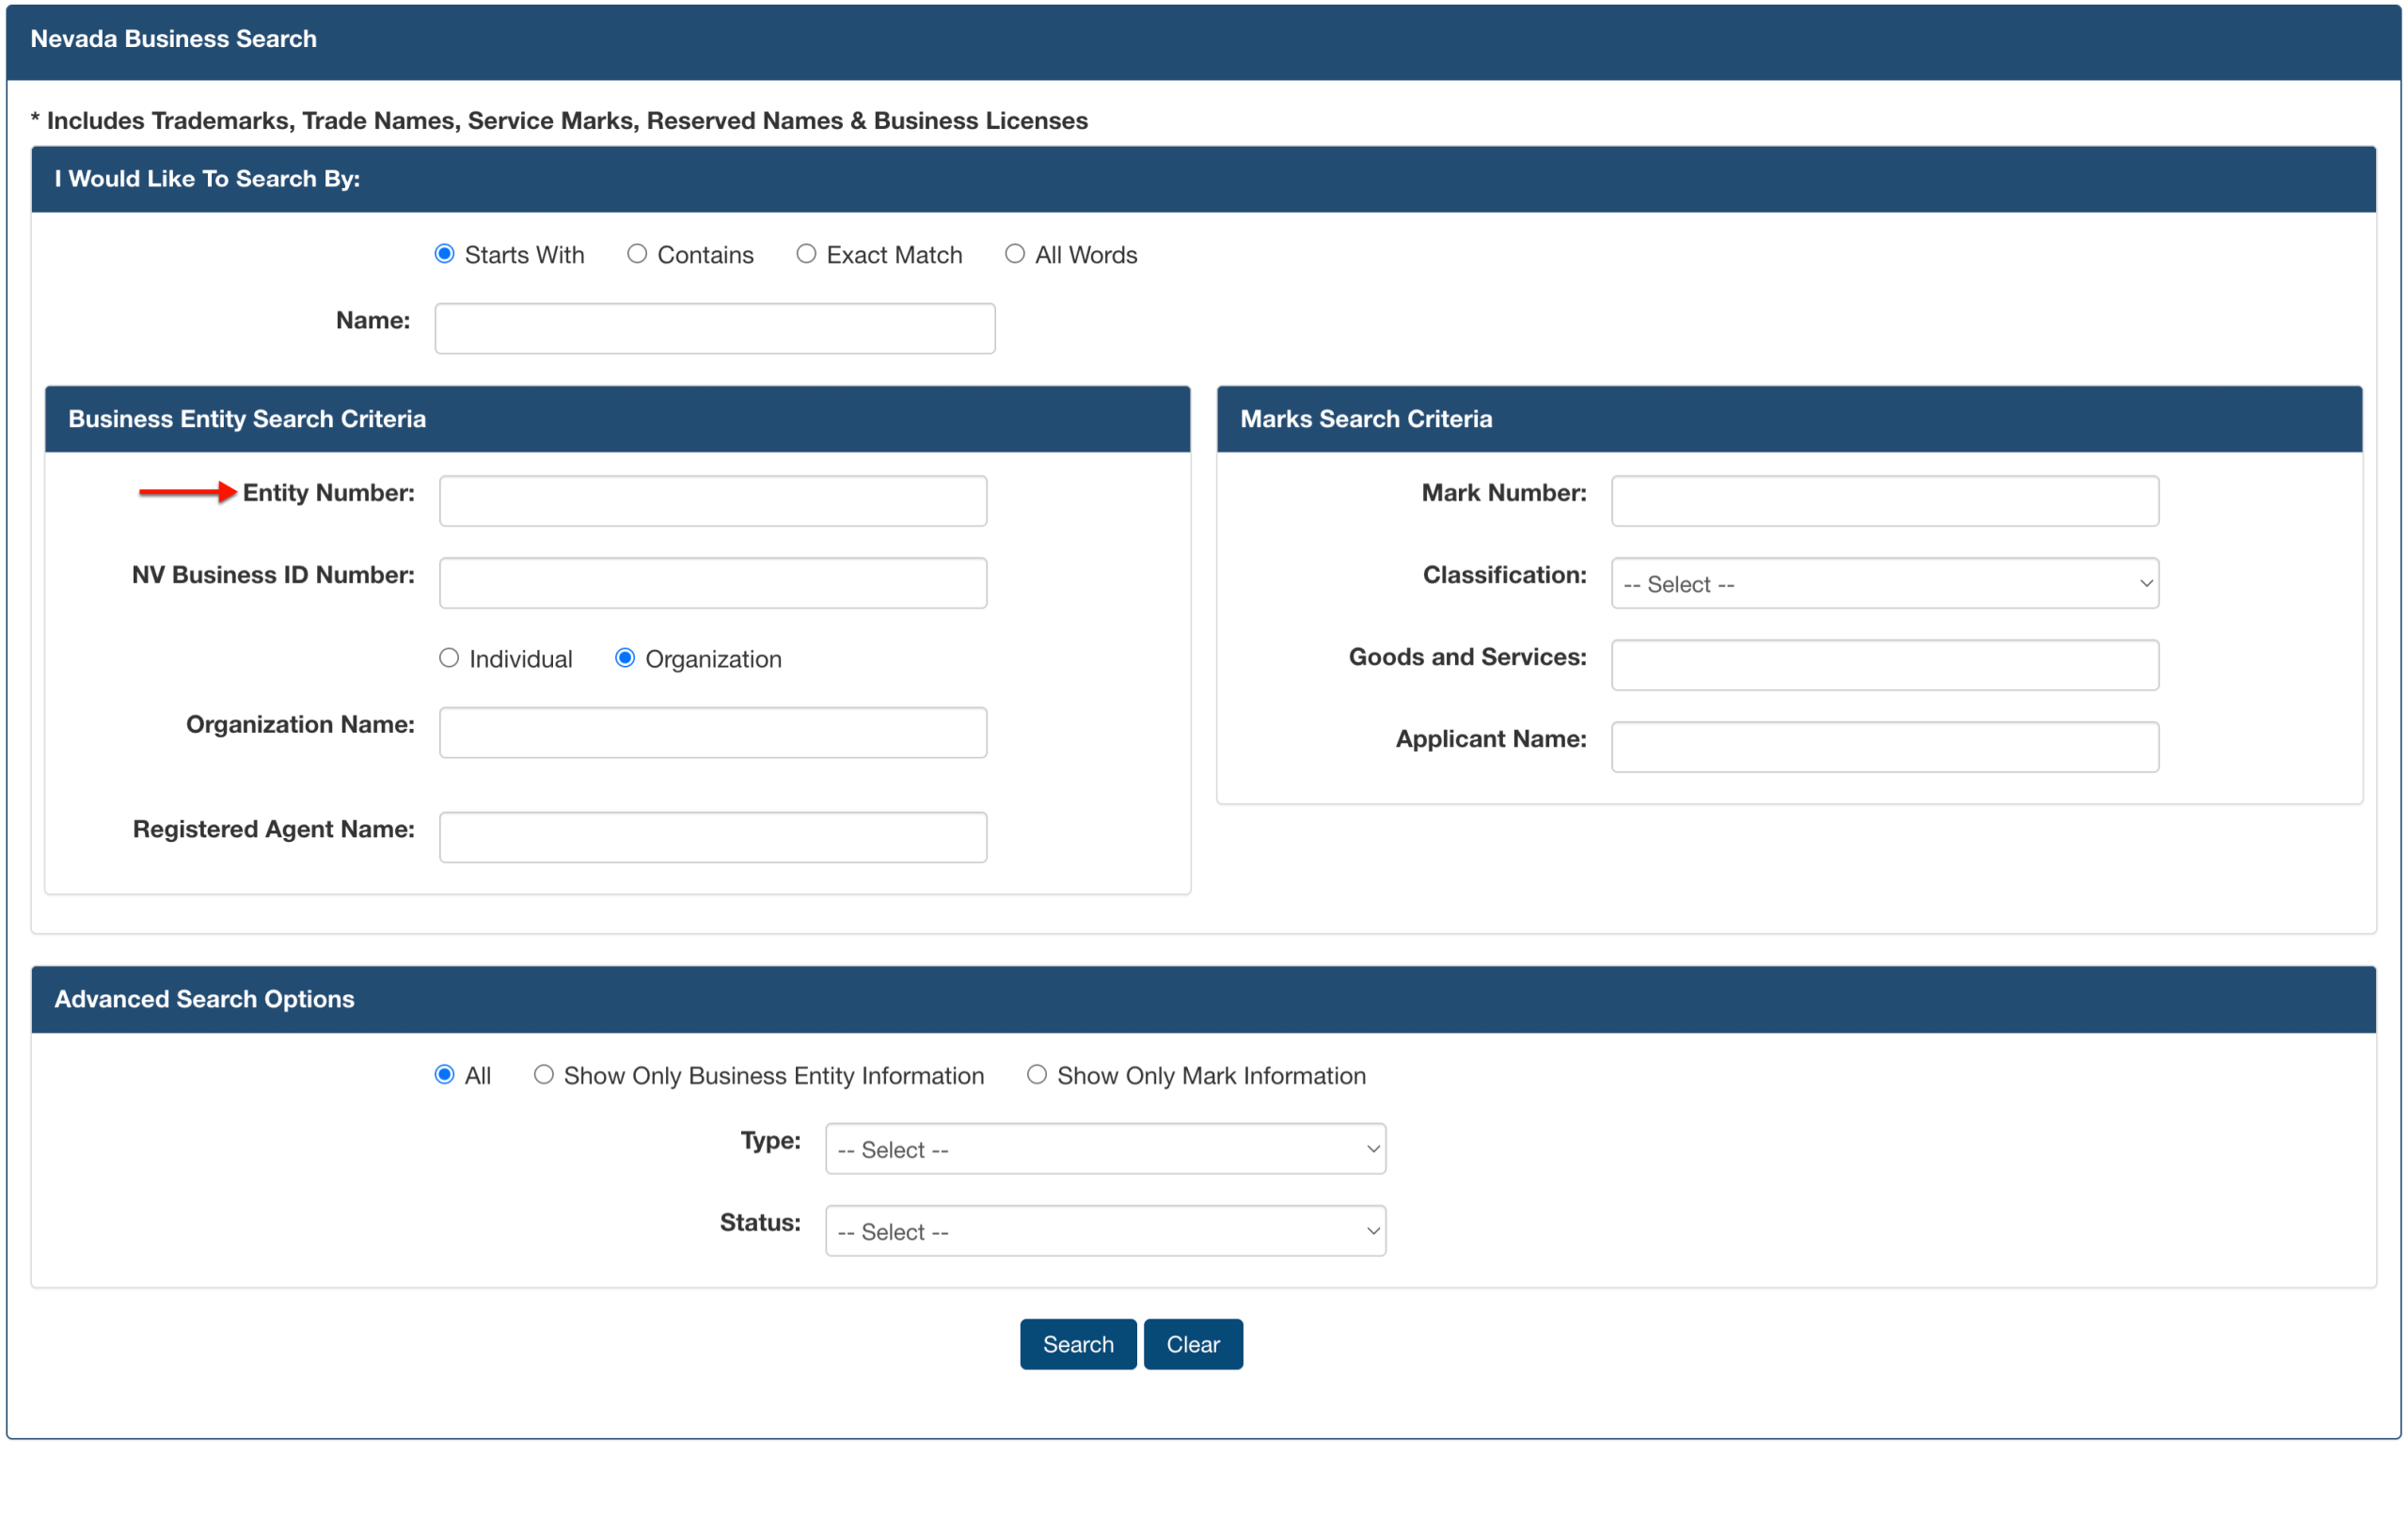
Step 5. Include Federal Information
Produce the entity’s FEIN in “Entity Number.” This may be left blank if unknown
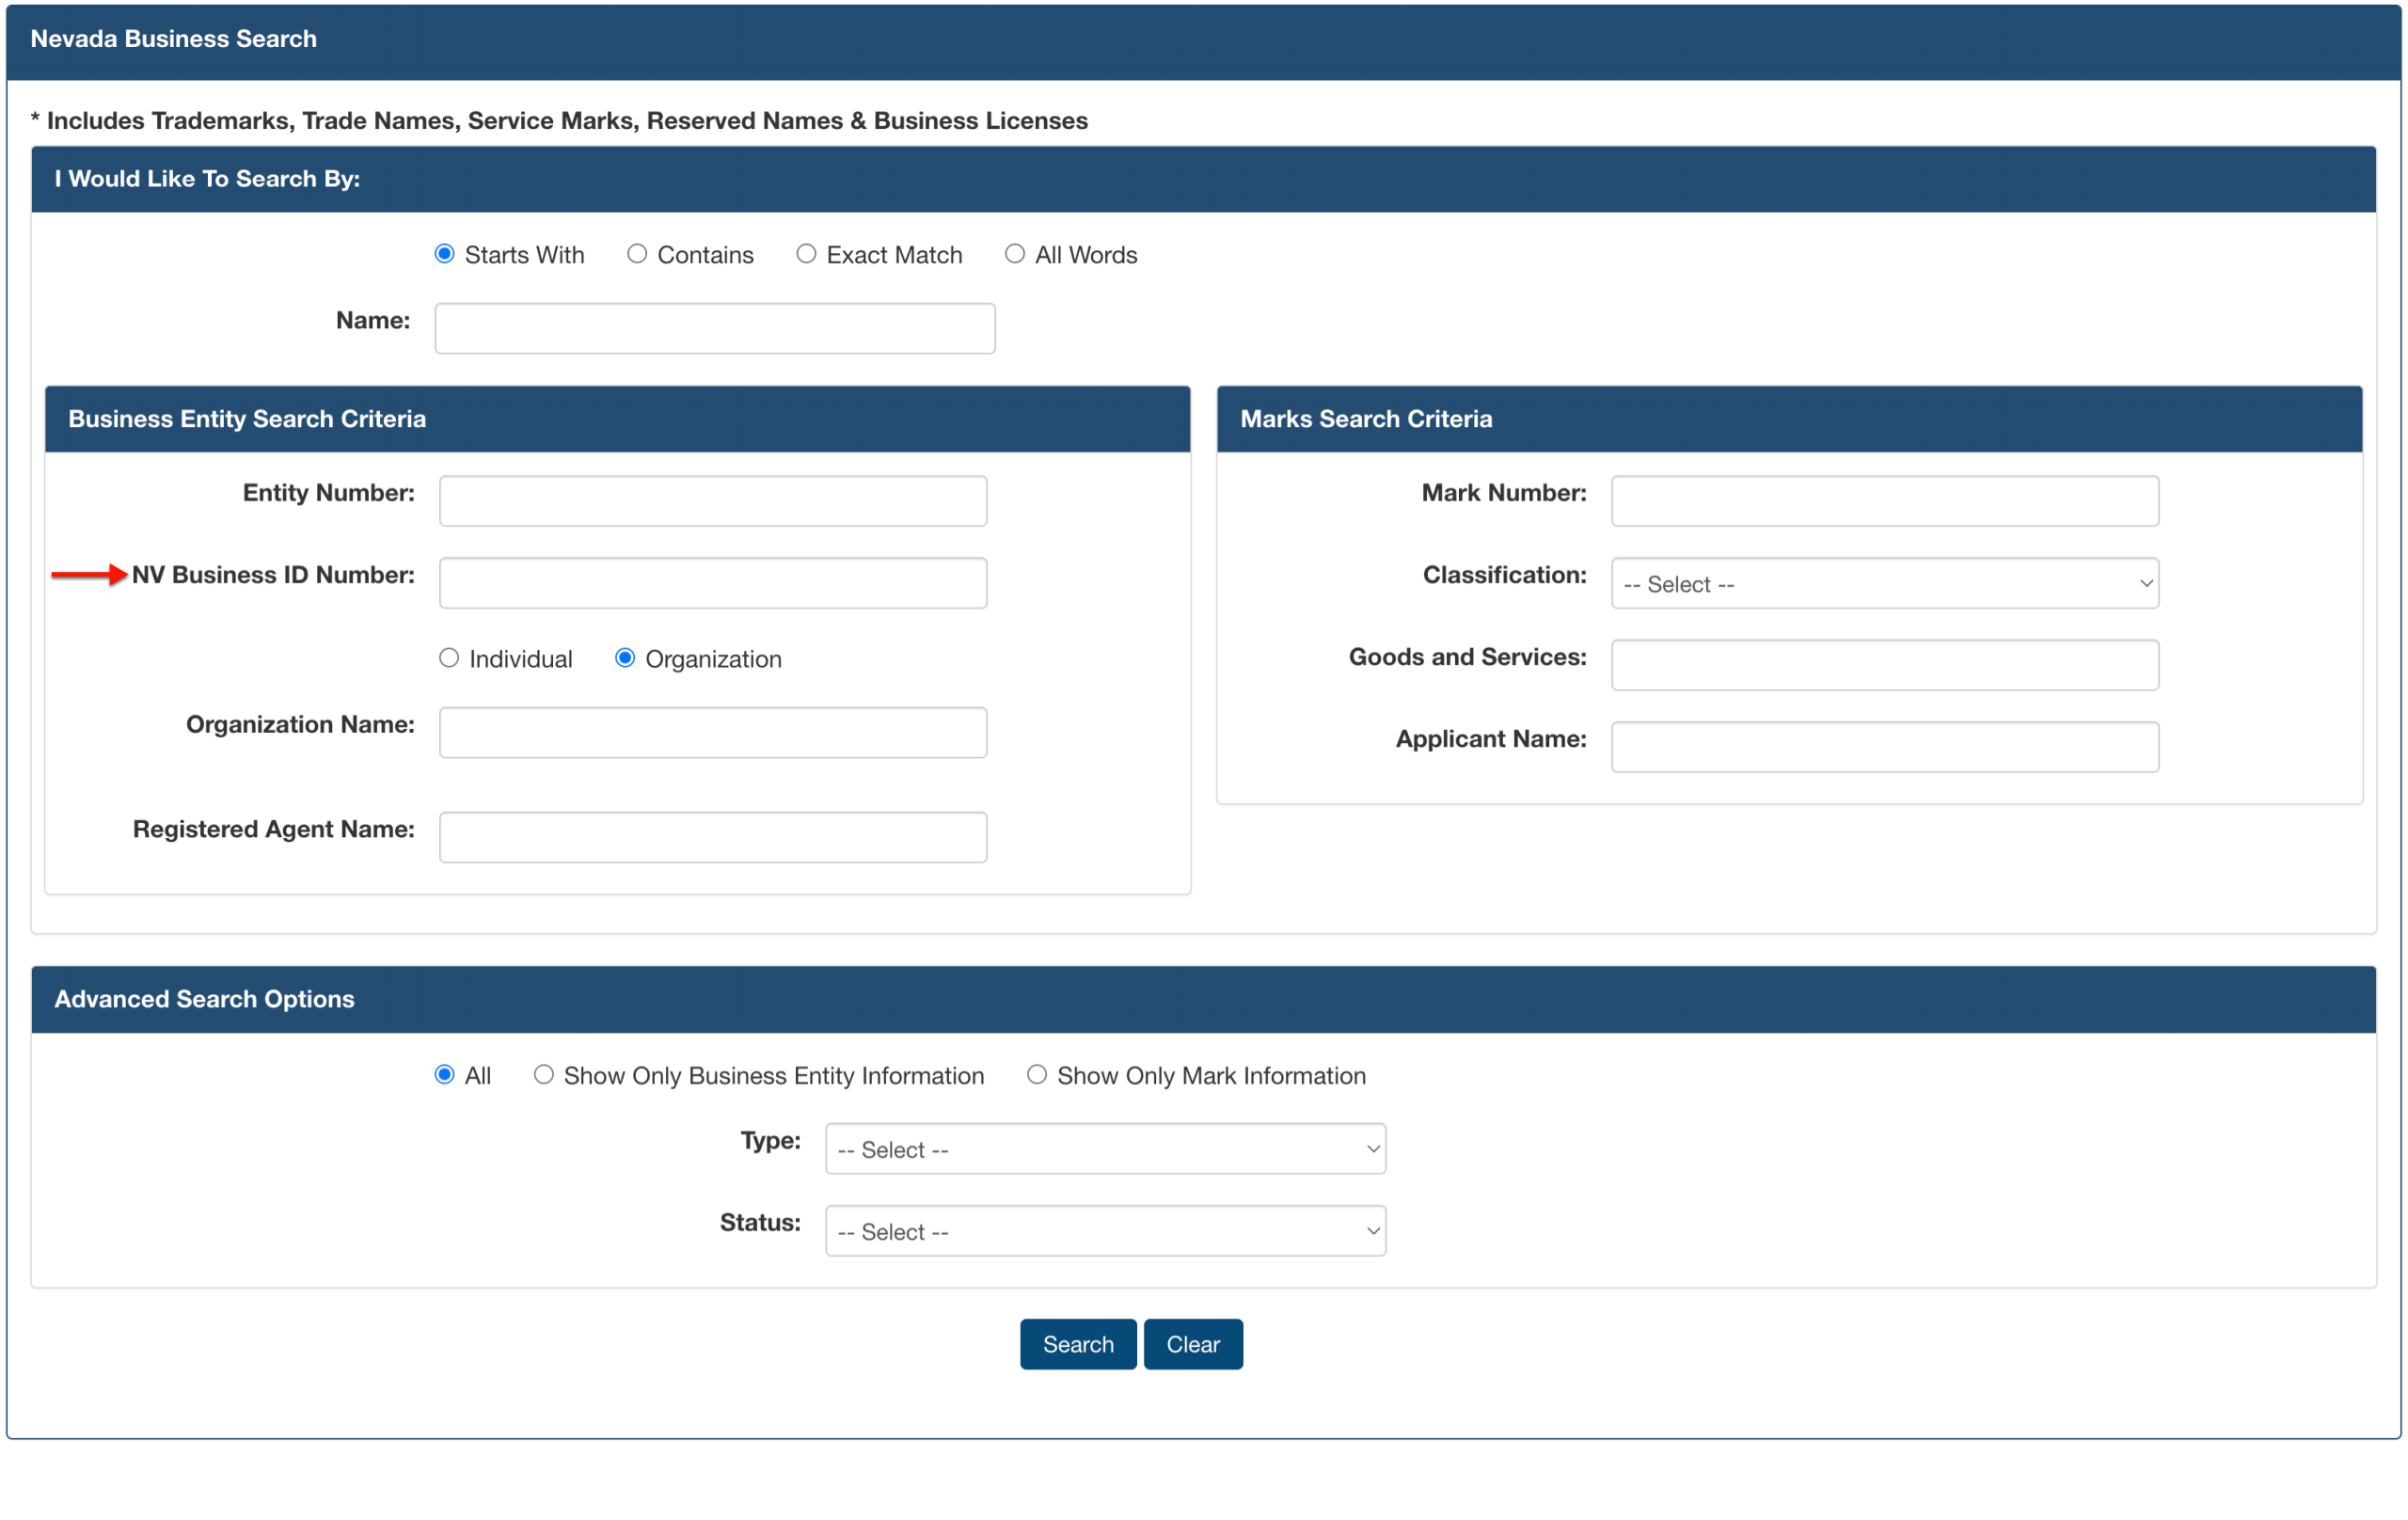
Step 6. Identify the Entity with State Information
Report the Nevada Business ID Number the state assigns to the entity in the second box of this section. If known, this can significantly narrow results.
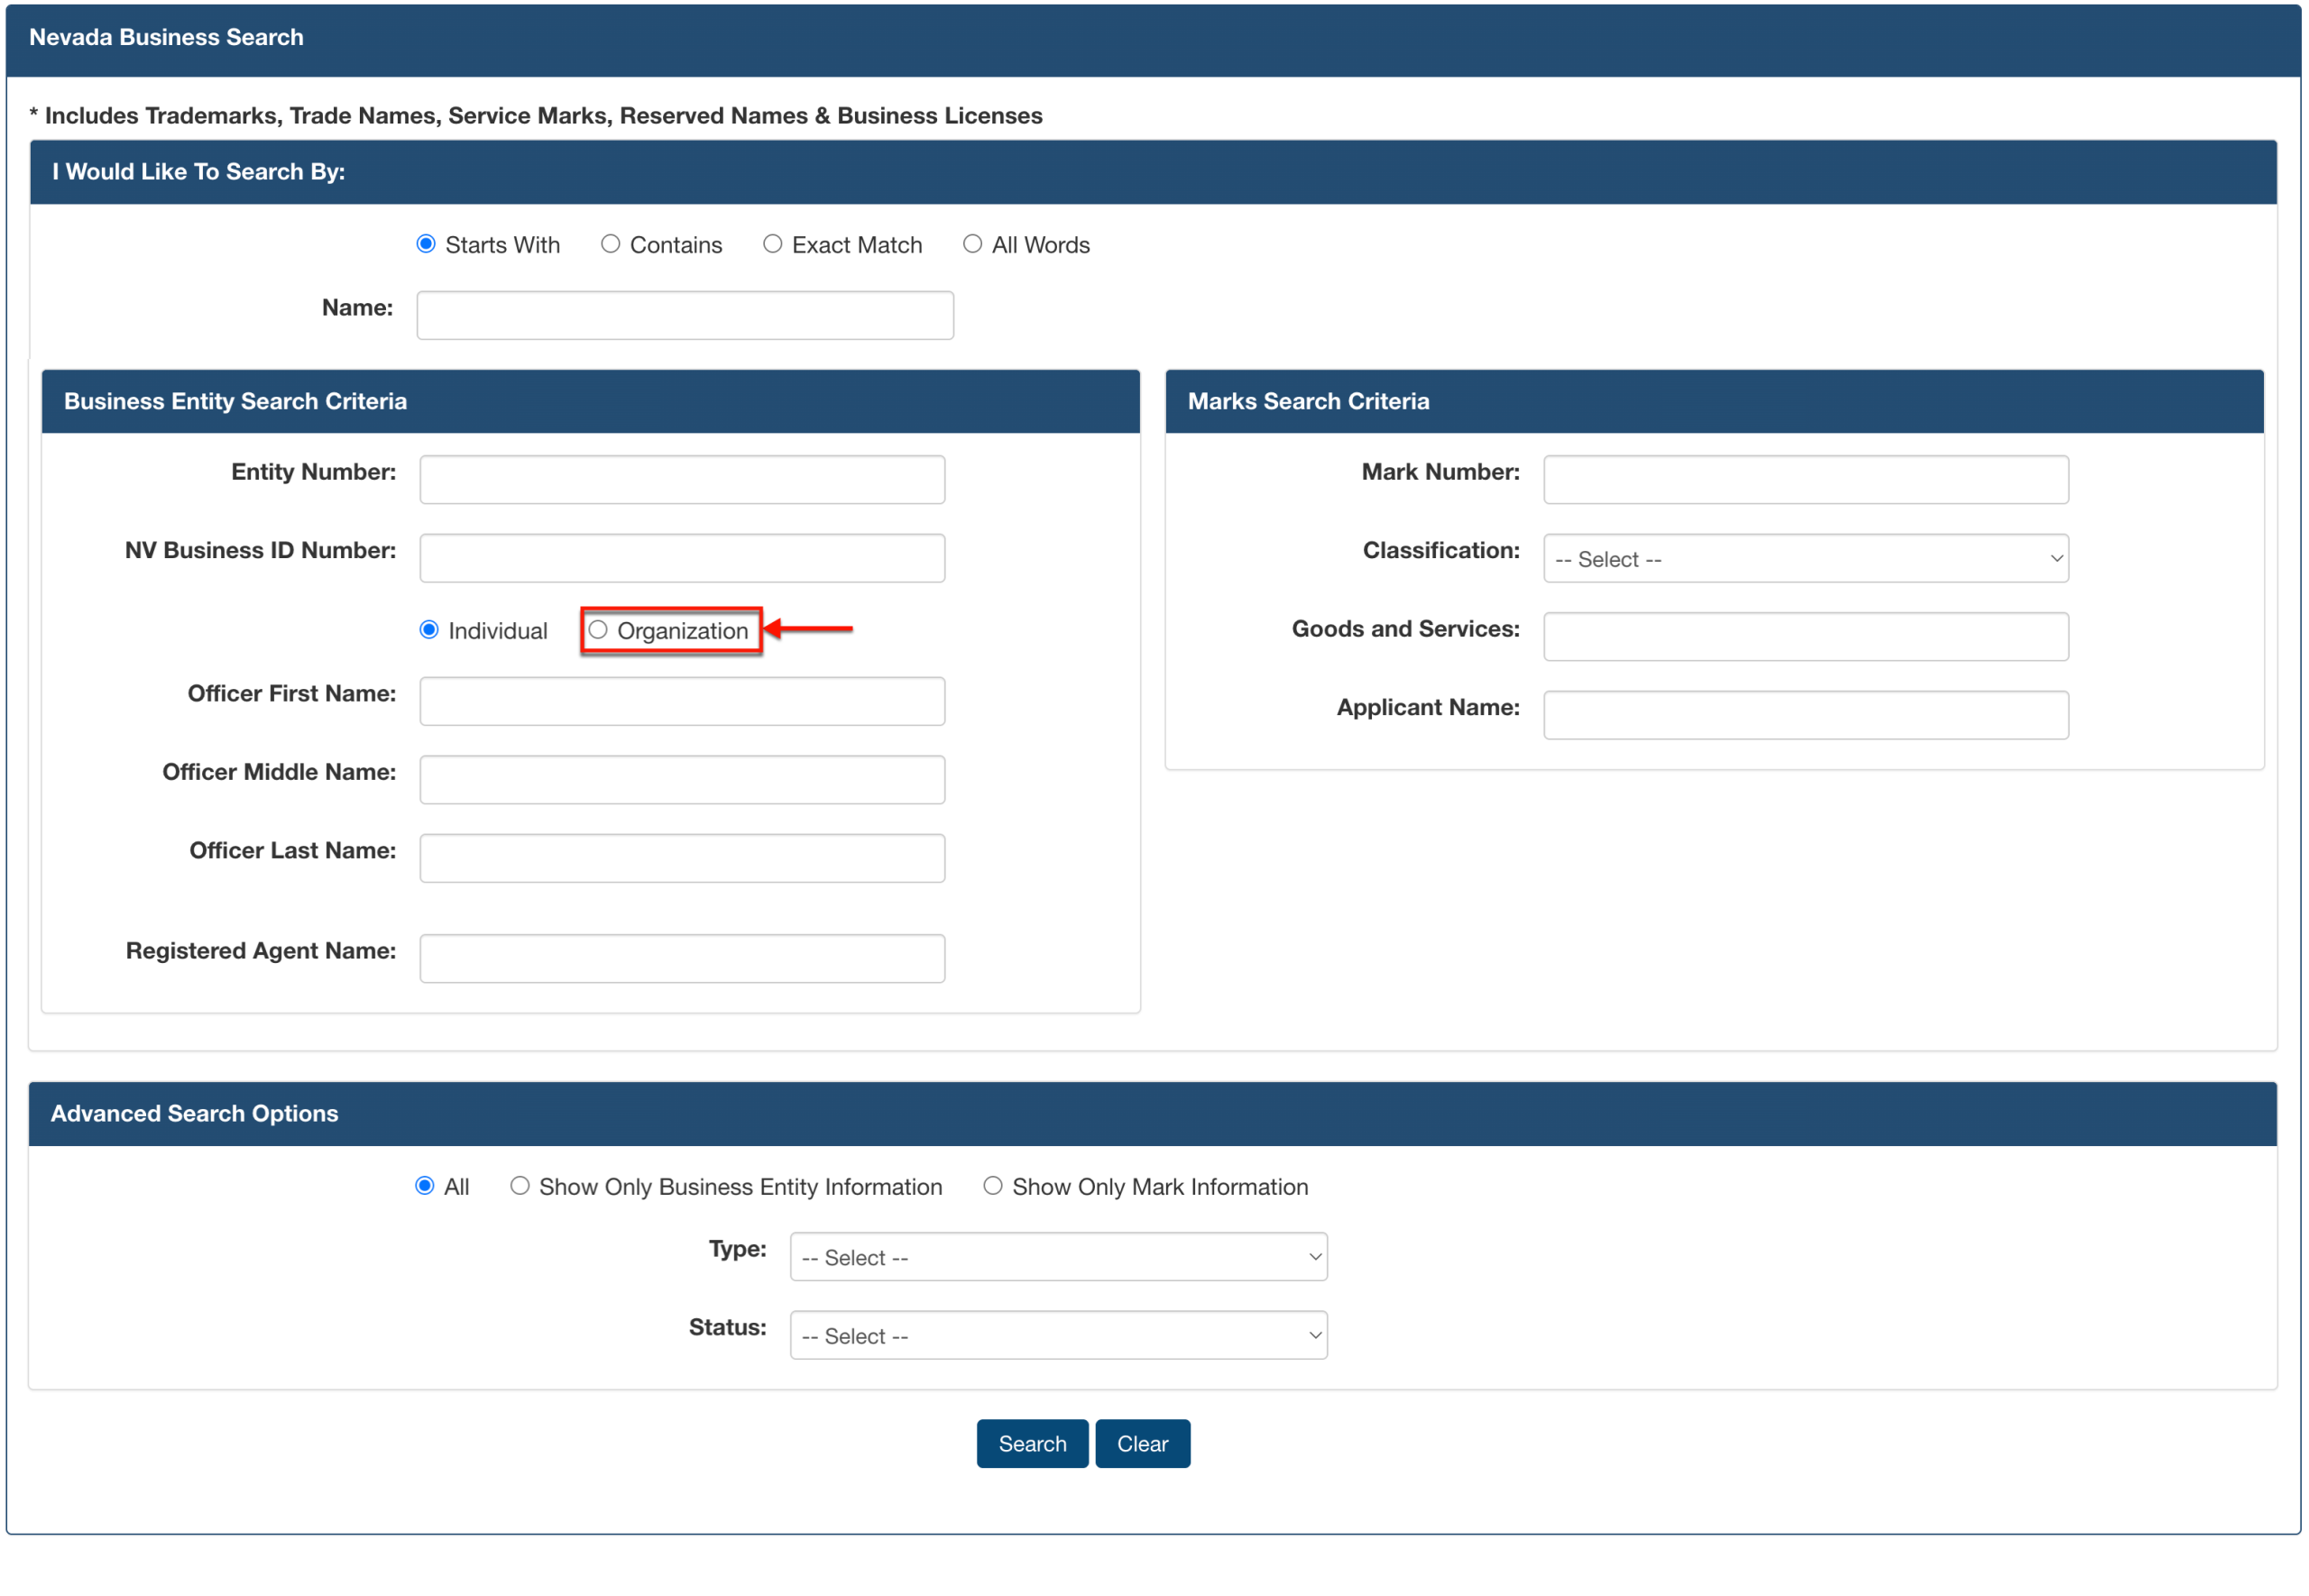
Step 7. Set the Type of Search
Additional criteria may include an Officer or Organization Name. For our purpose, select “Organization.”
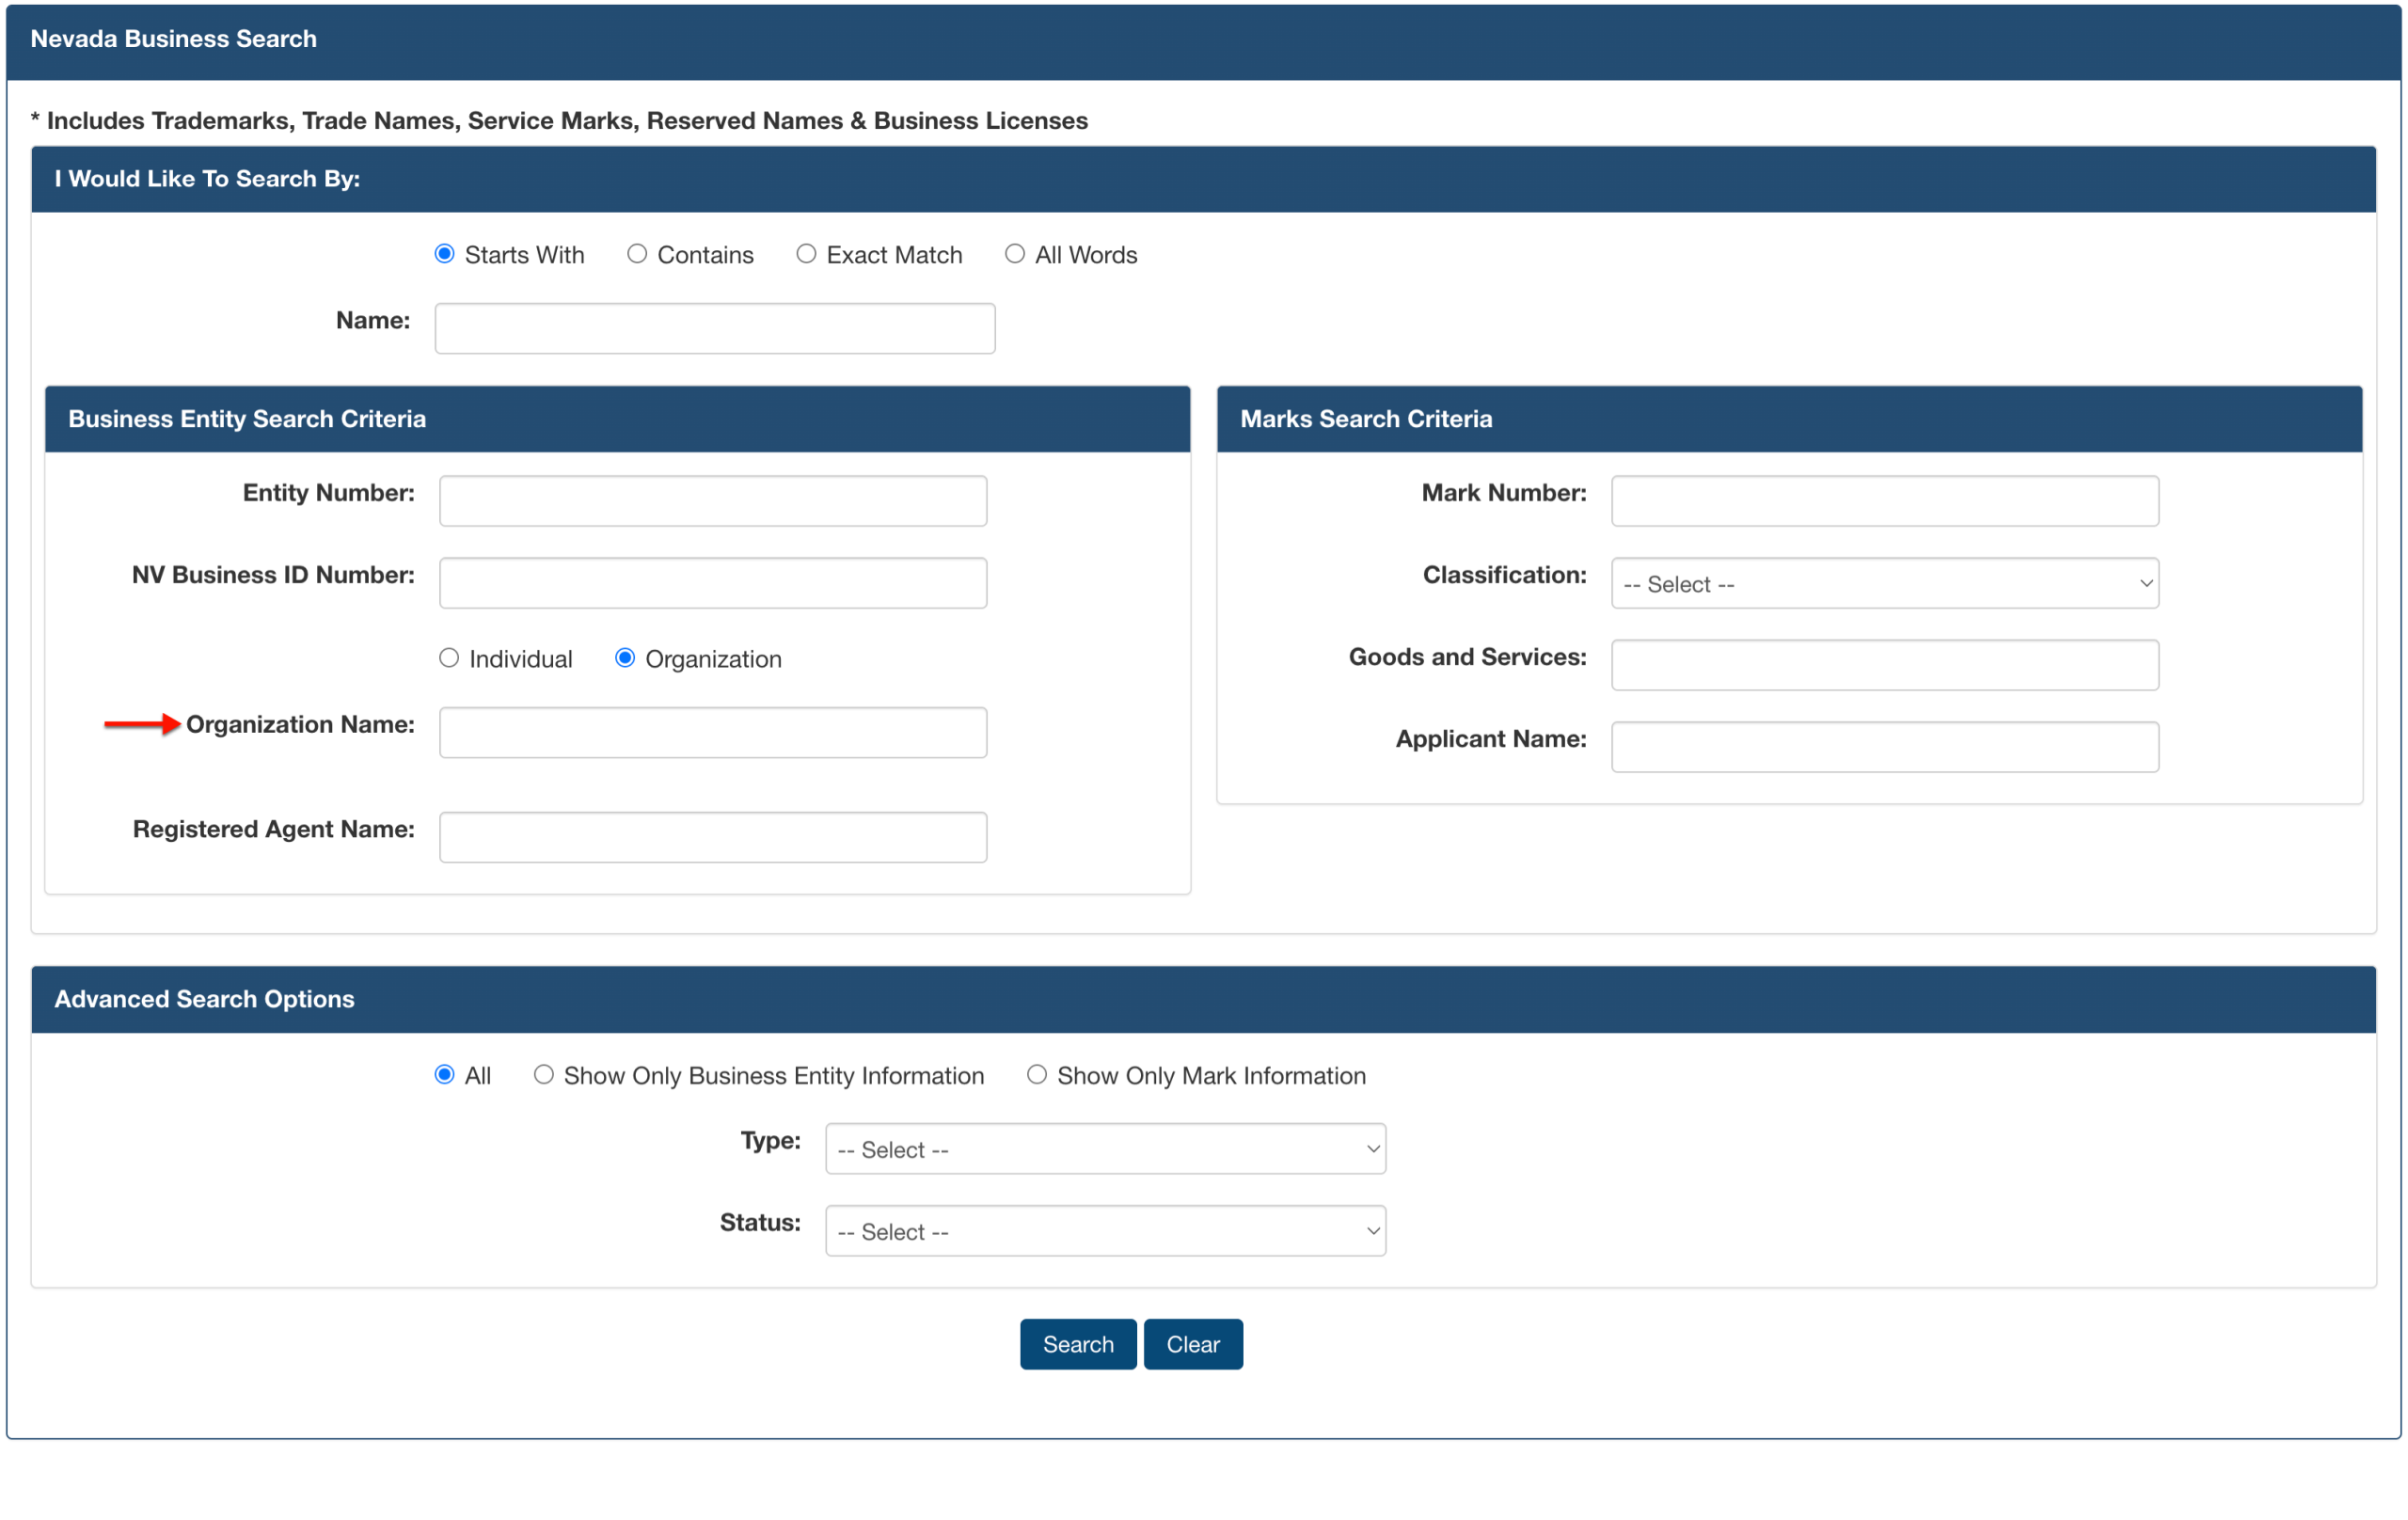
Step 8. Report Additional Criteria
A new box appears upon selecting “Organization.” Use the first box in this new area to report the entity’s “Organization Name” (e.g., a foreign entity’s original name).
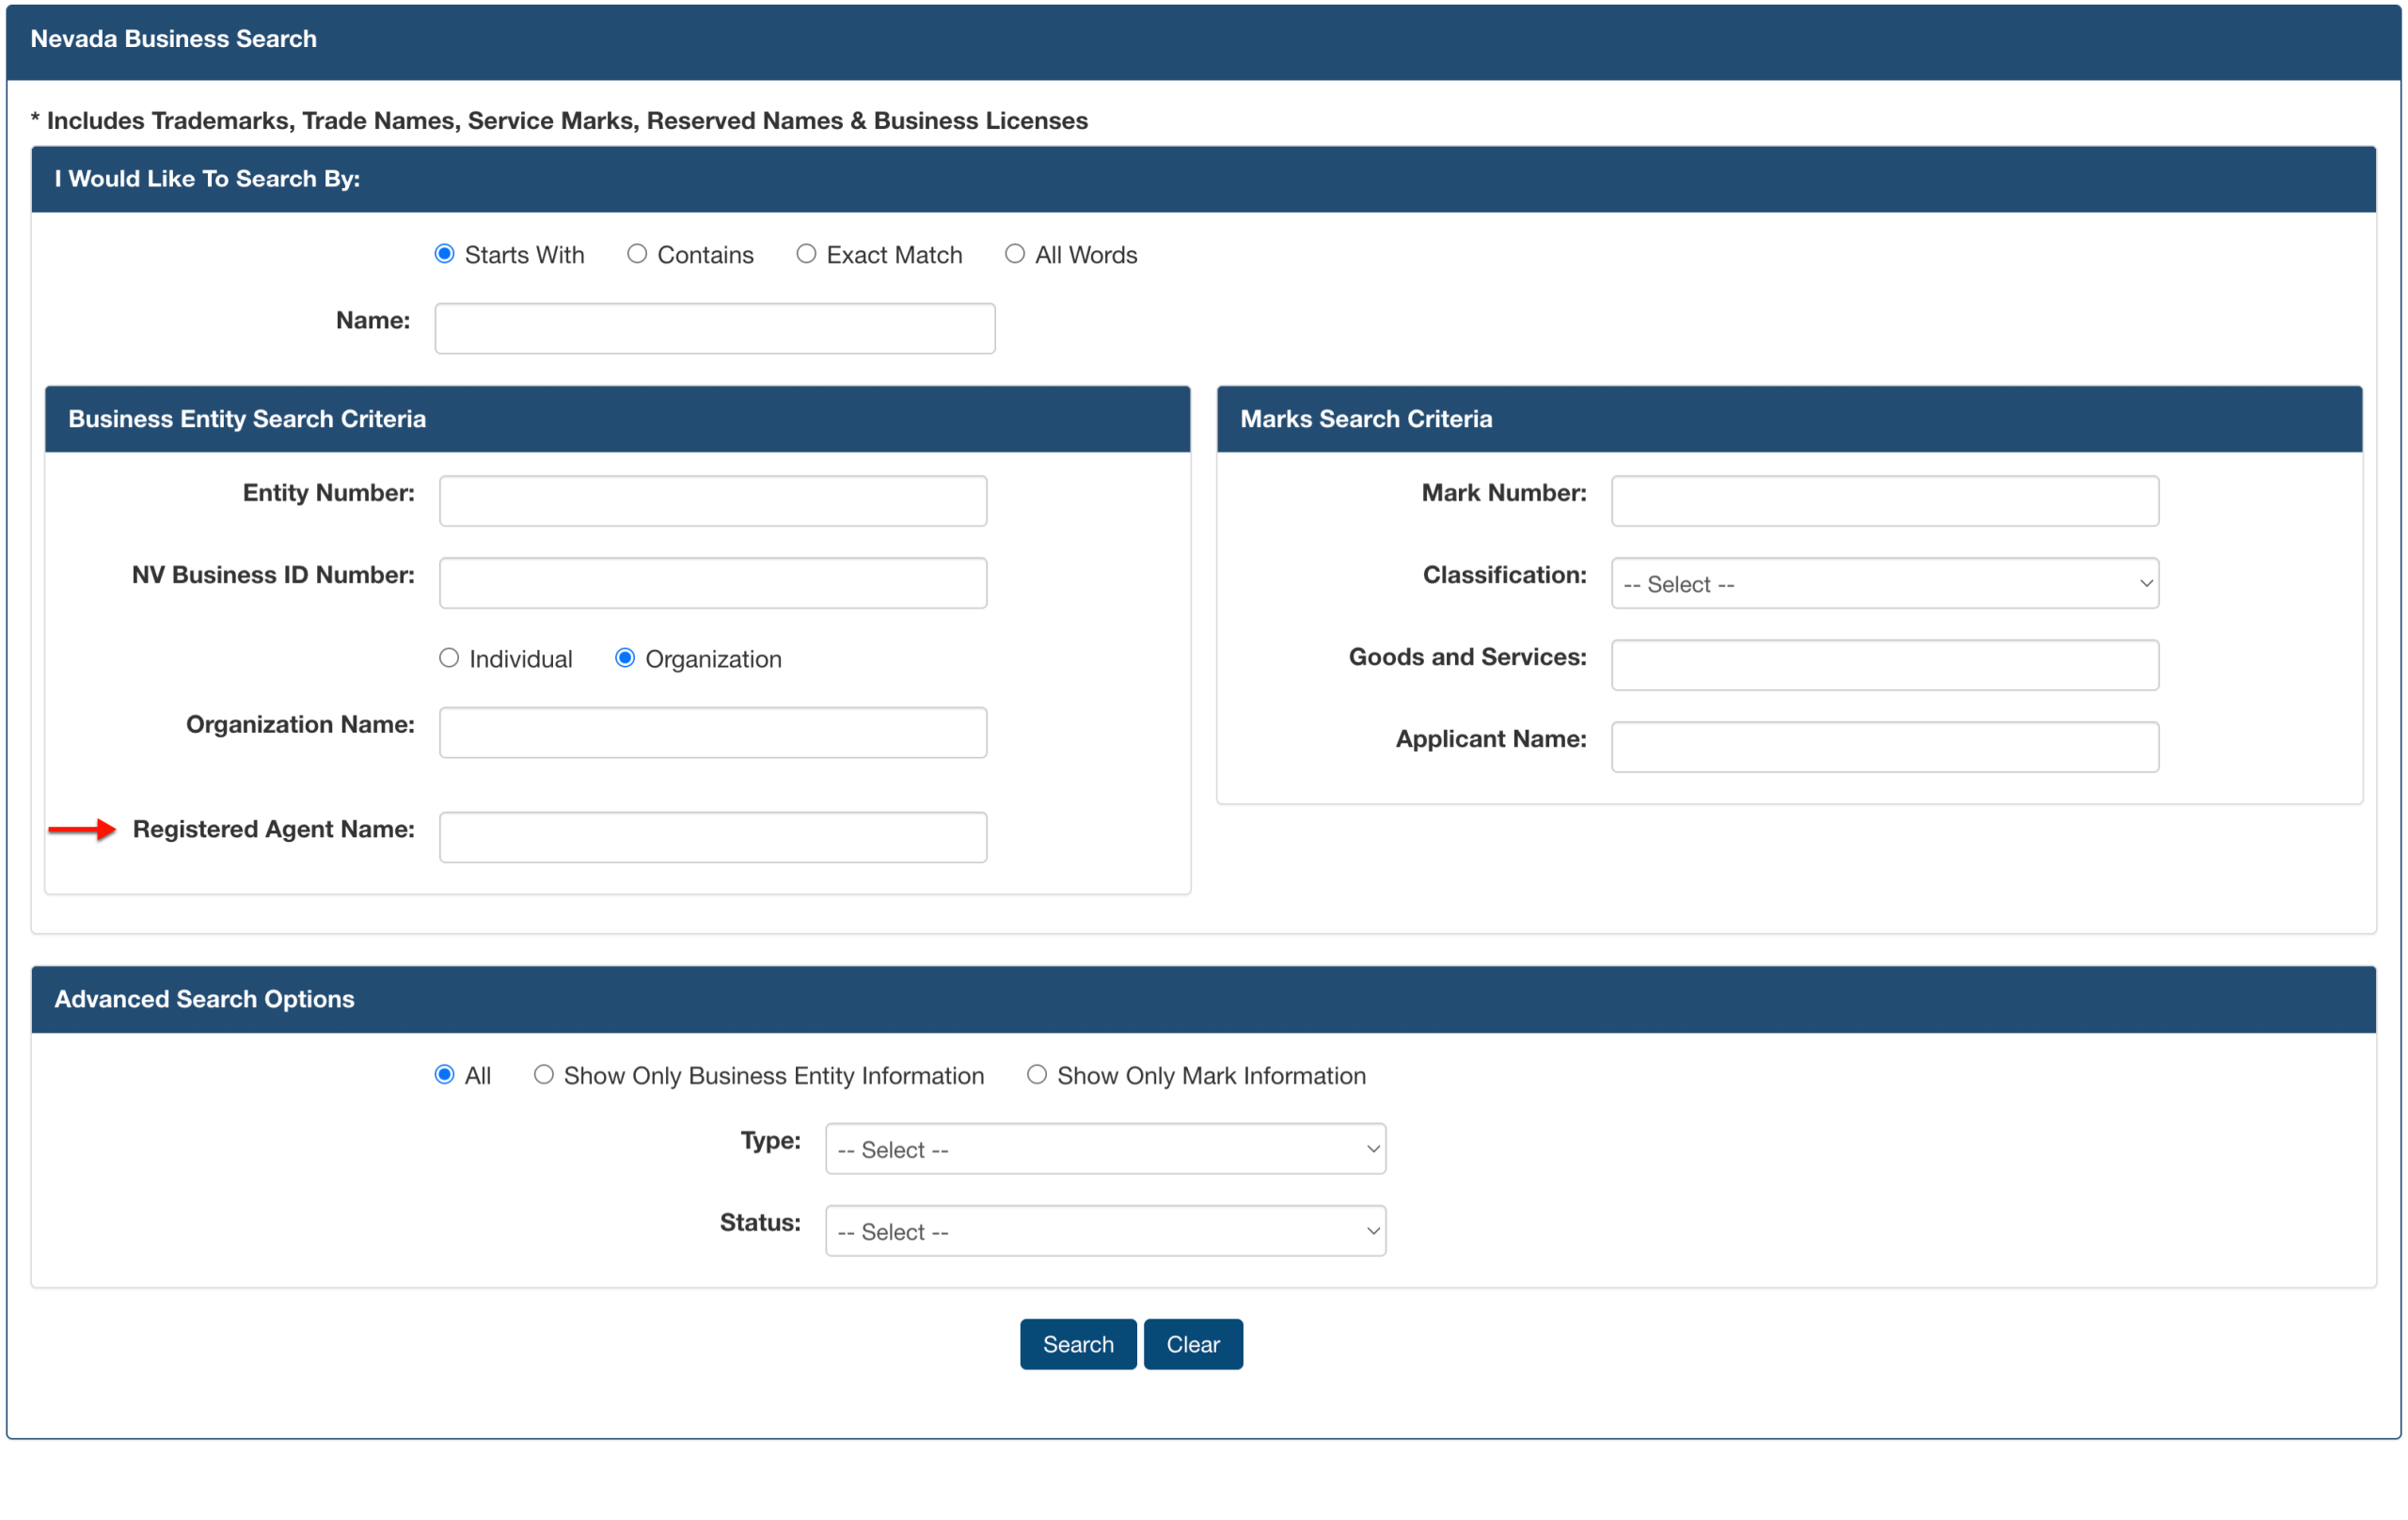
Step 9. Use Registered Agent Name
If the name of the registered agent is known, then use their name to focus the query. Report the full name of the registered agent where requested.
Step 10. Trademarks Search Option
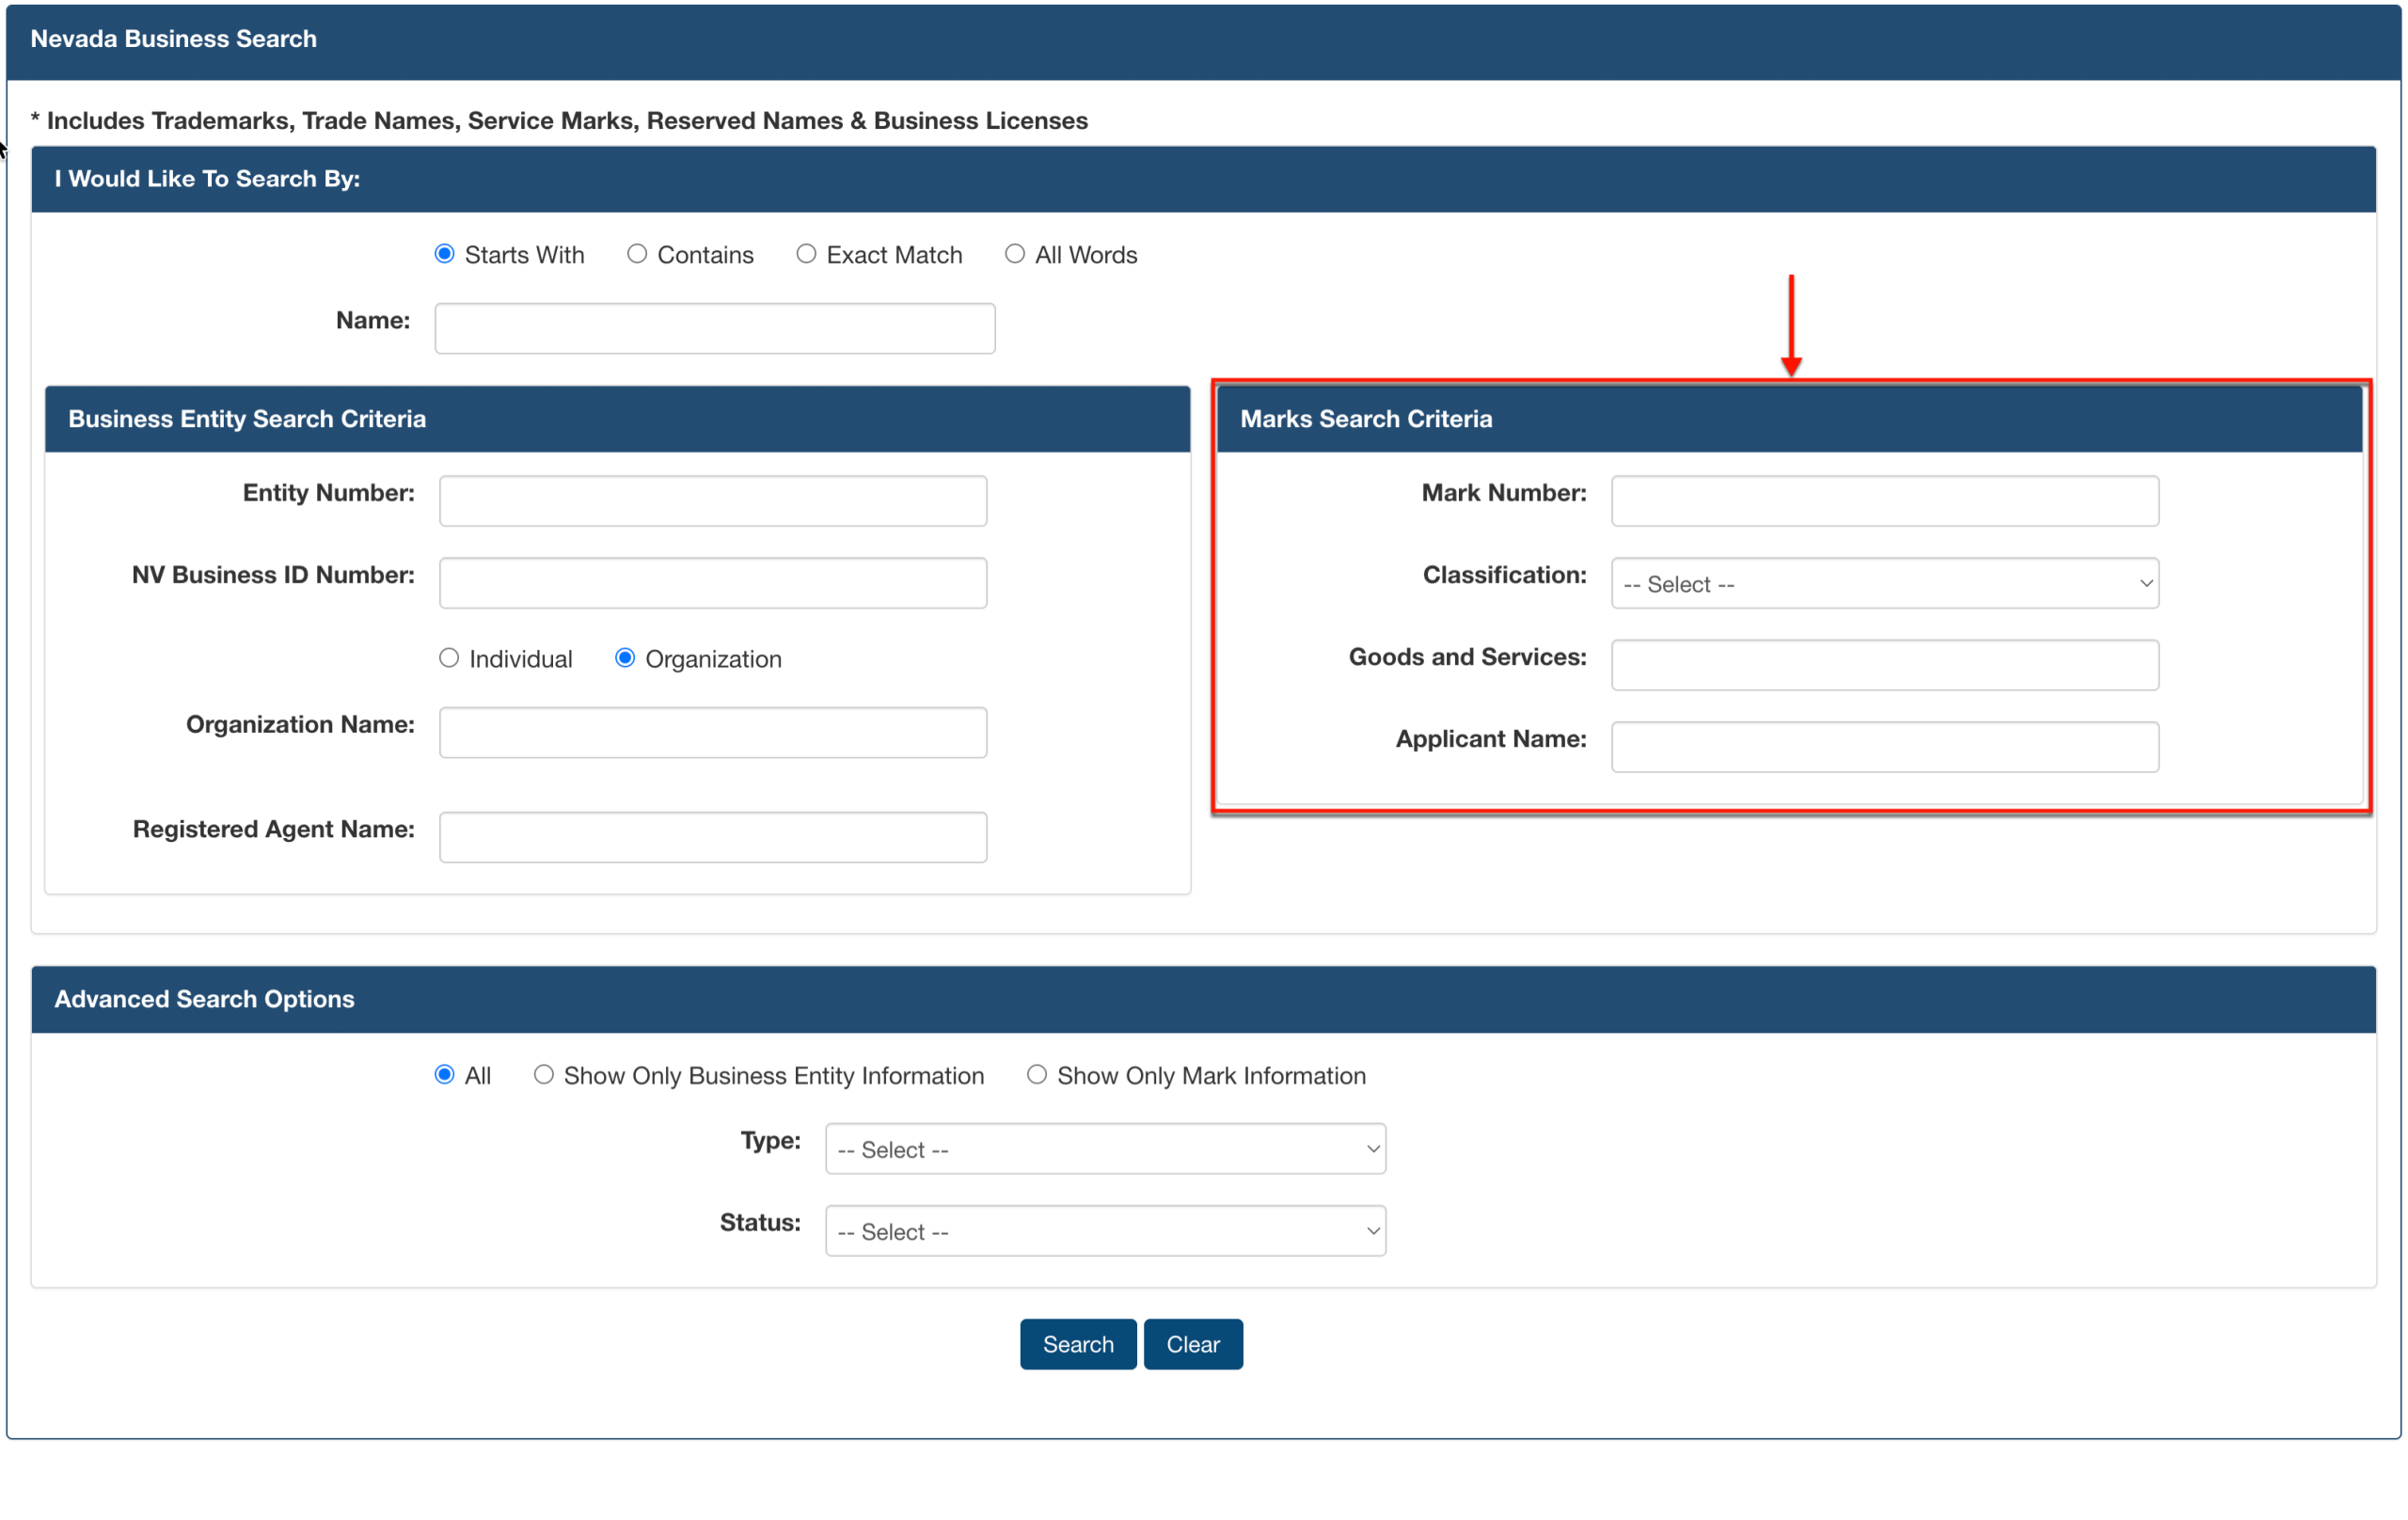
Since trademarks have clear owners, the “Marks Search Criteria” can also narrow the query results. Review the optional criteria options.
- Mark Number
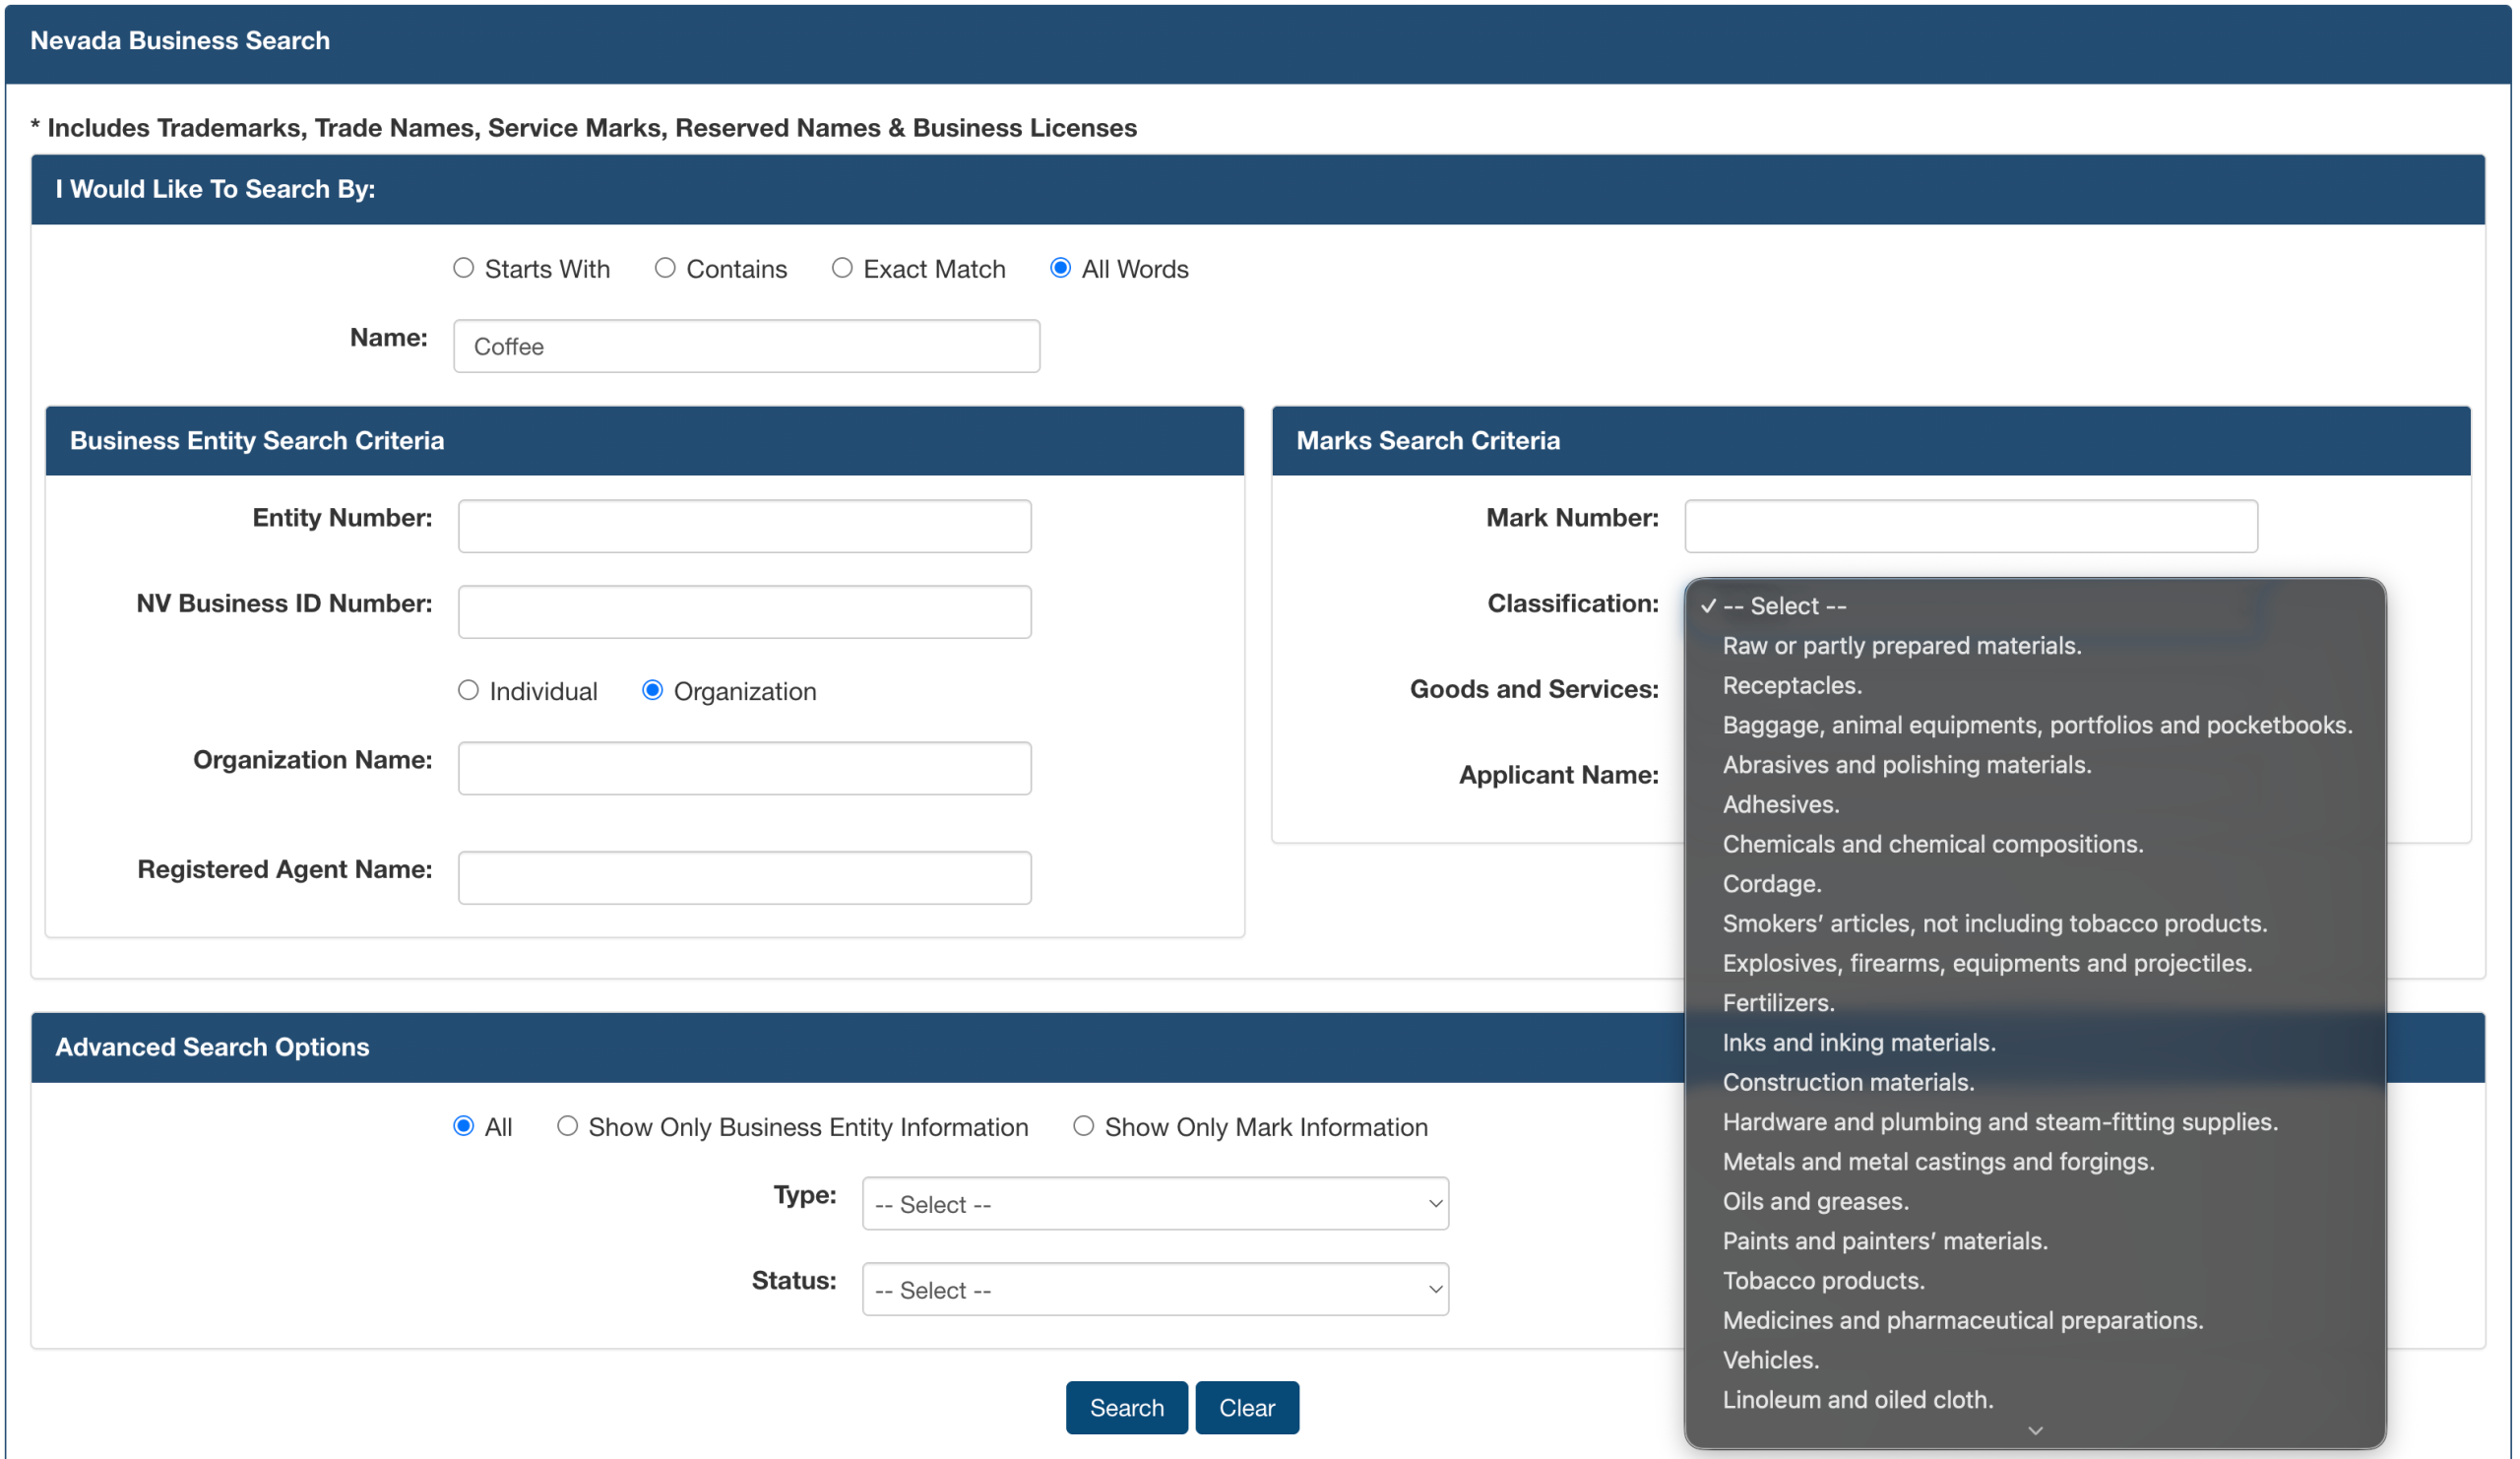
- Classification
- Goods and Services
- Applicant Name
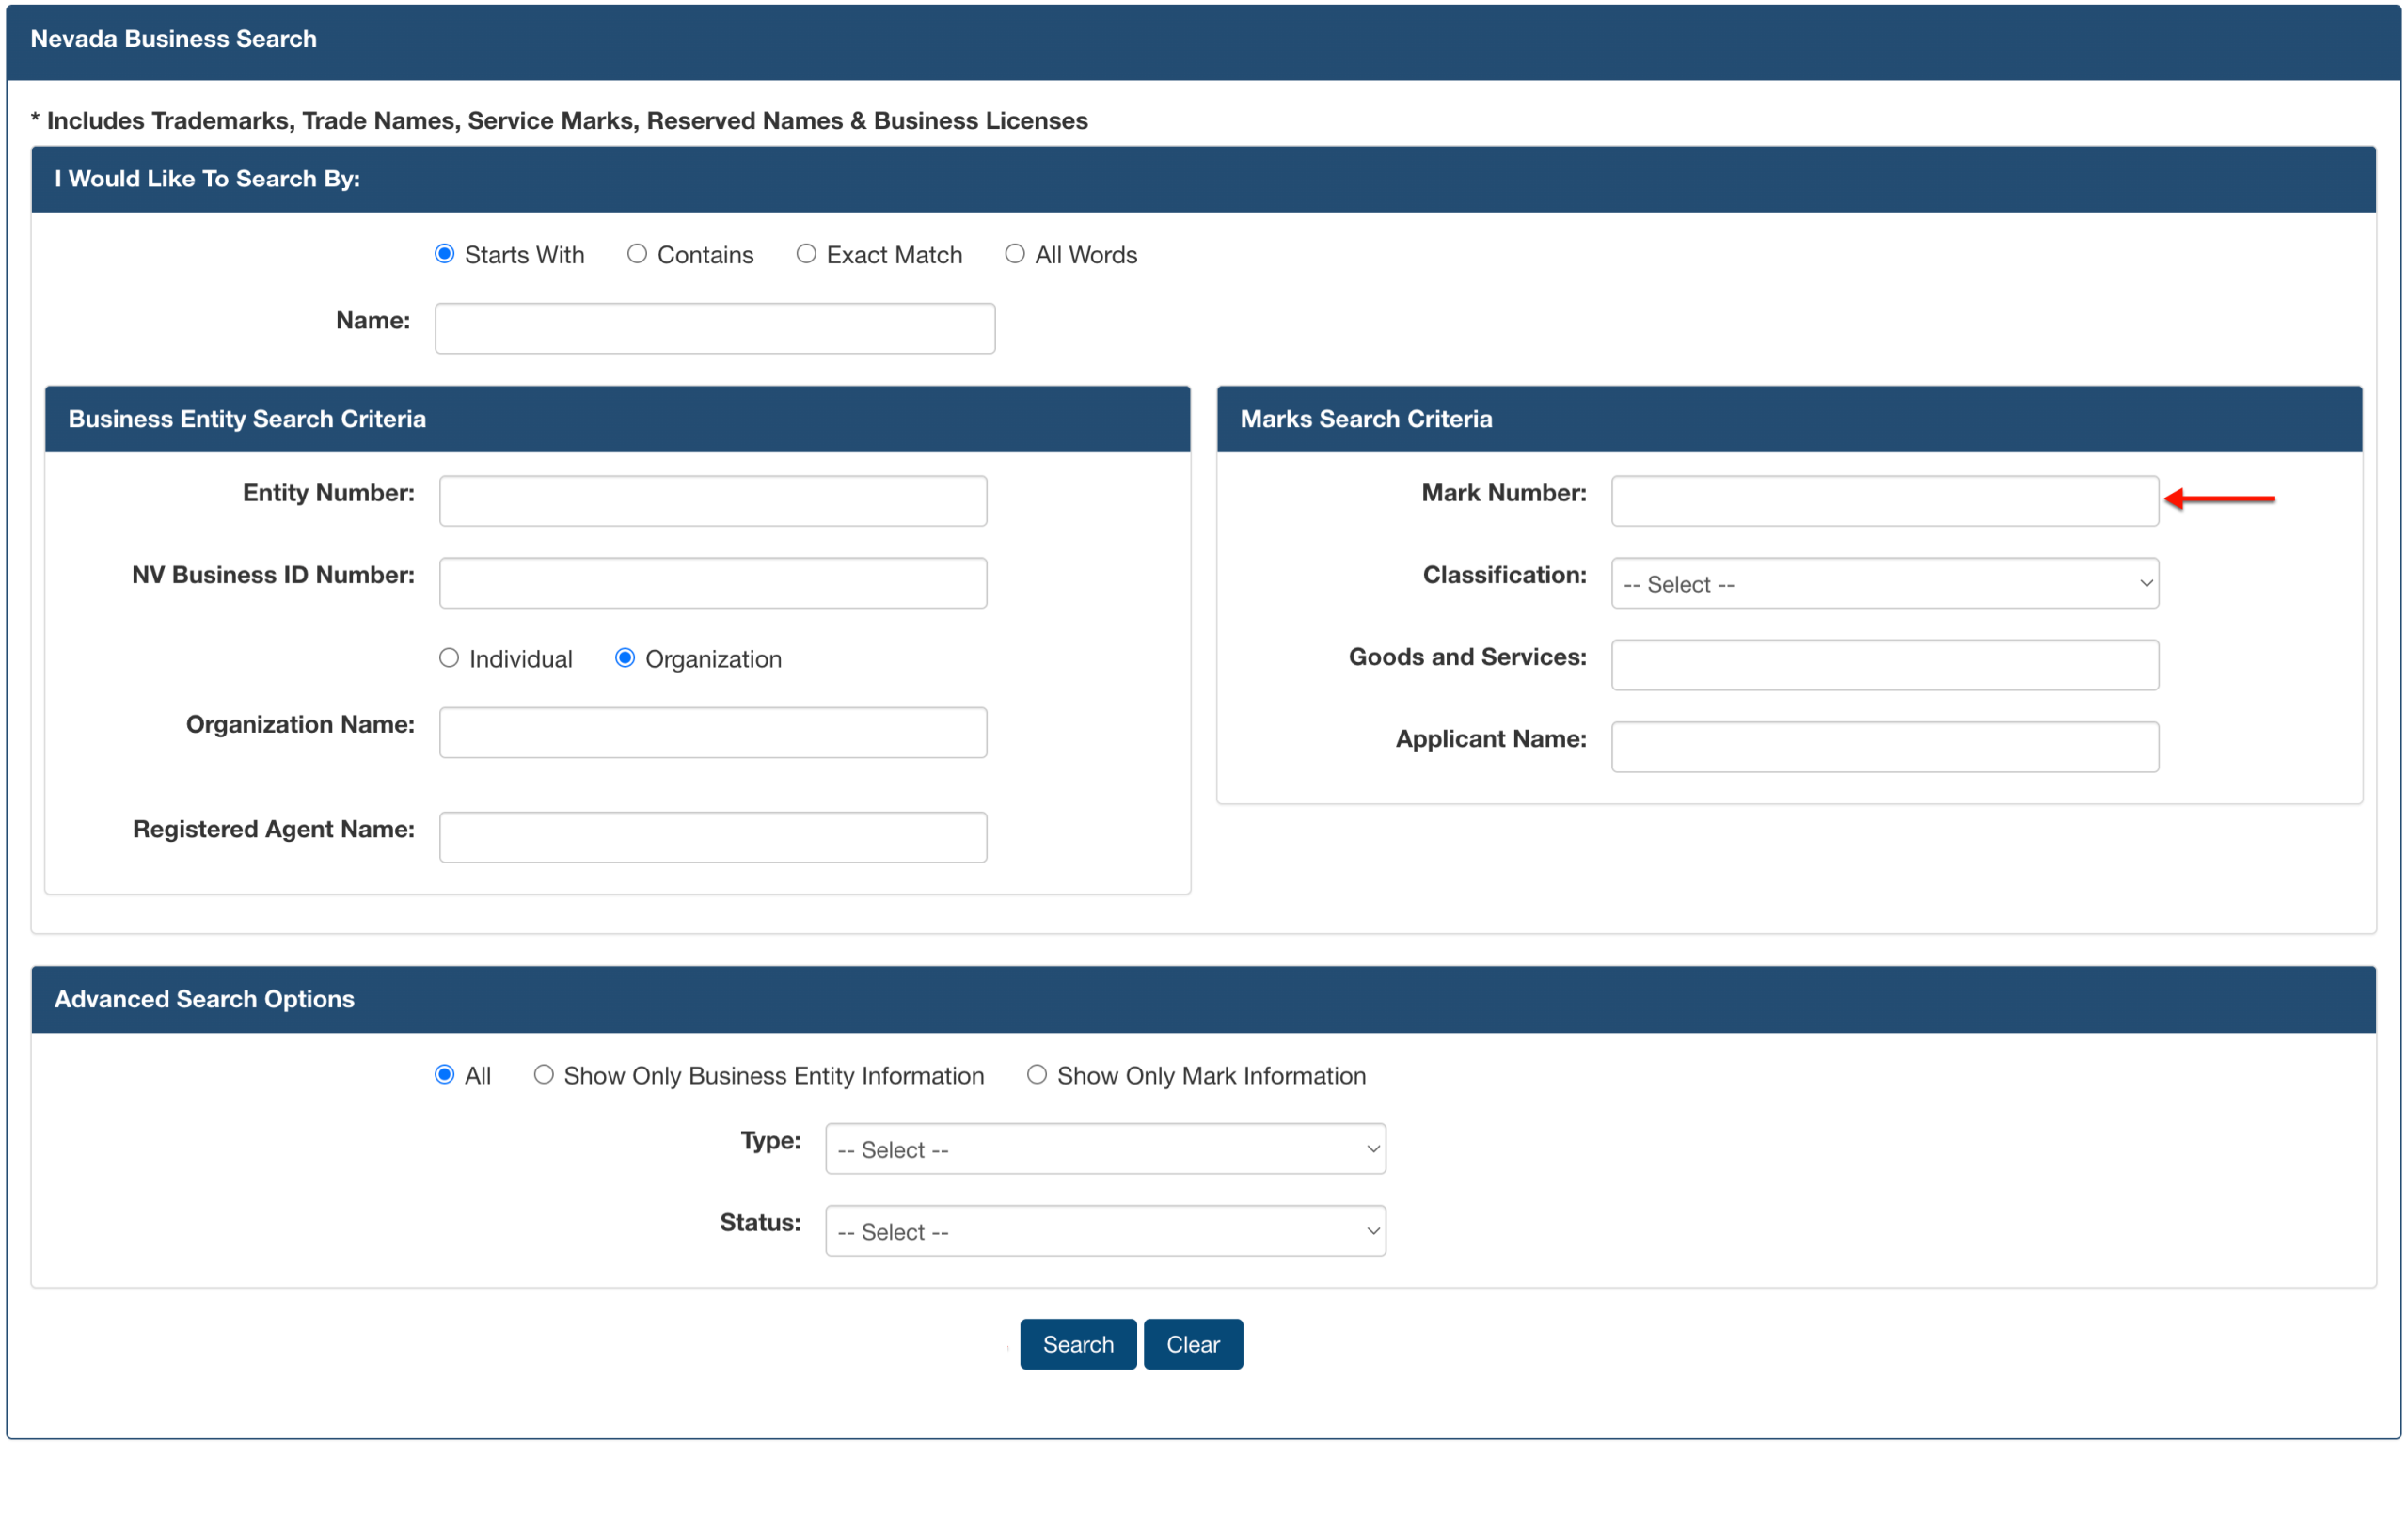
Step 11. Identify the Trademark
If the entity has a trademark, then report the trademark’s identification number in the “Mark Number” box. Consider the fields in this area optional but (potentially) extremely useful.
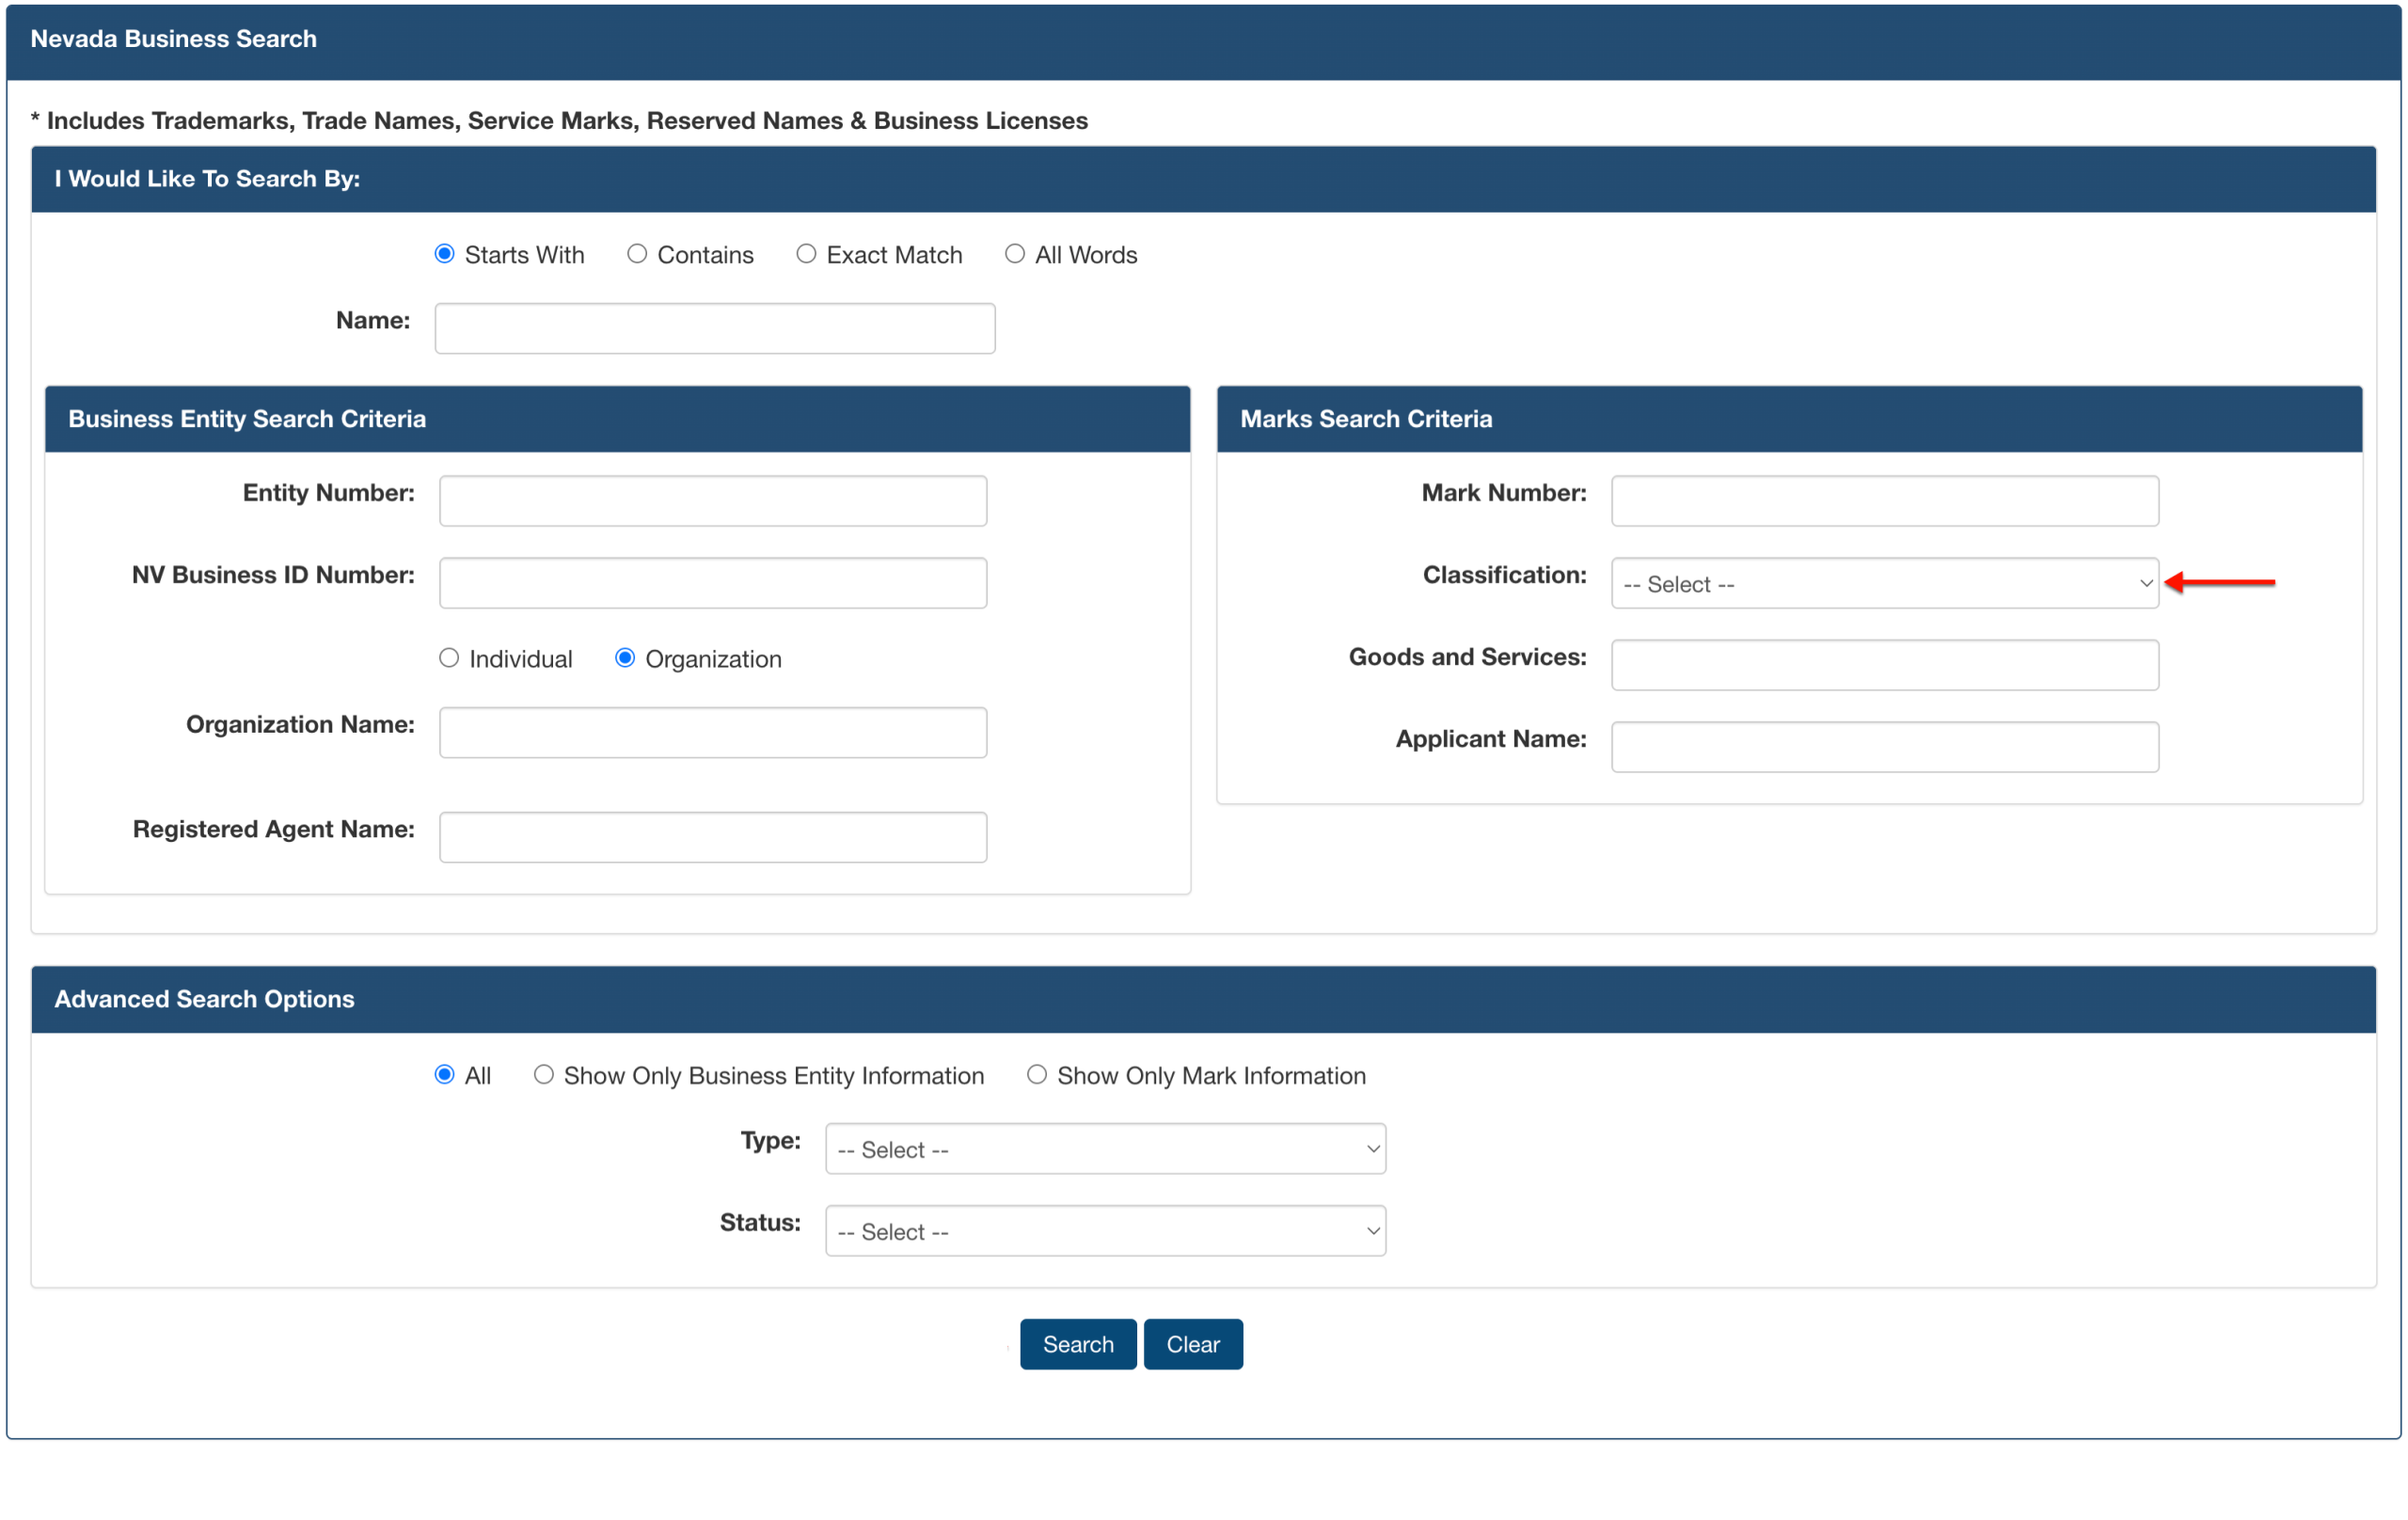
Step 12. Attach the Trademark Classification
Select the state classification for the targeted entity’s trademark from the drop-down menu available (see image). Supply this information if known, even if the mark number is not.
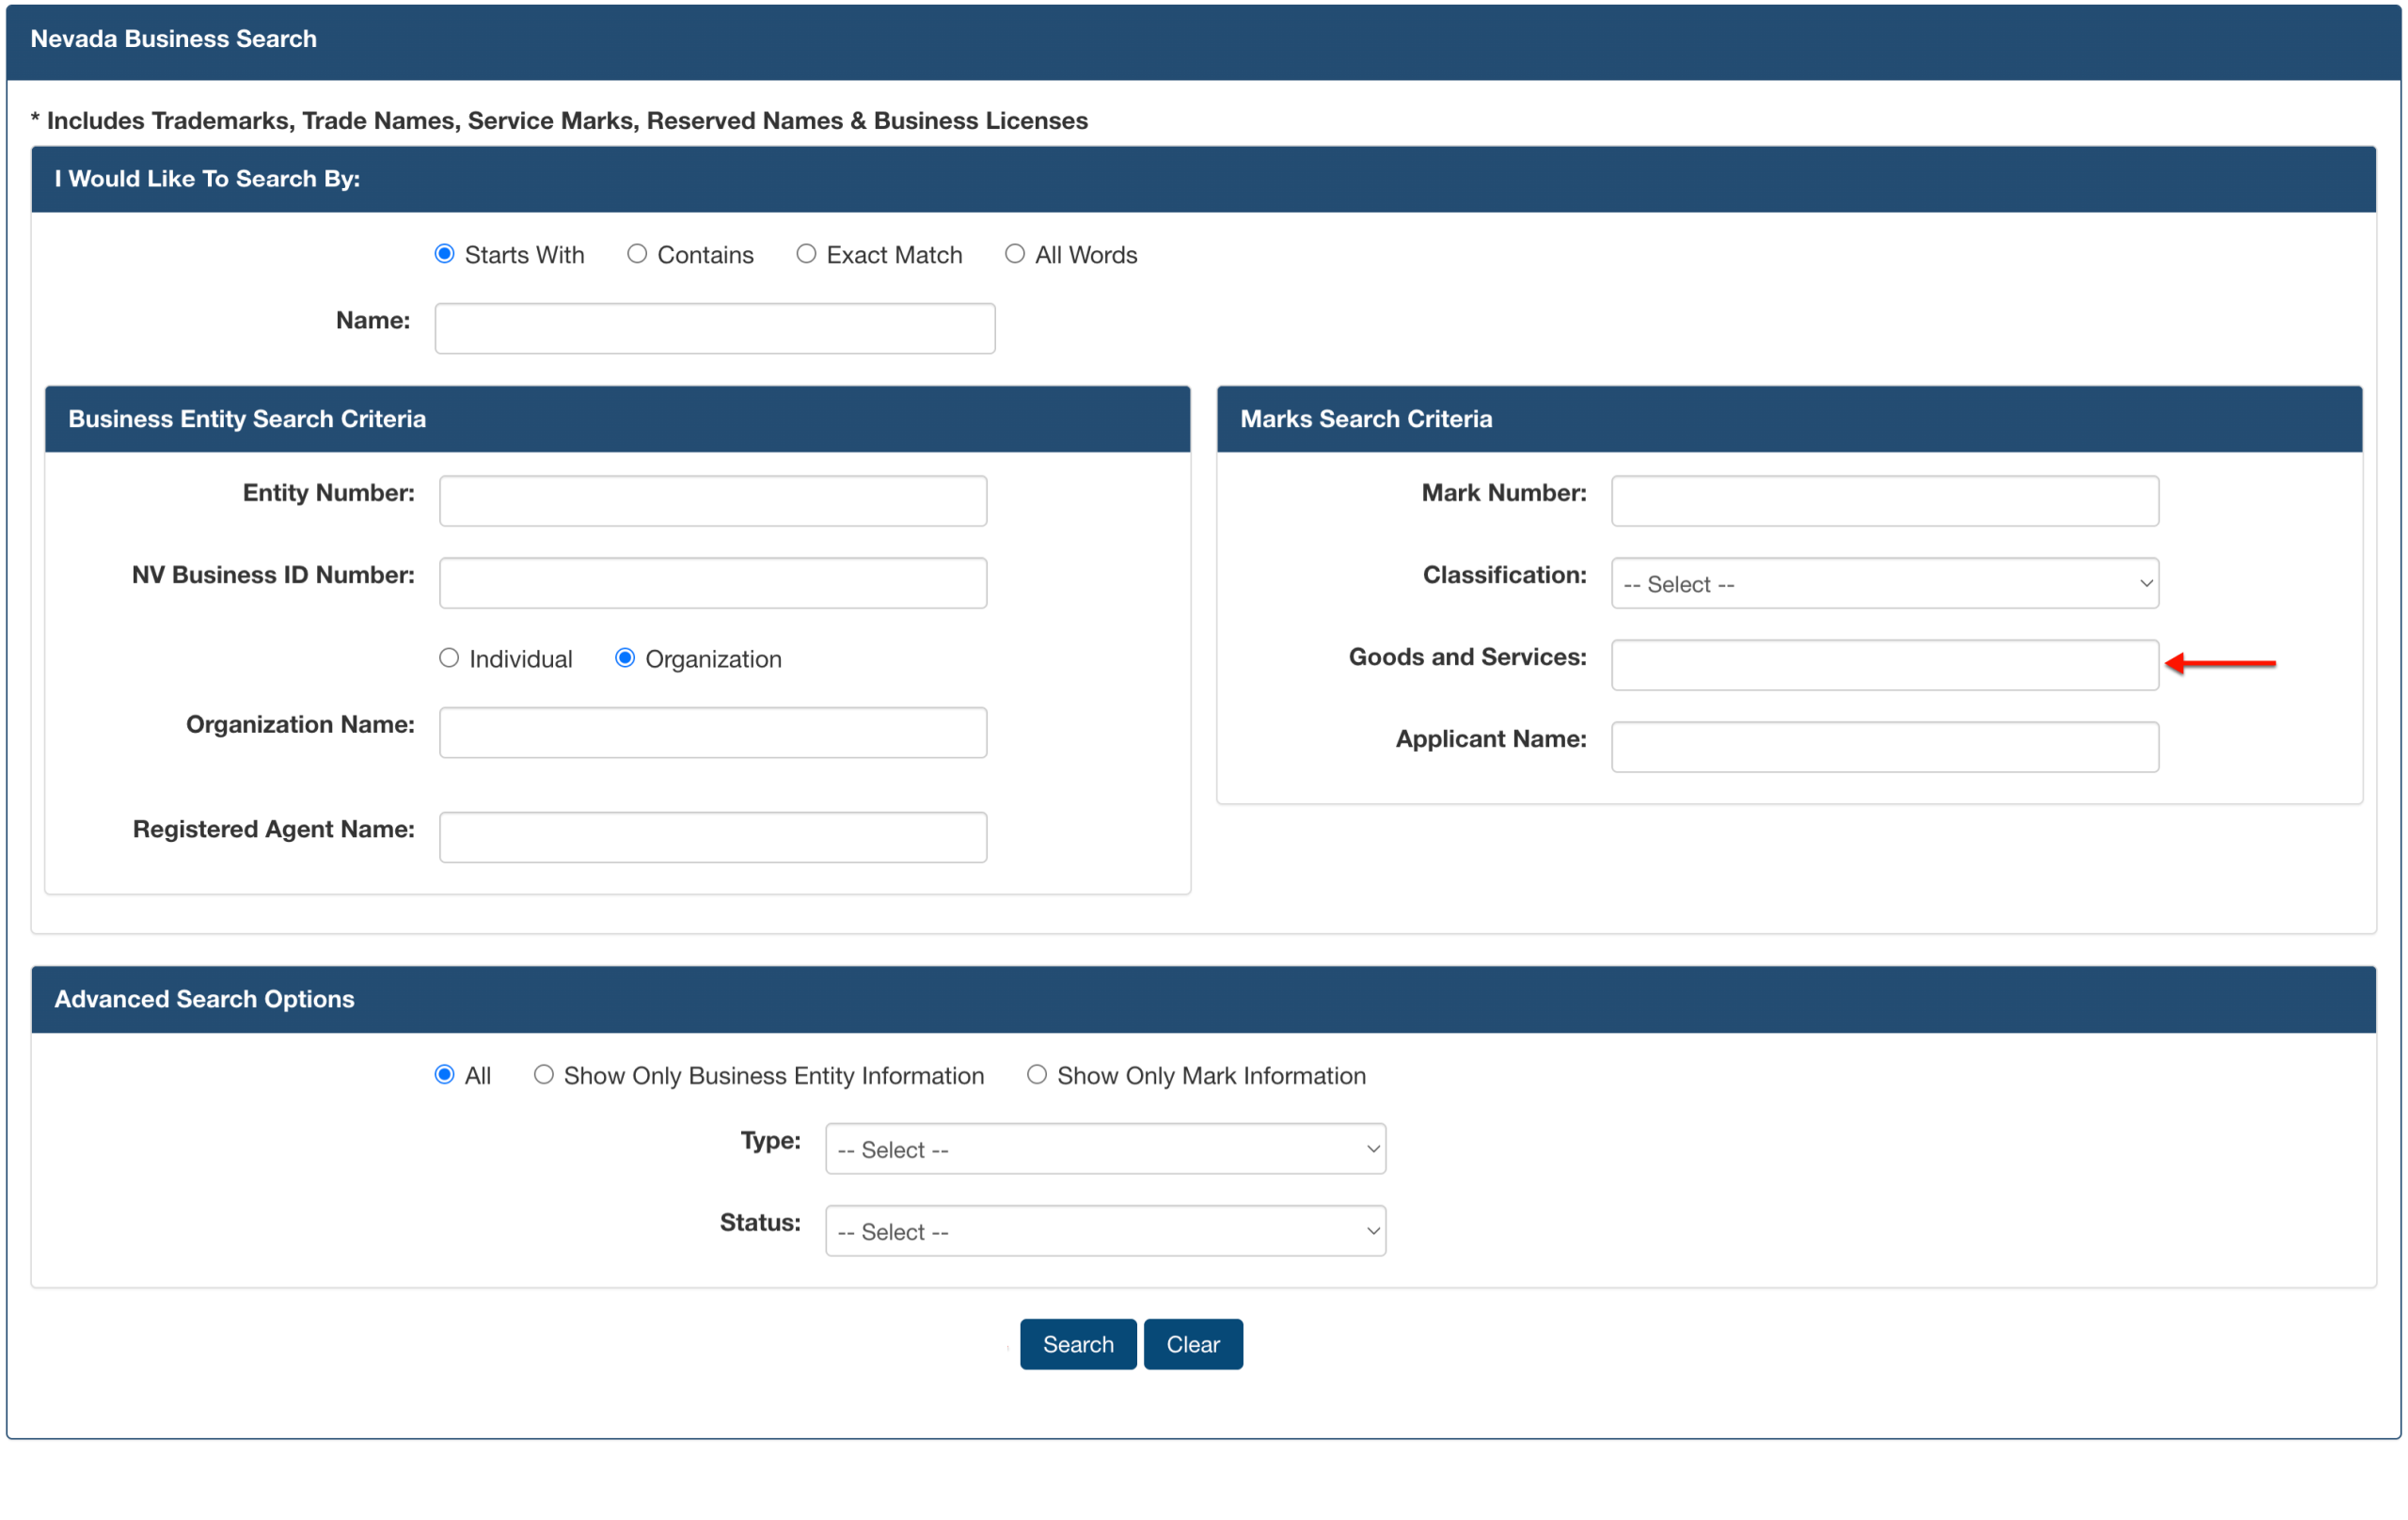
Step 13. Define Trademark Business
Indicate the “Goods and Services” the state reserves for the trademark. Verify this information since some entities have multiple trademarks.
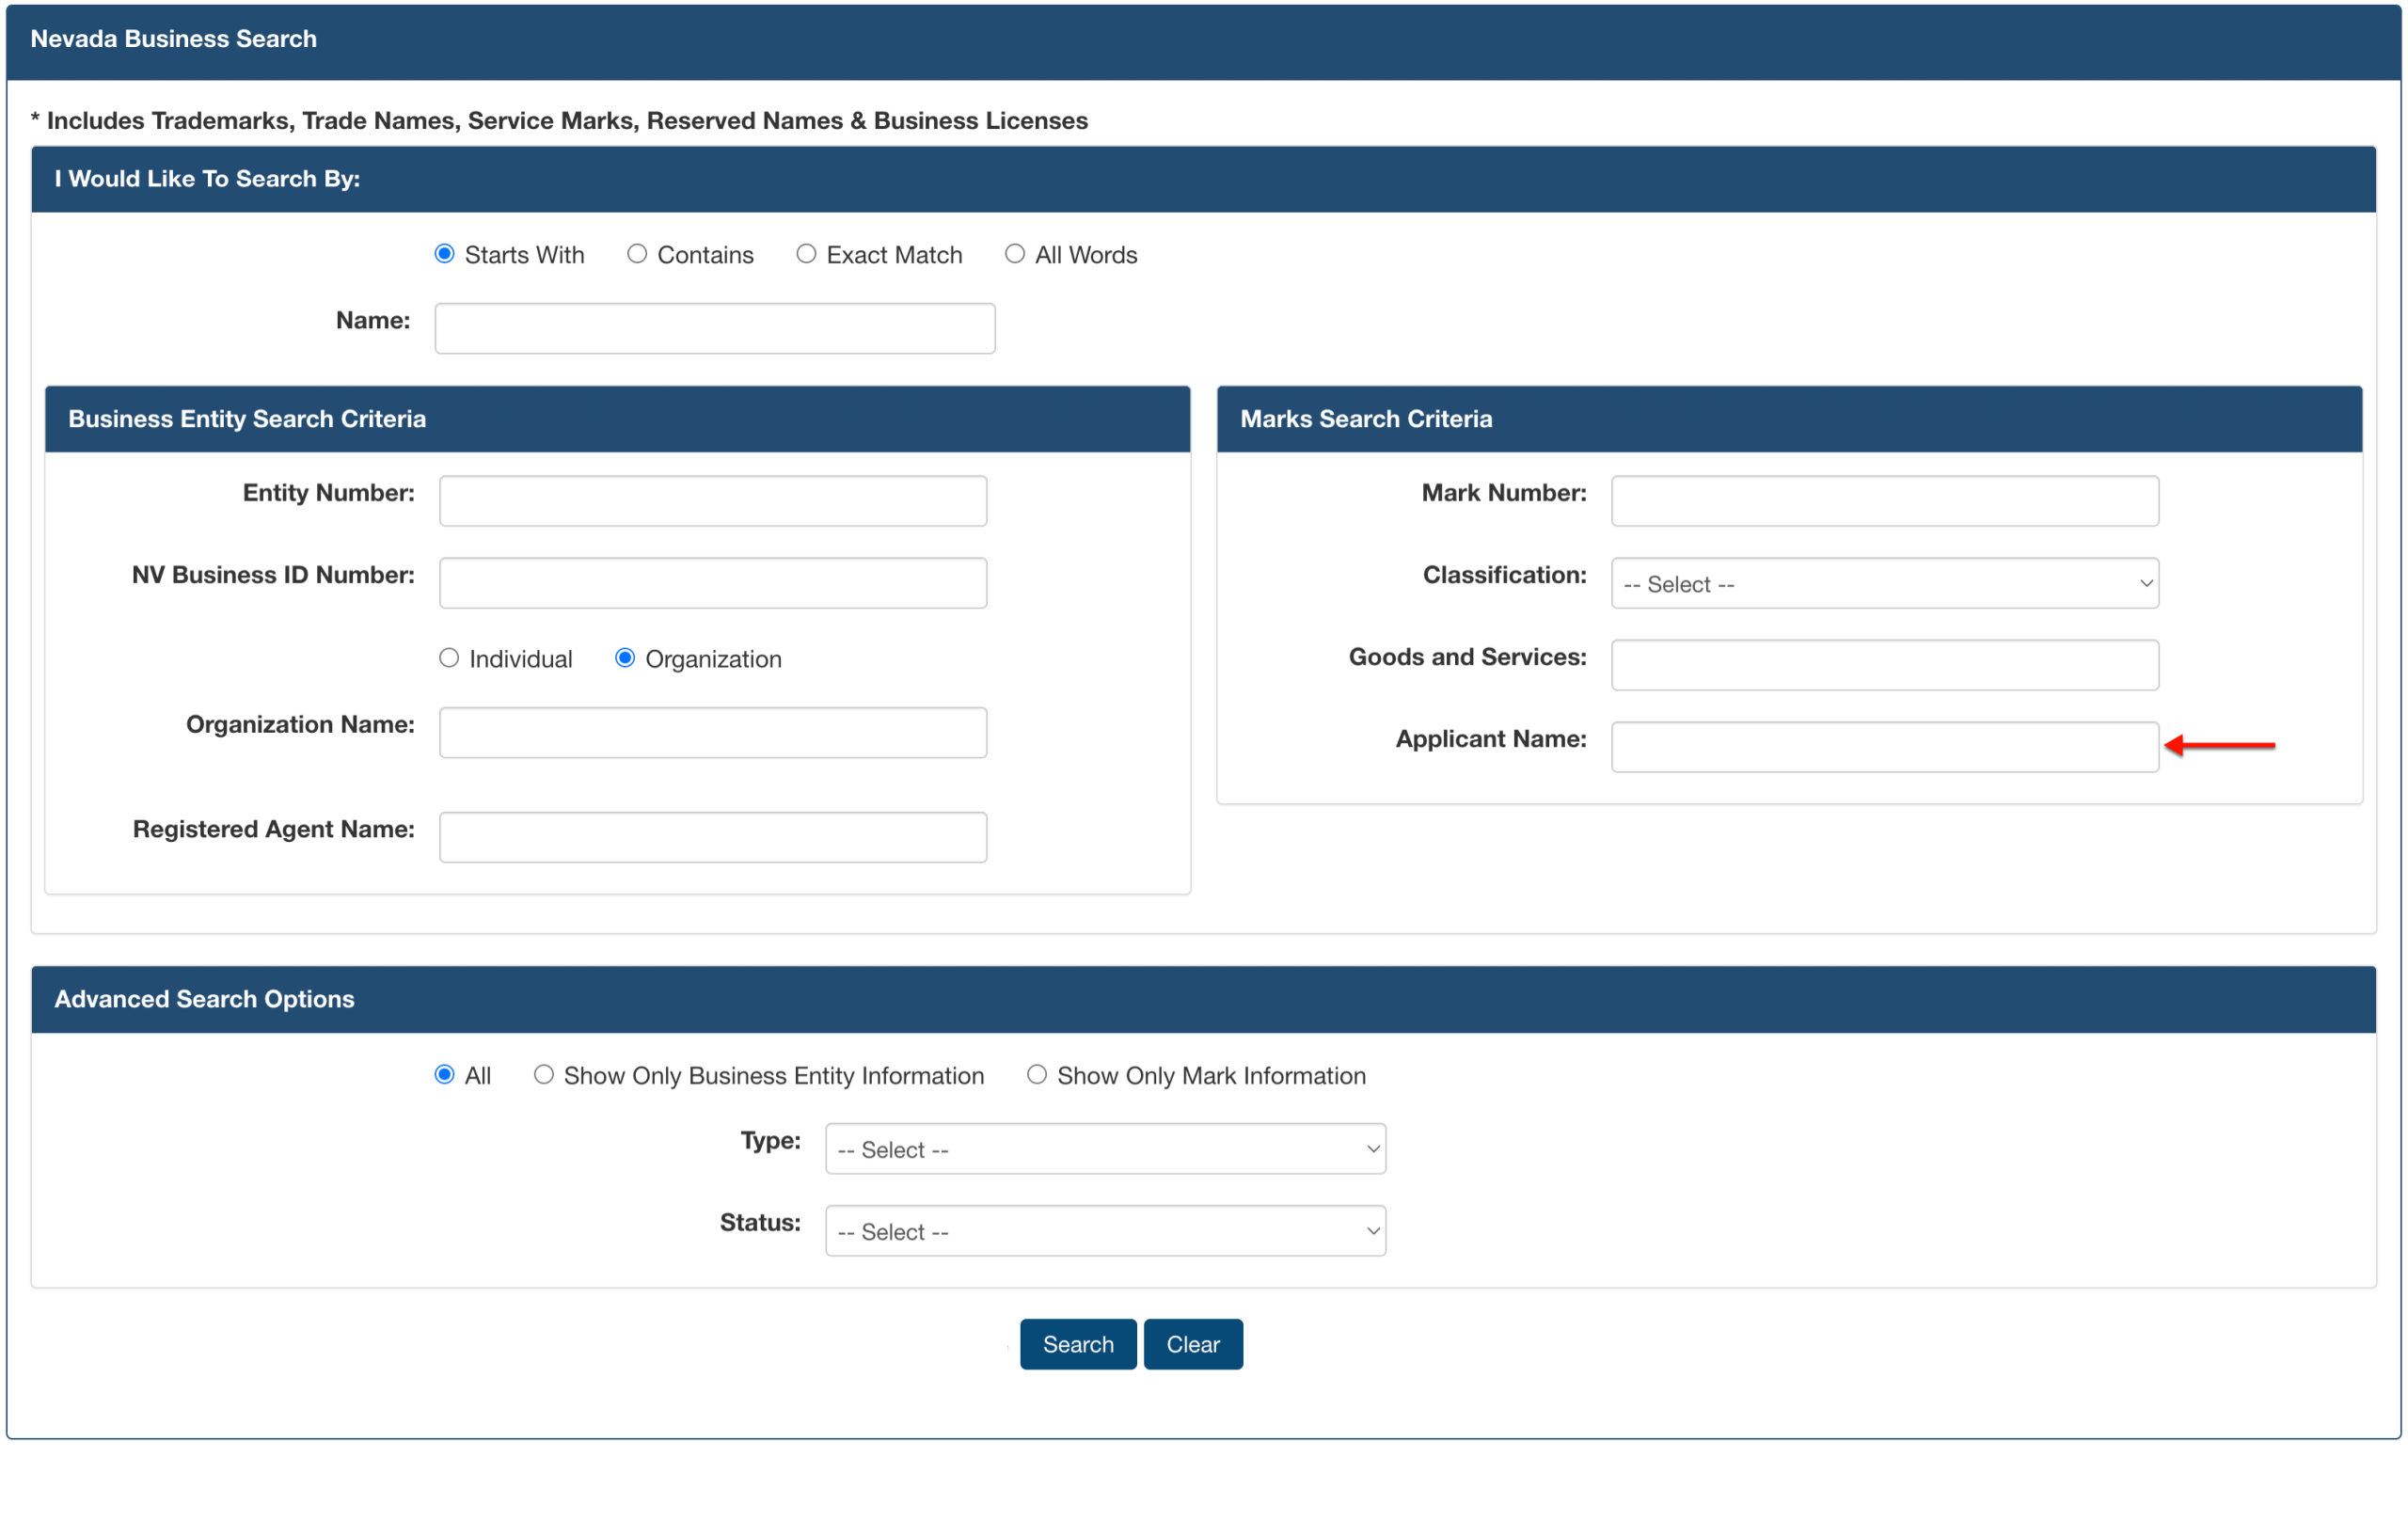
Step 14. Identify the Trademark Applicant
Attach the formal name of the applicant holding the trademark in the final box. Once this information is complete, continue to the advanced features.
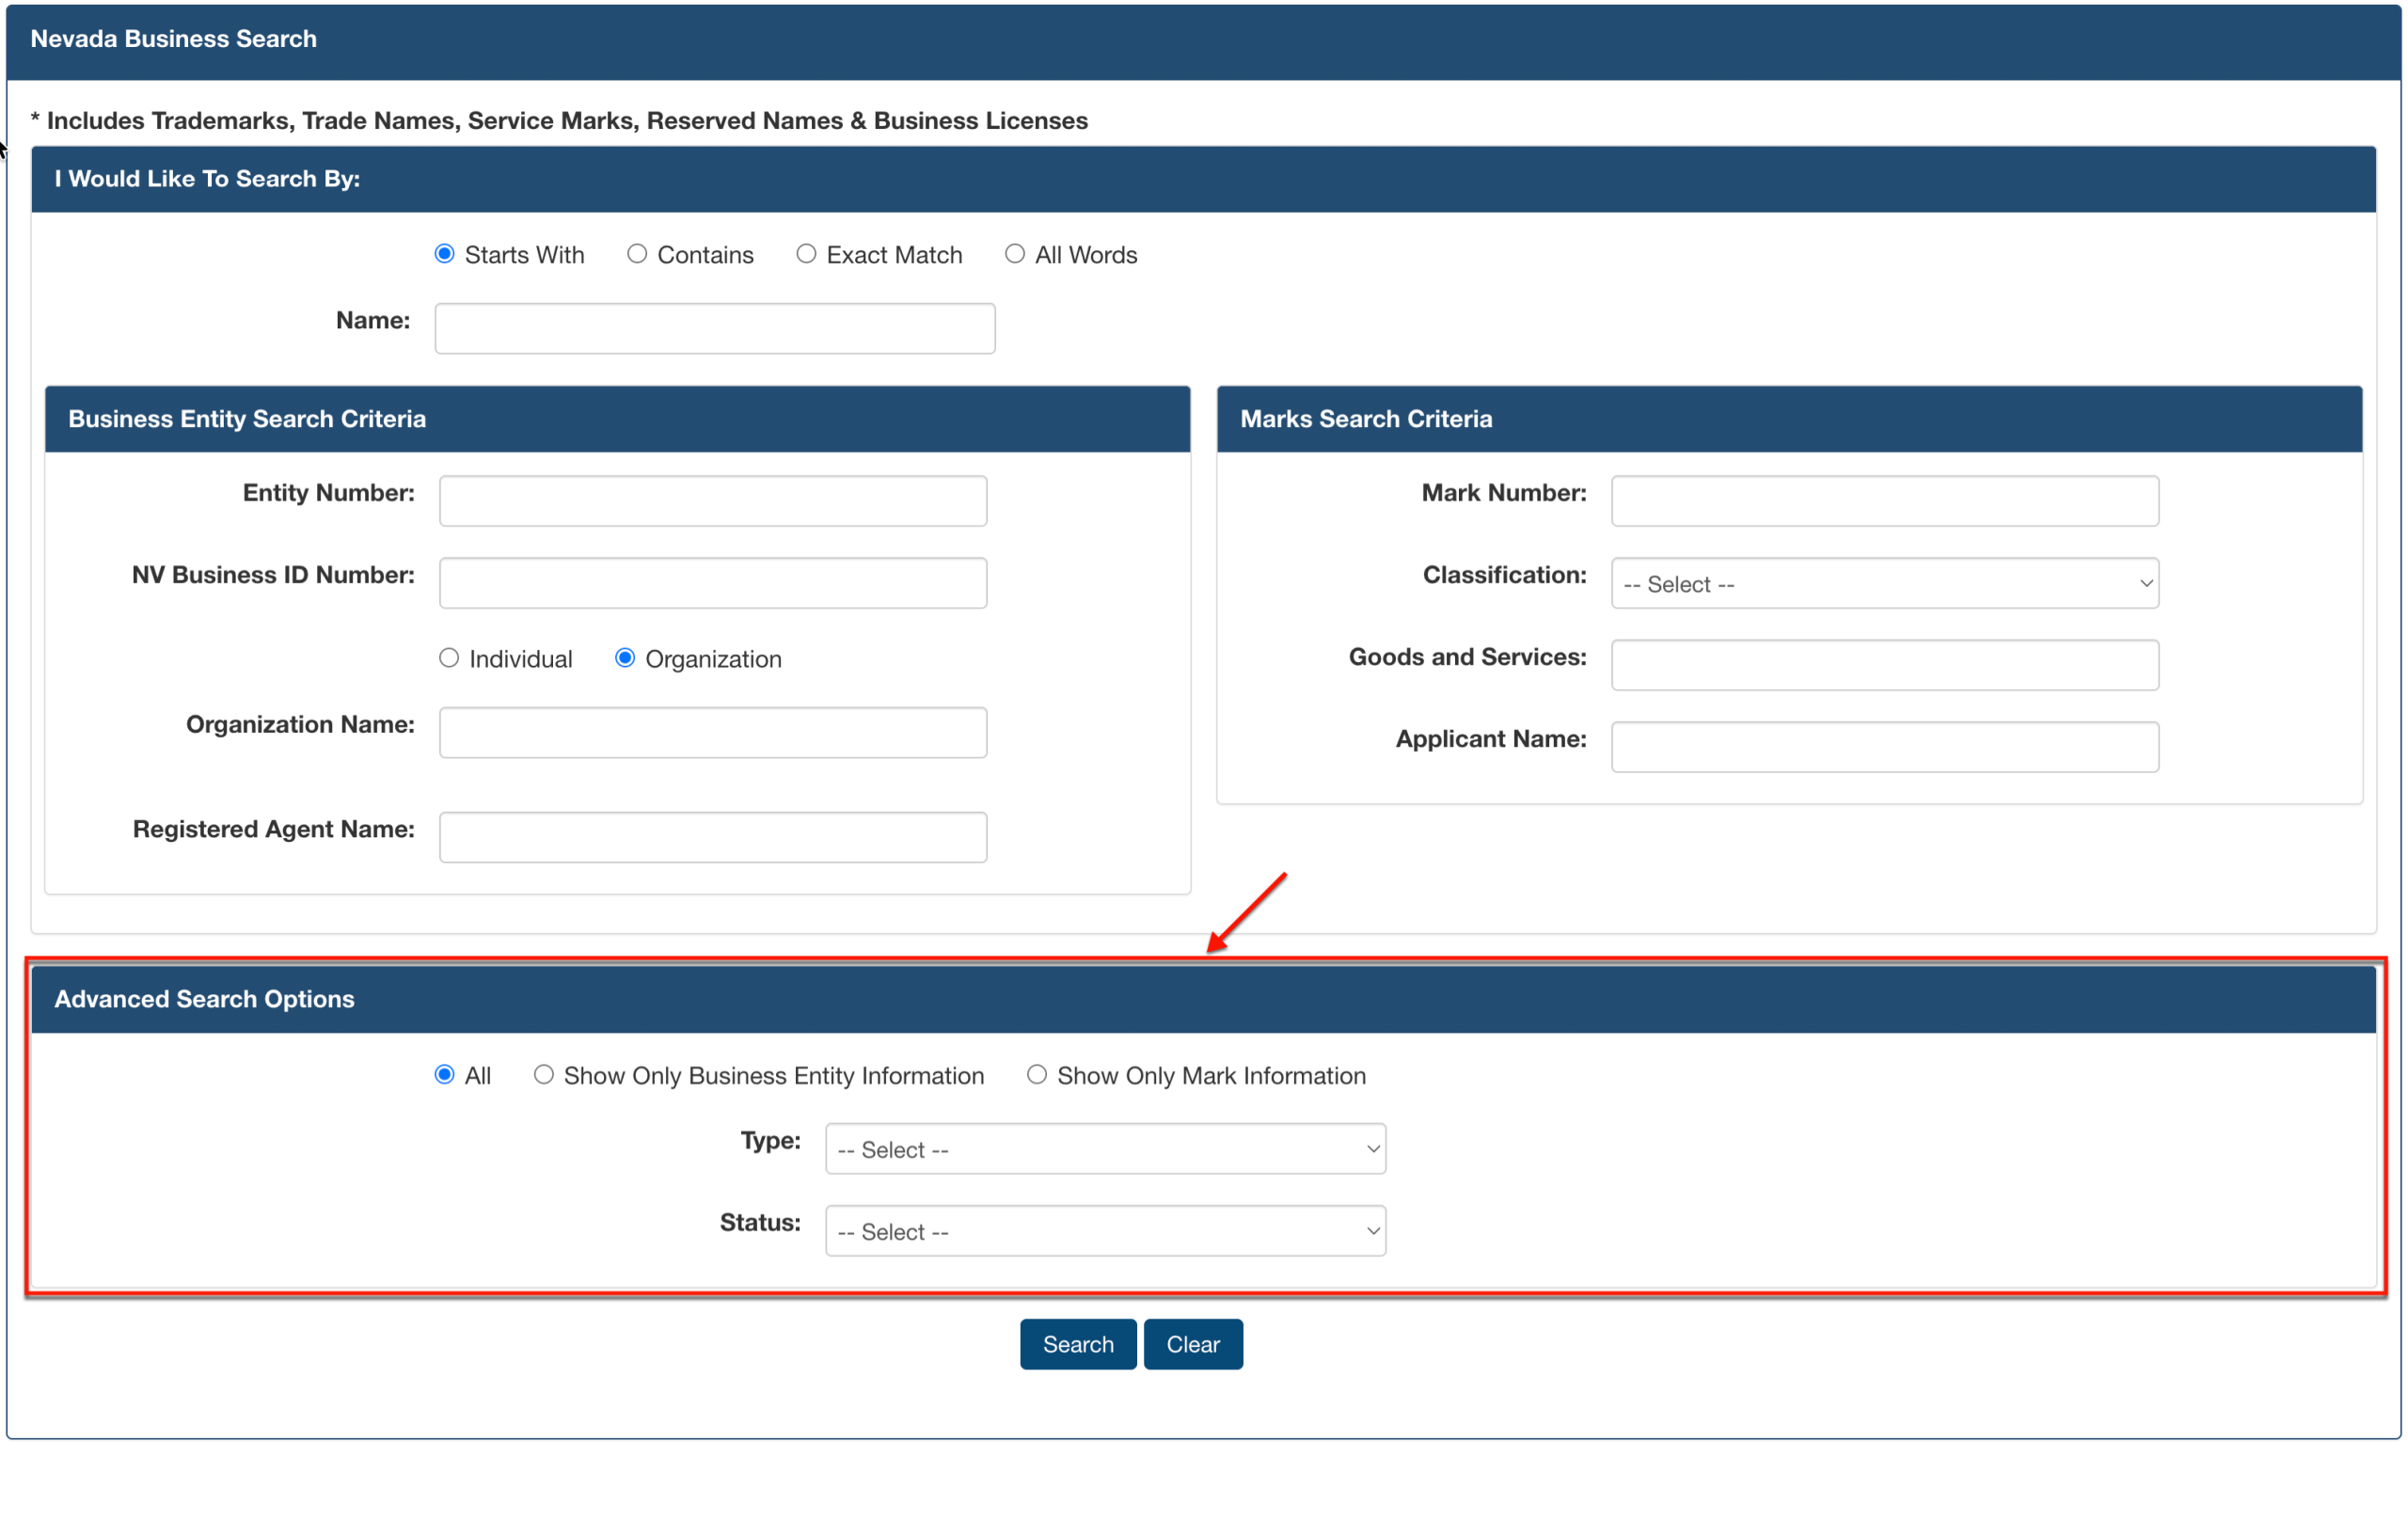
Step 15. Utilize the Advanced Search Option Filter
Locate the final options for this tool. Here, several advanced features are available for visitors to narrow down their matching results.
- All
- Show Only Business Entity Information
- Show Only Mark Information
- Type
- Status
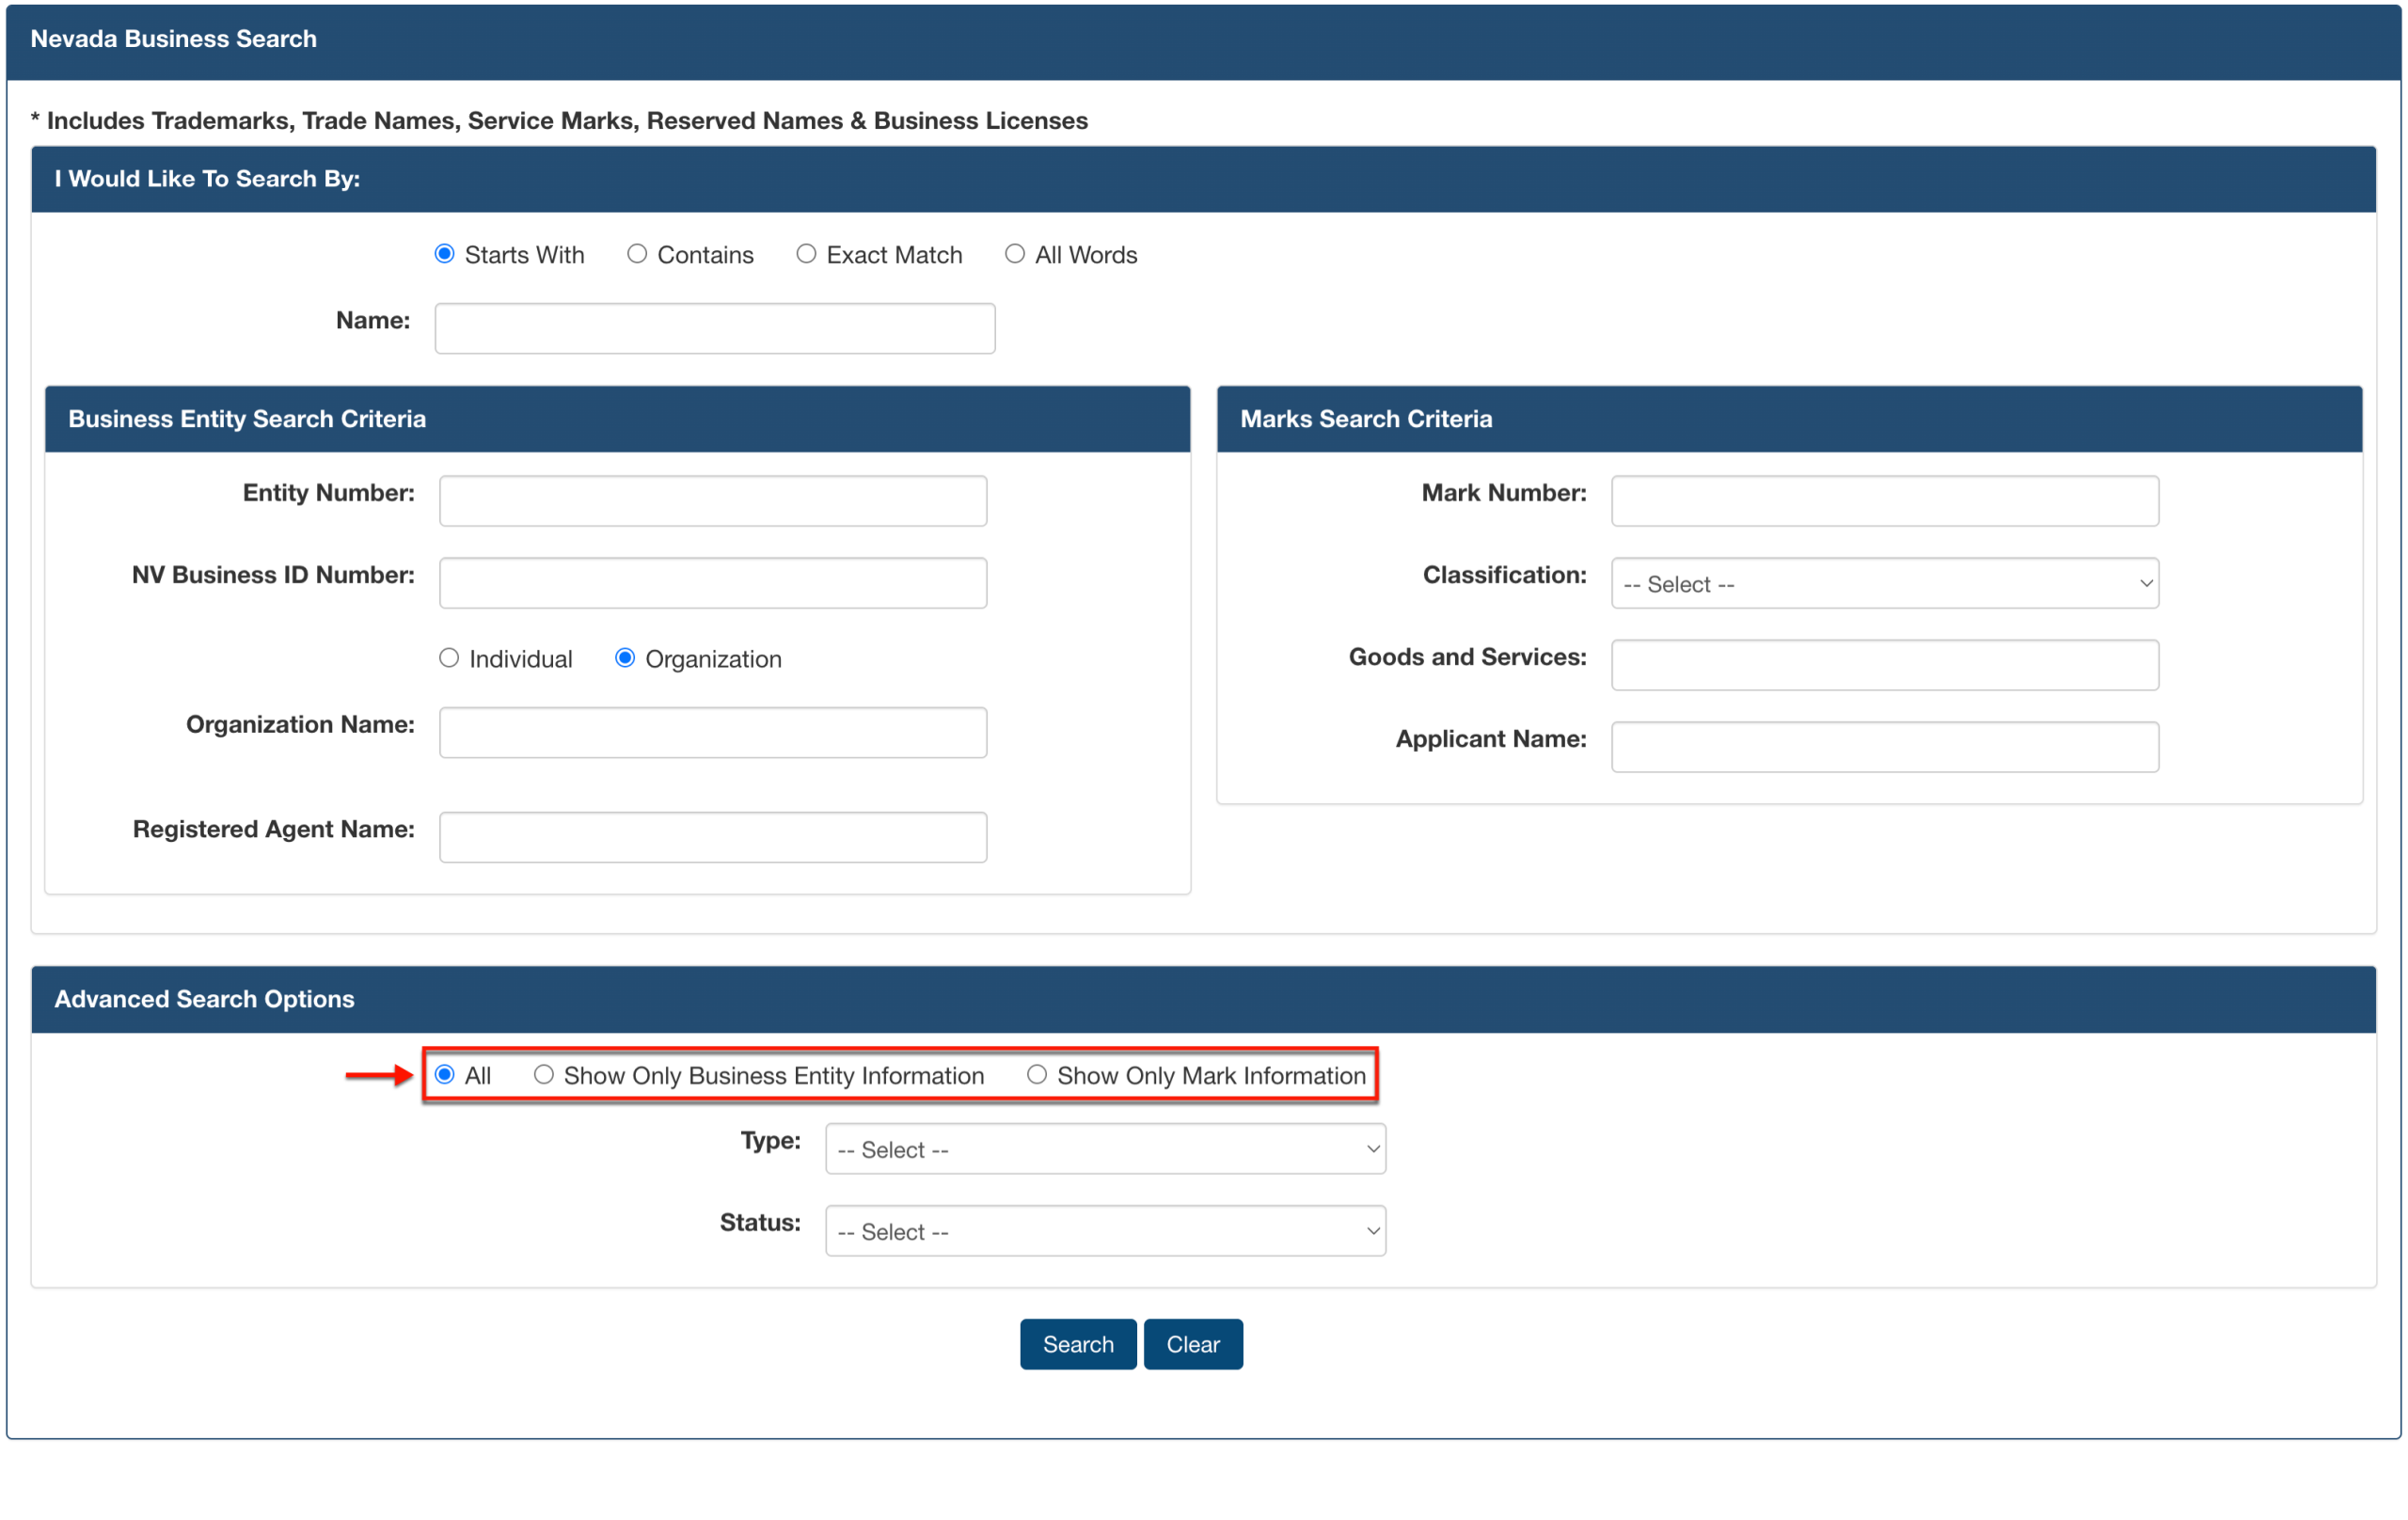
Step 16. Control the Matching Results Return
Instruct the query on what precisely to include in its results display using the radio buttons. For our purpose, it is recommended to select “All.”
Step 17. Assign the Entity Type To the Criteria
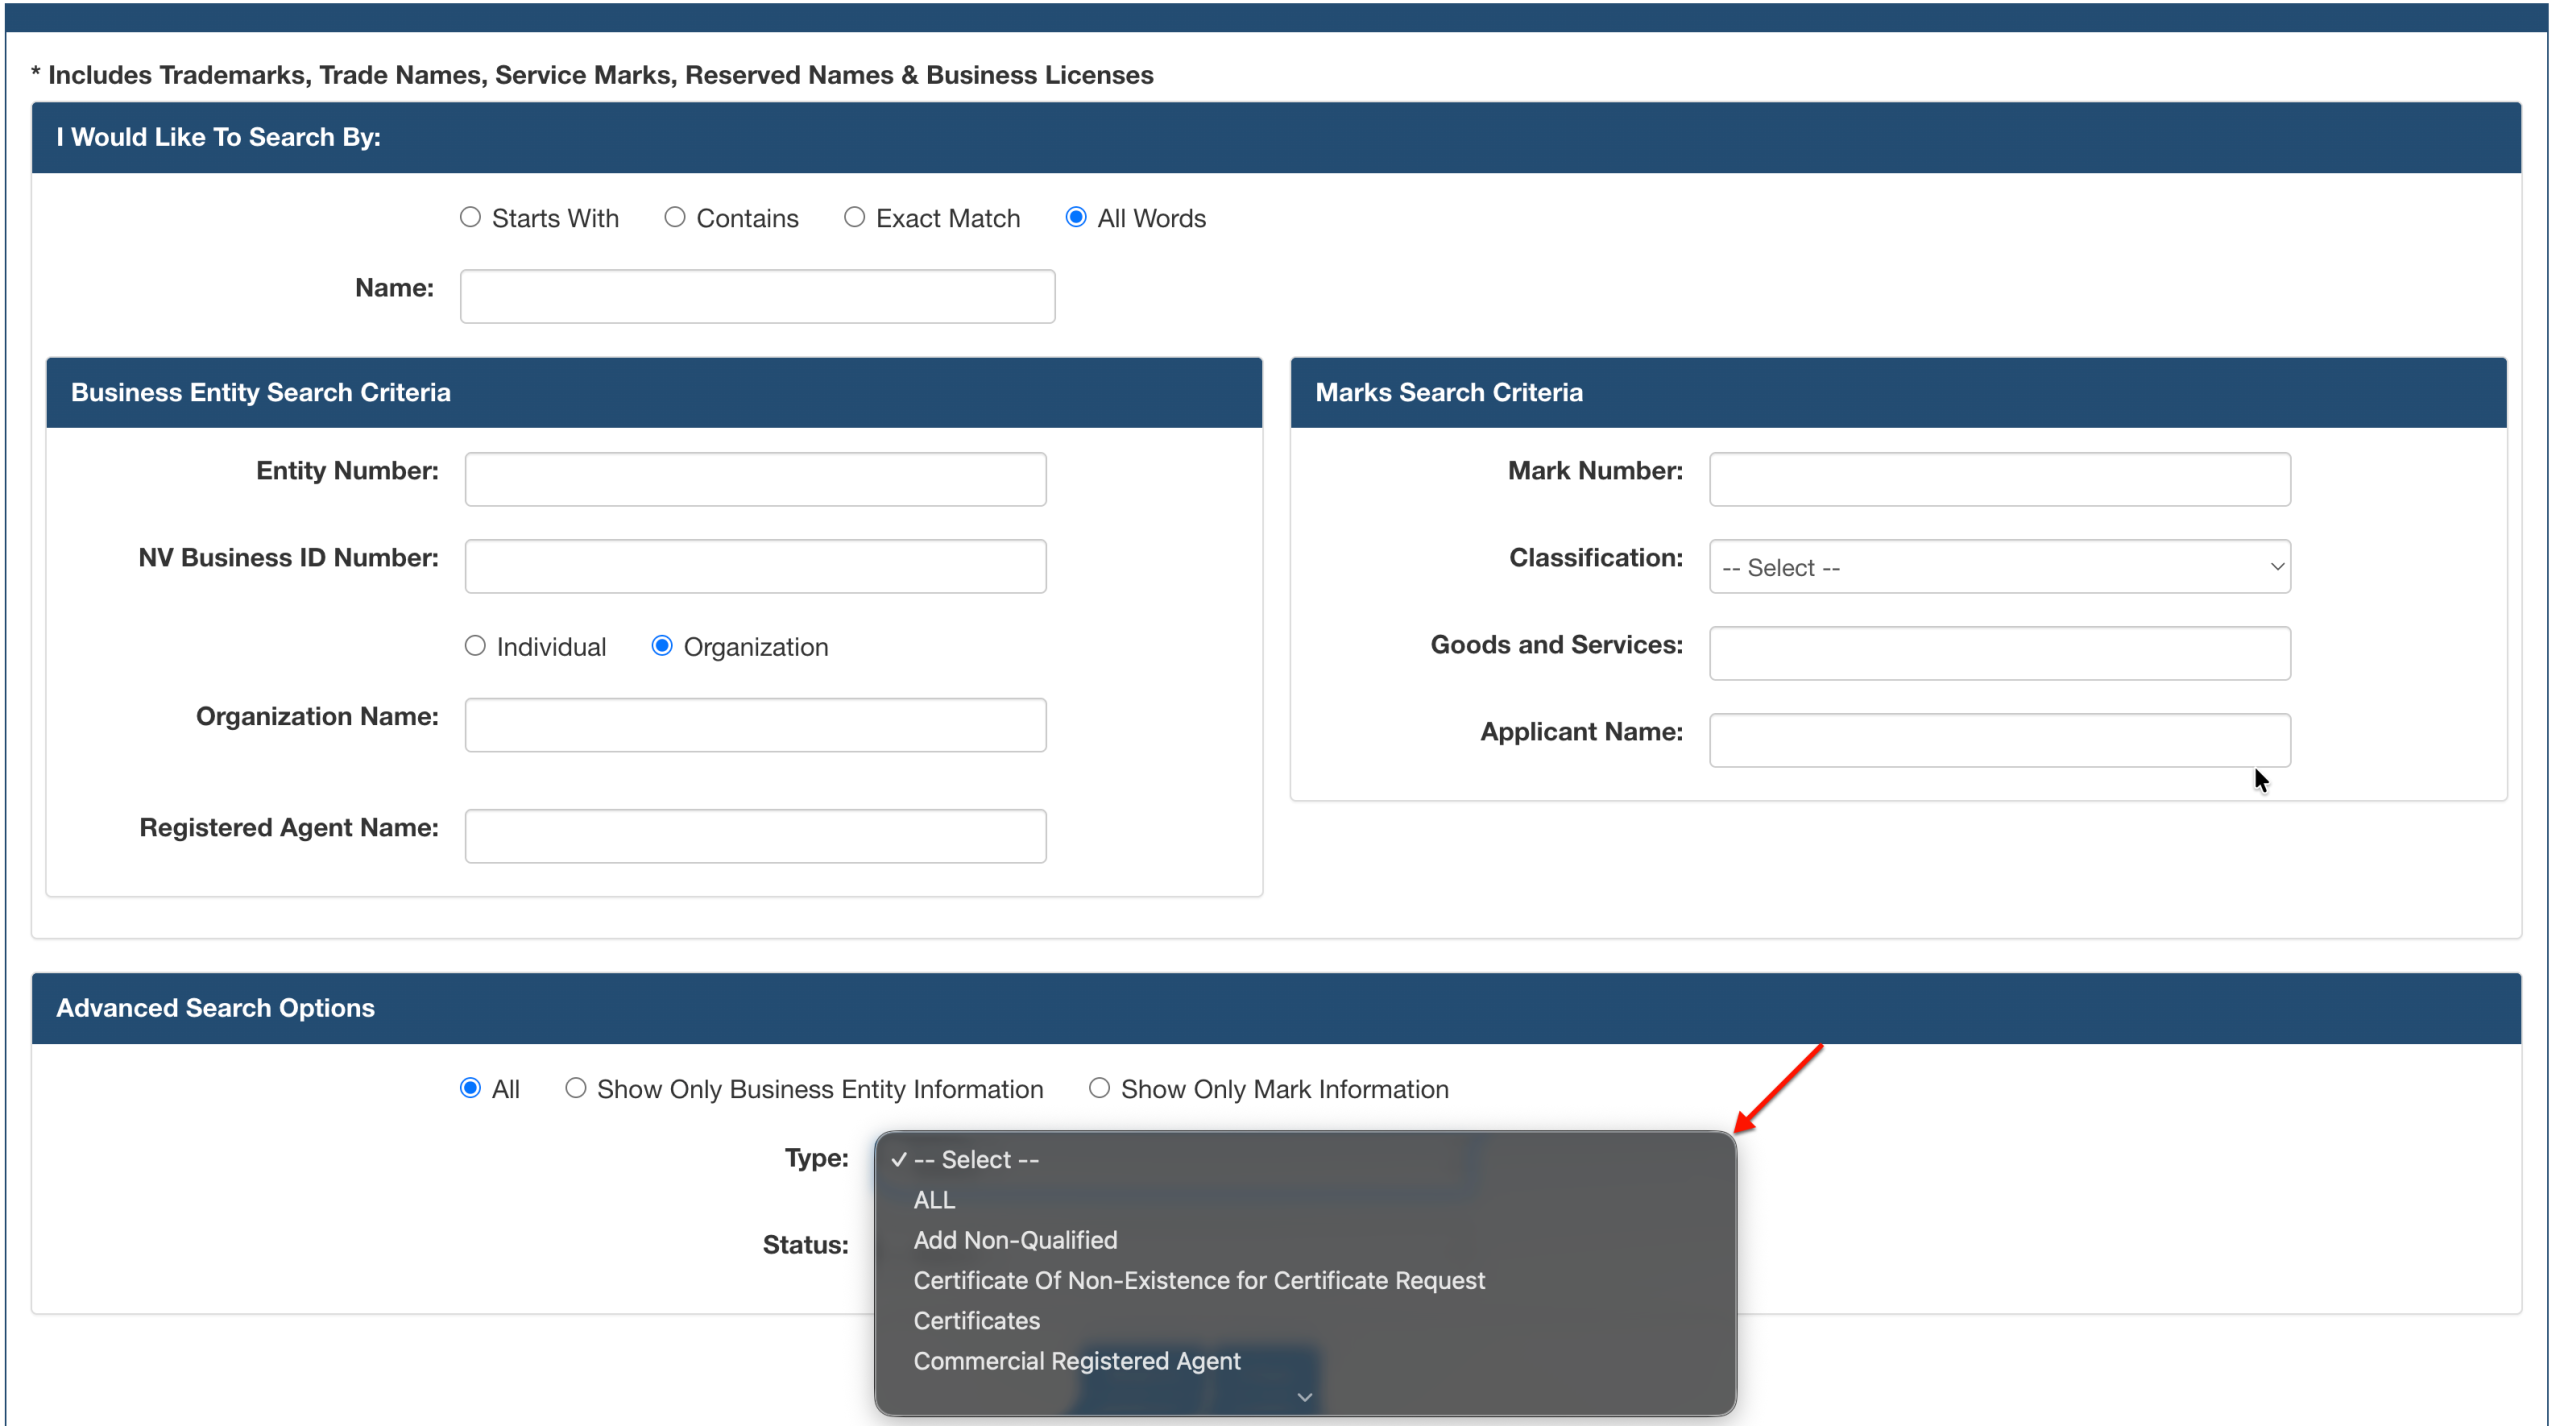
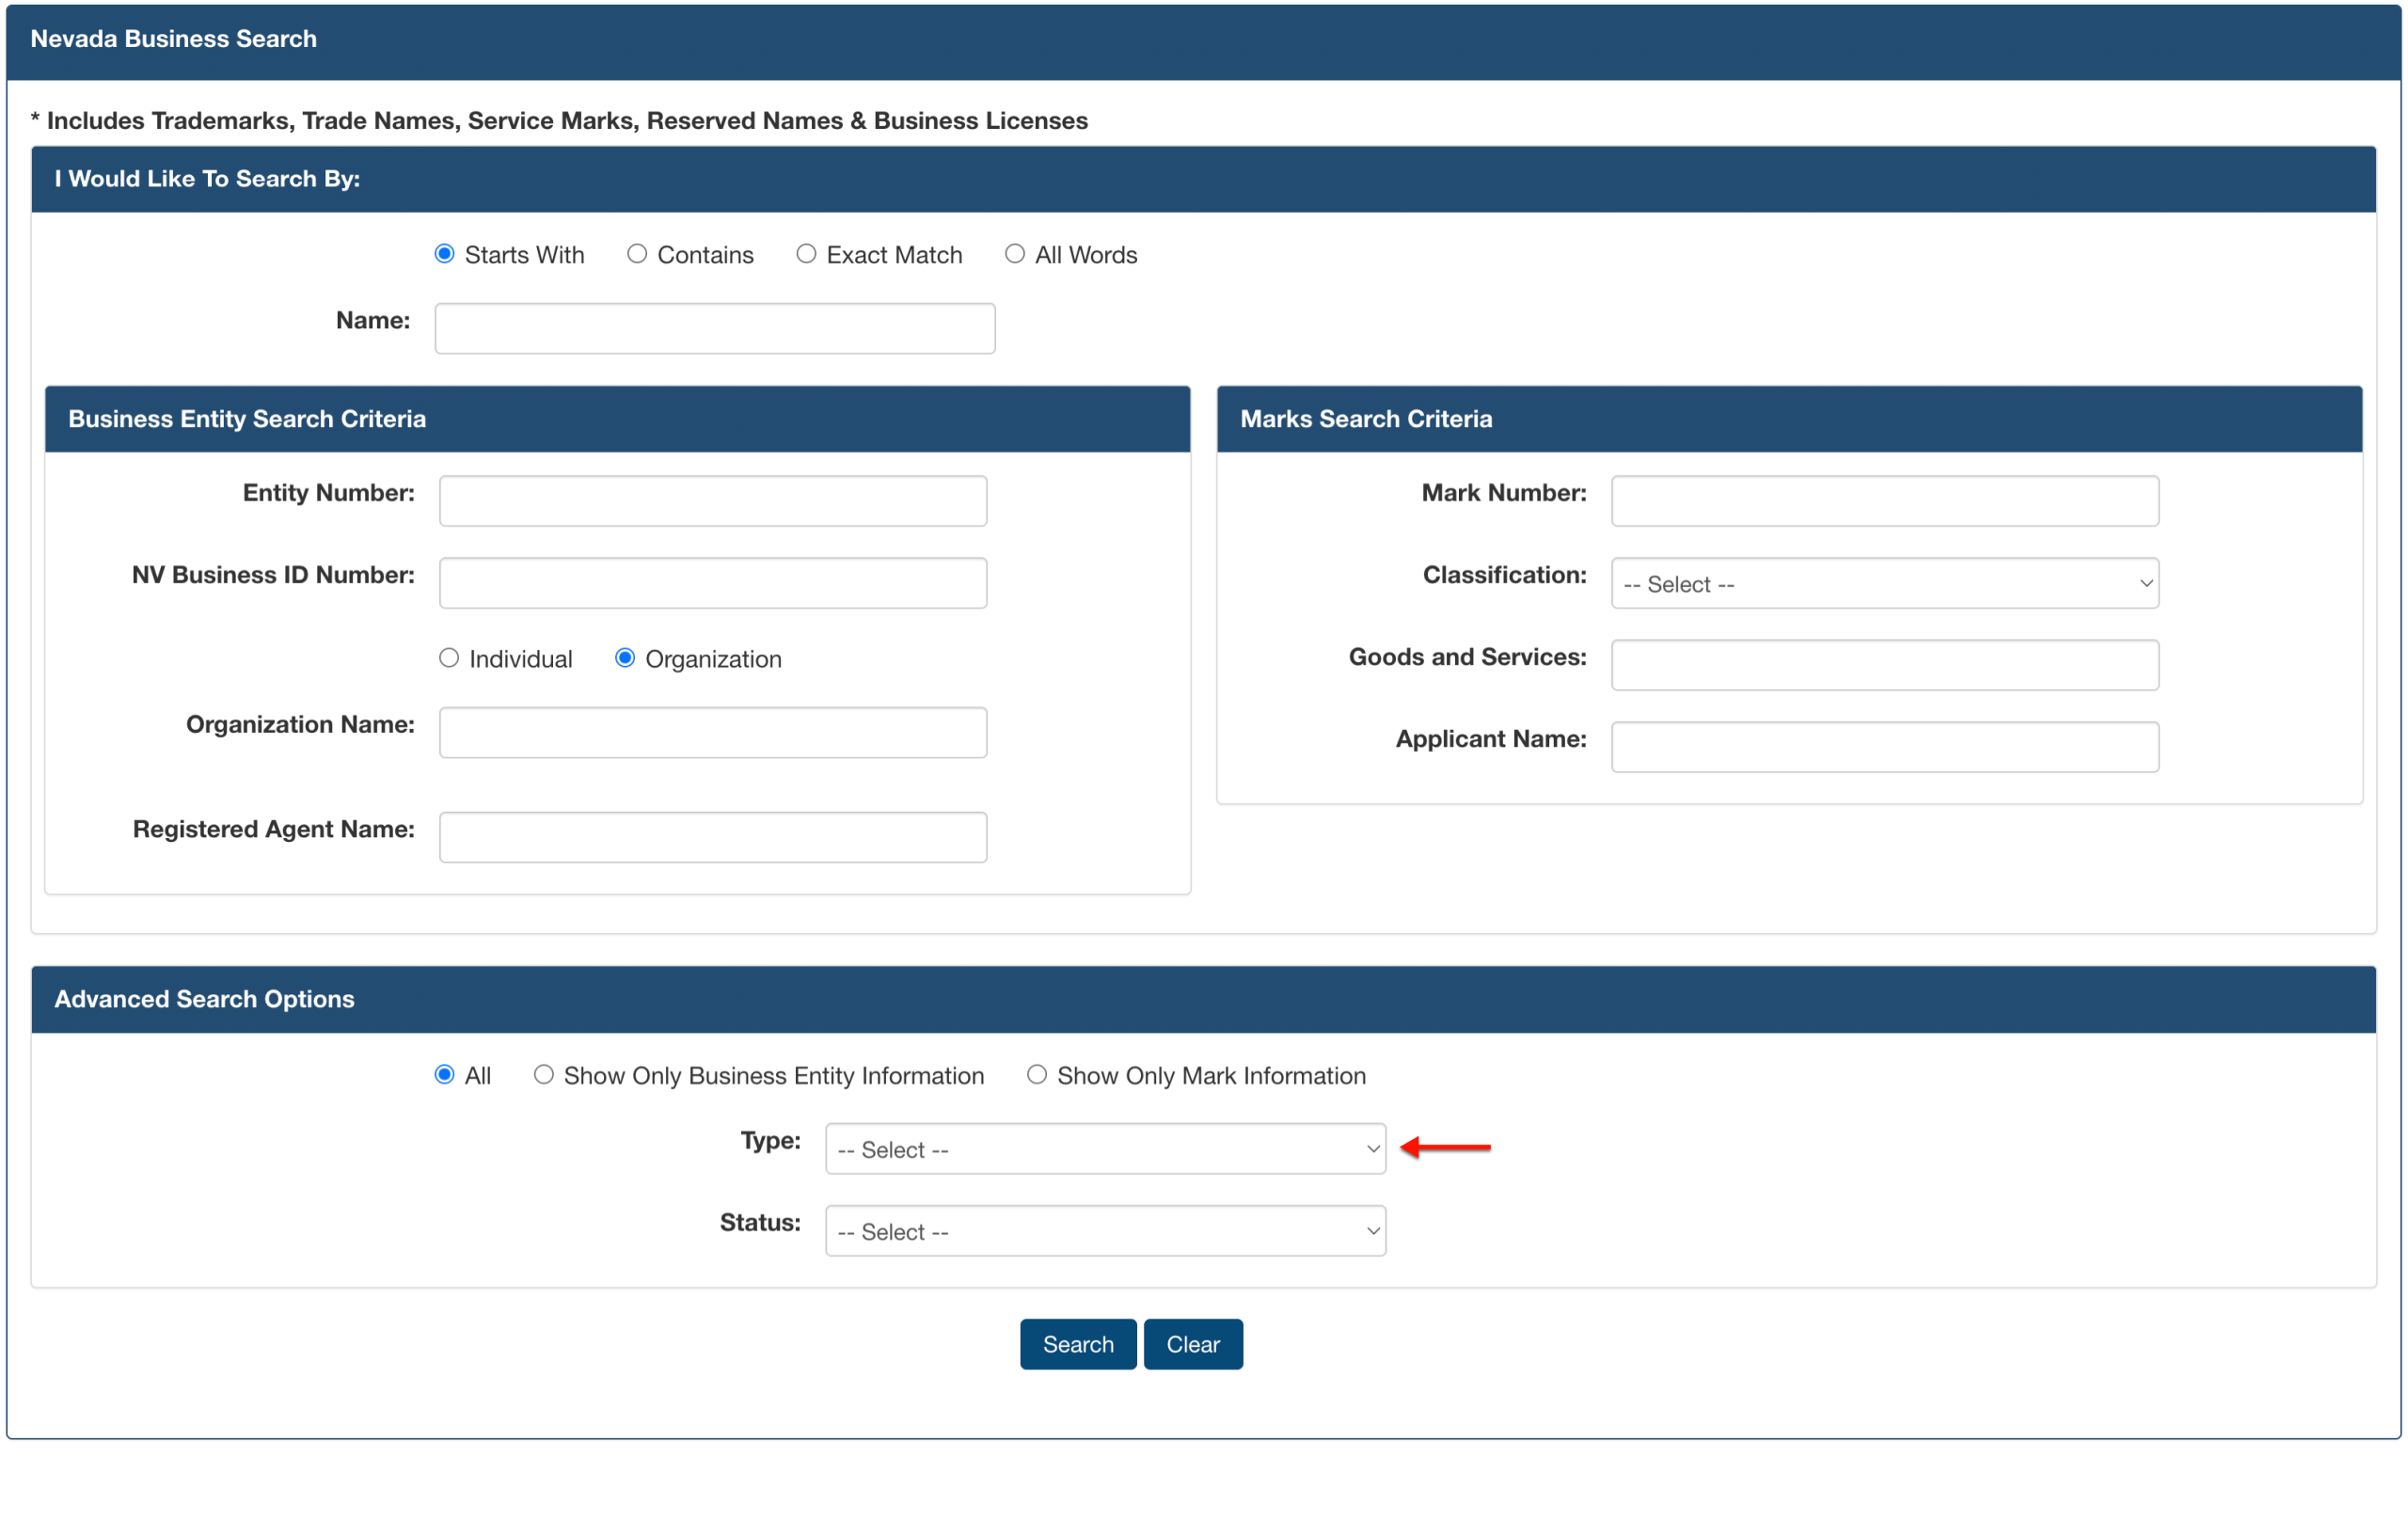
Use the drop-down menu (see image) for “Type” to more specifically describe the entity. If known, select the type of entity you wish to see in the results.
Step 18. Select the Entity Status
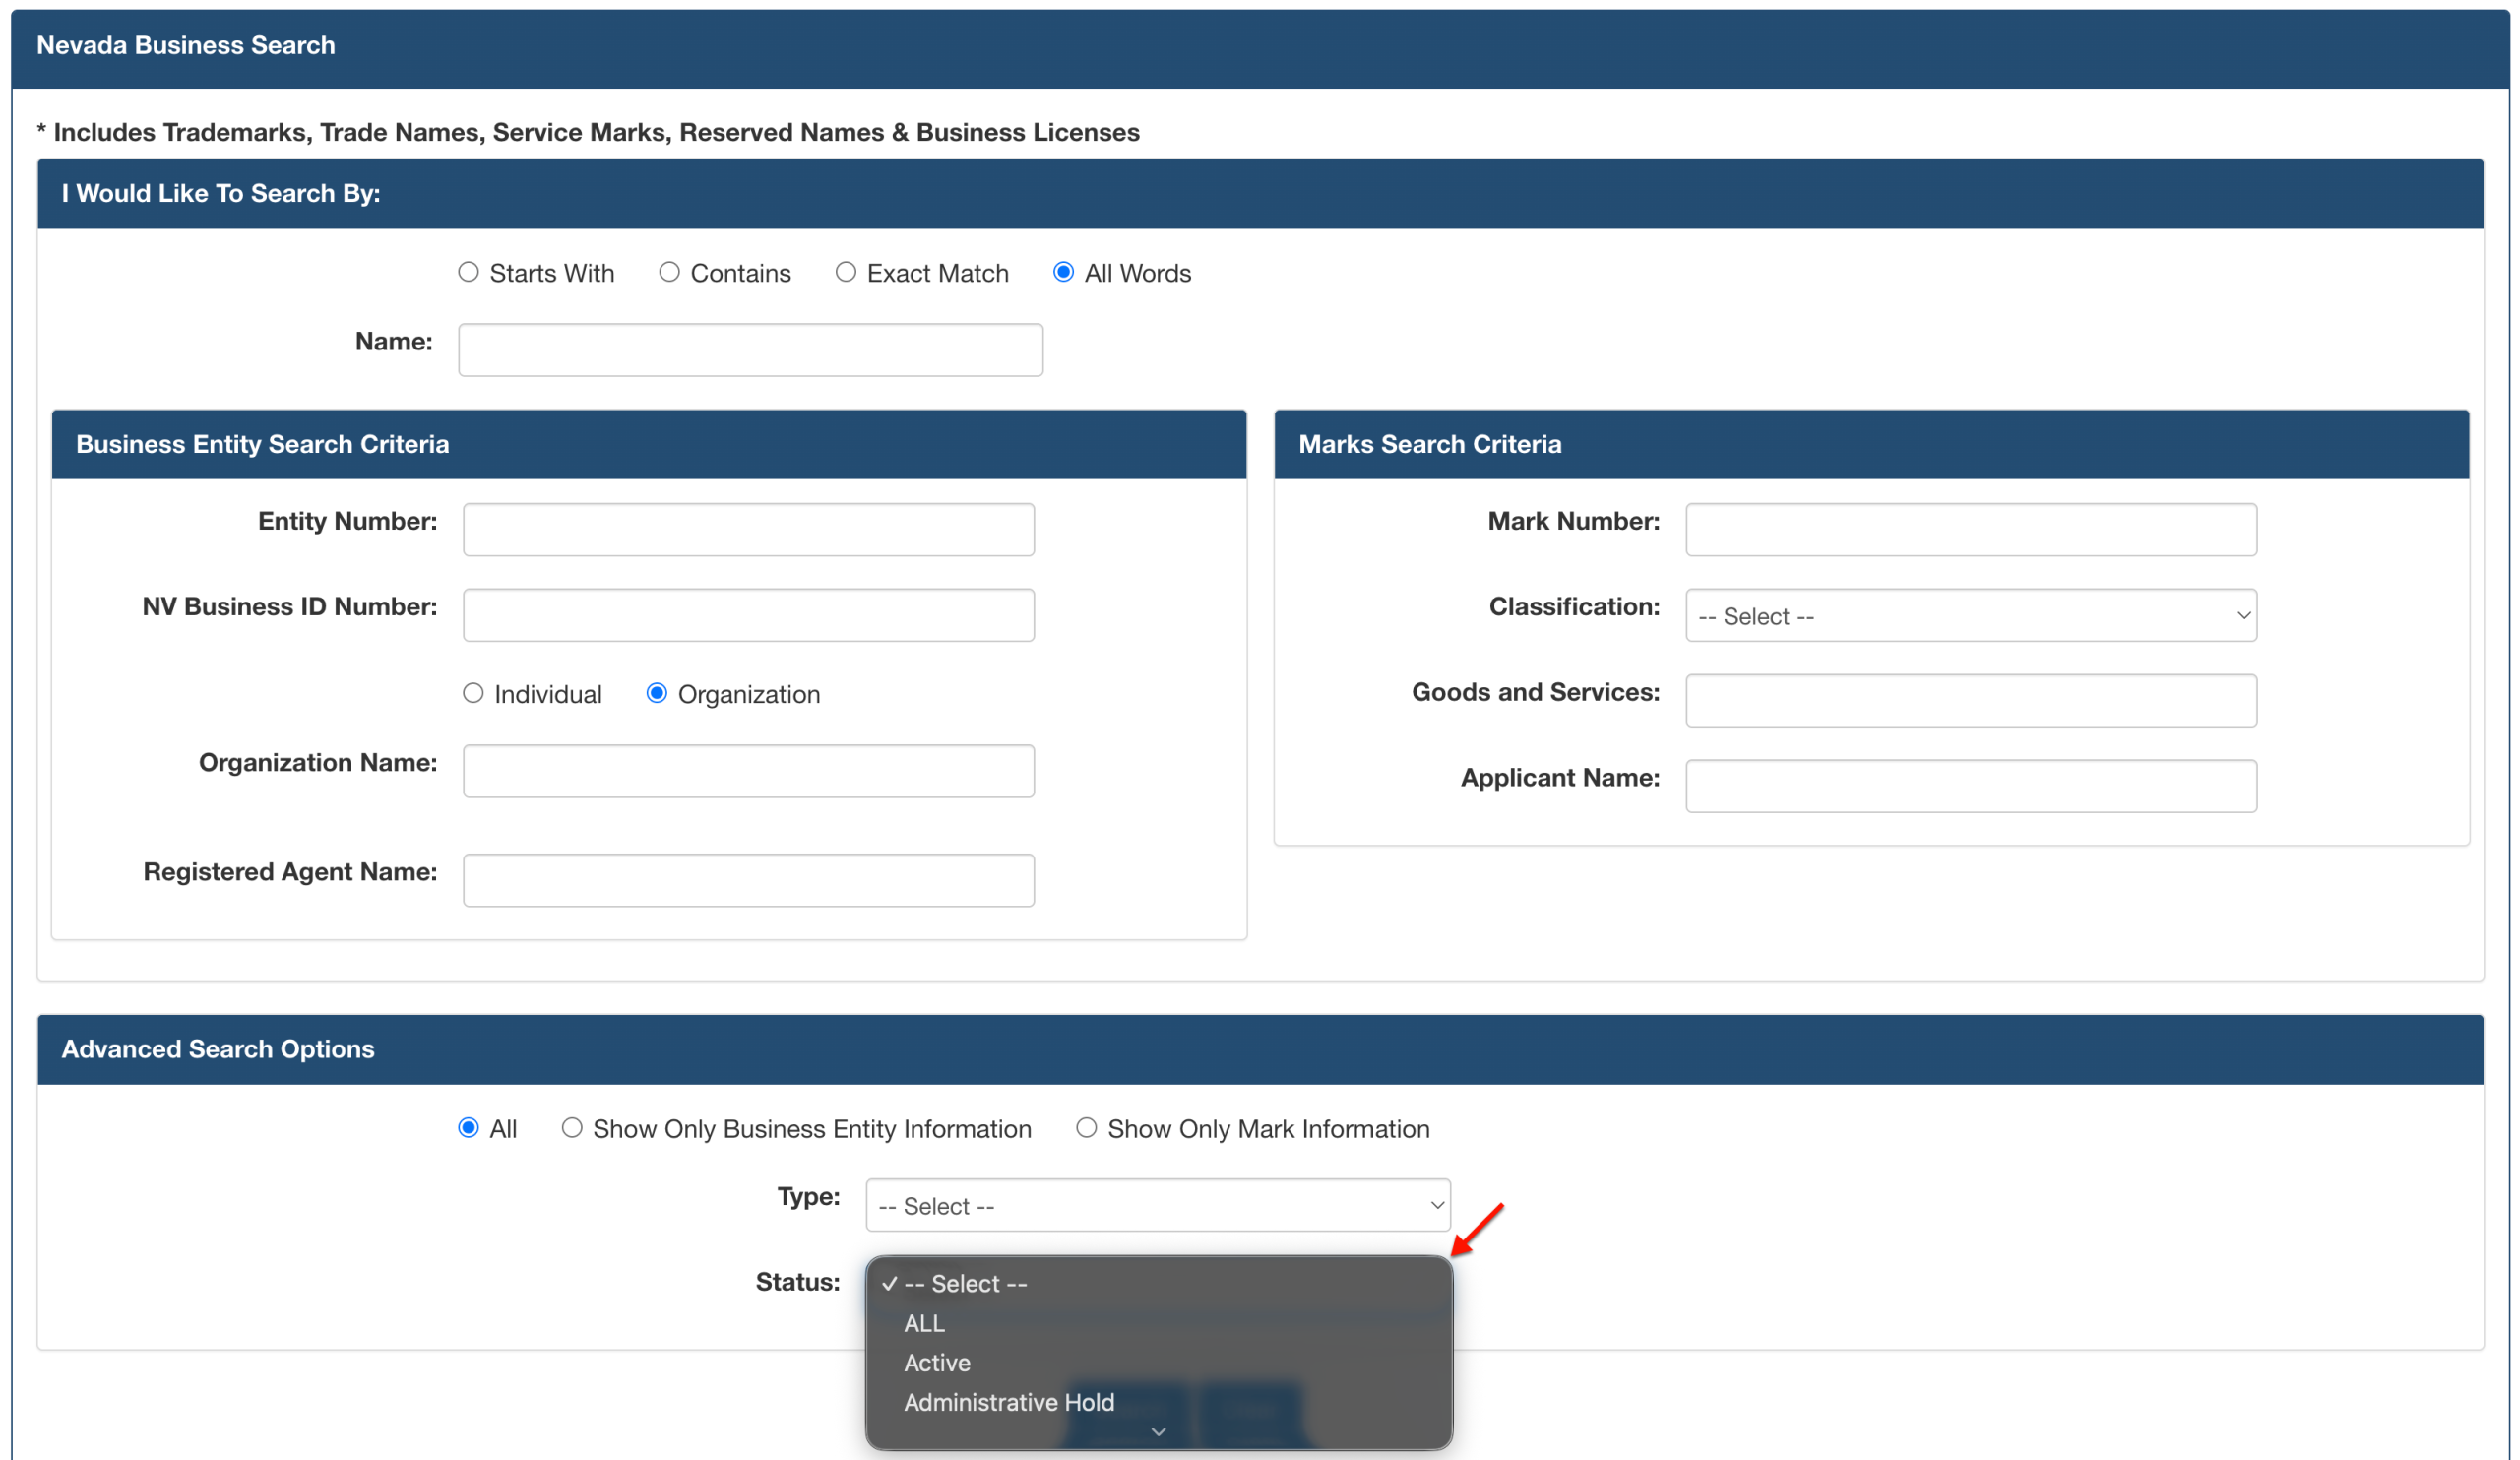
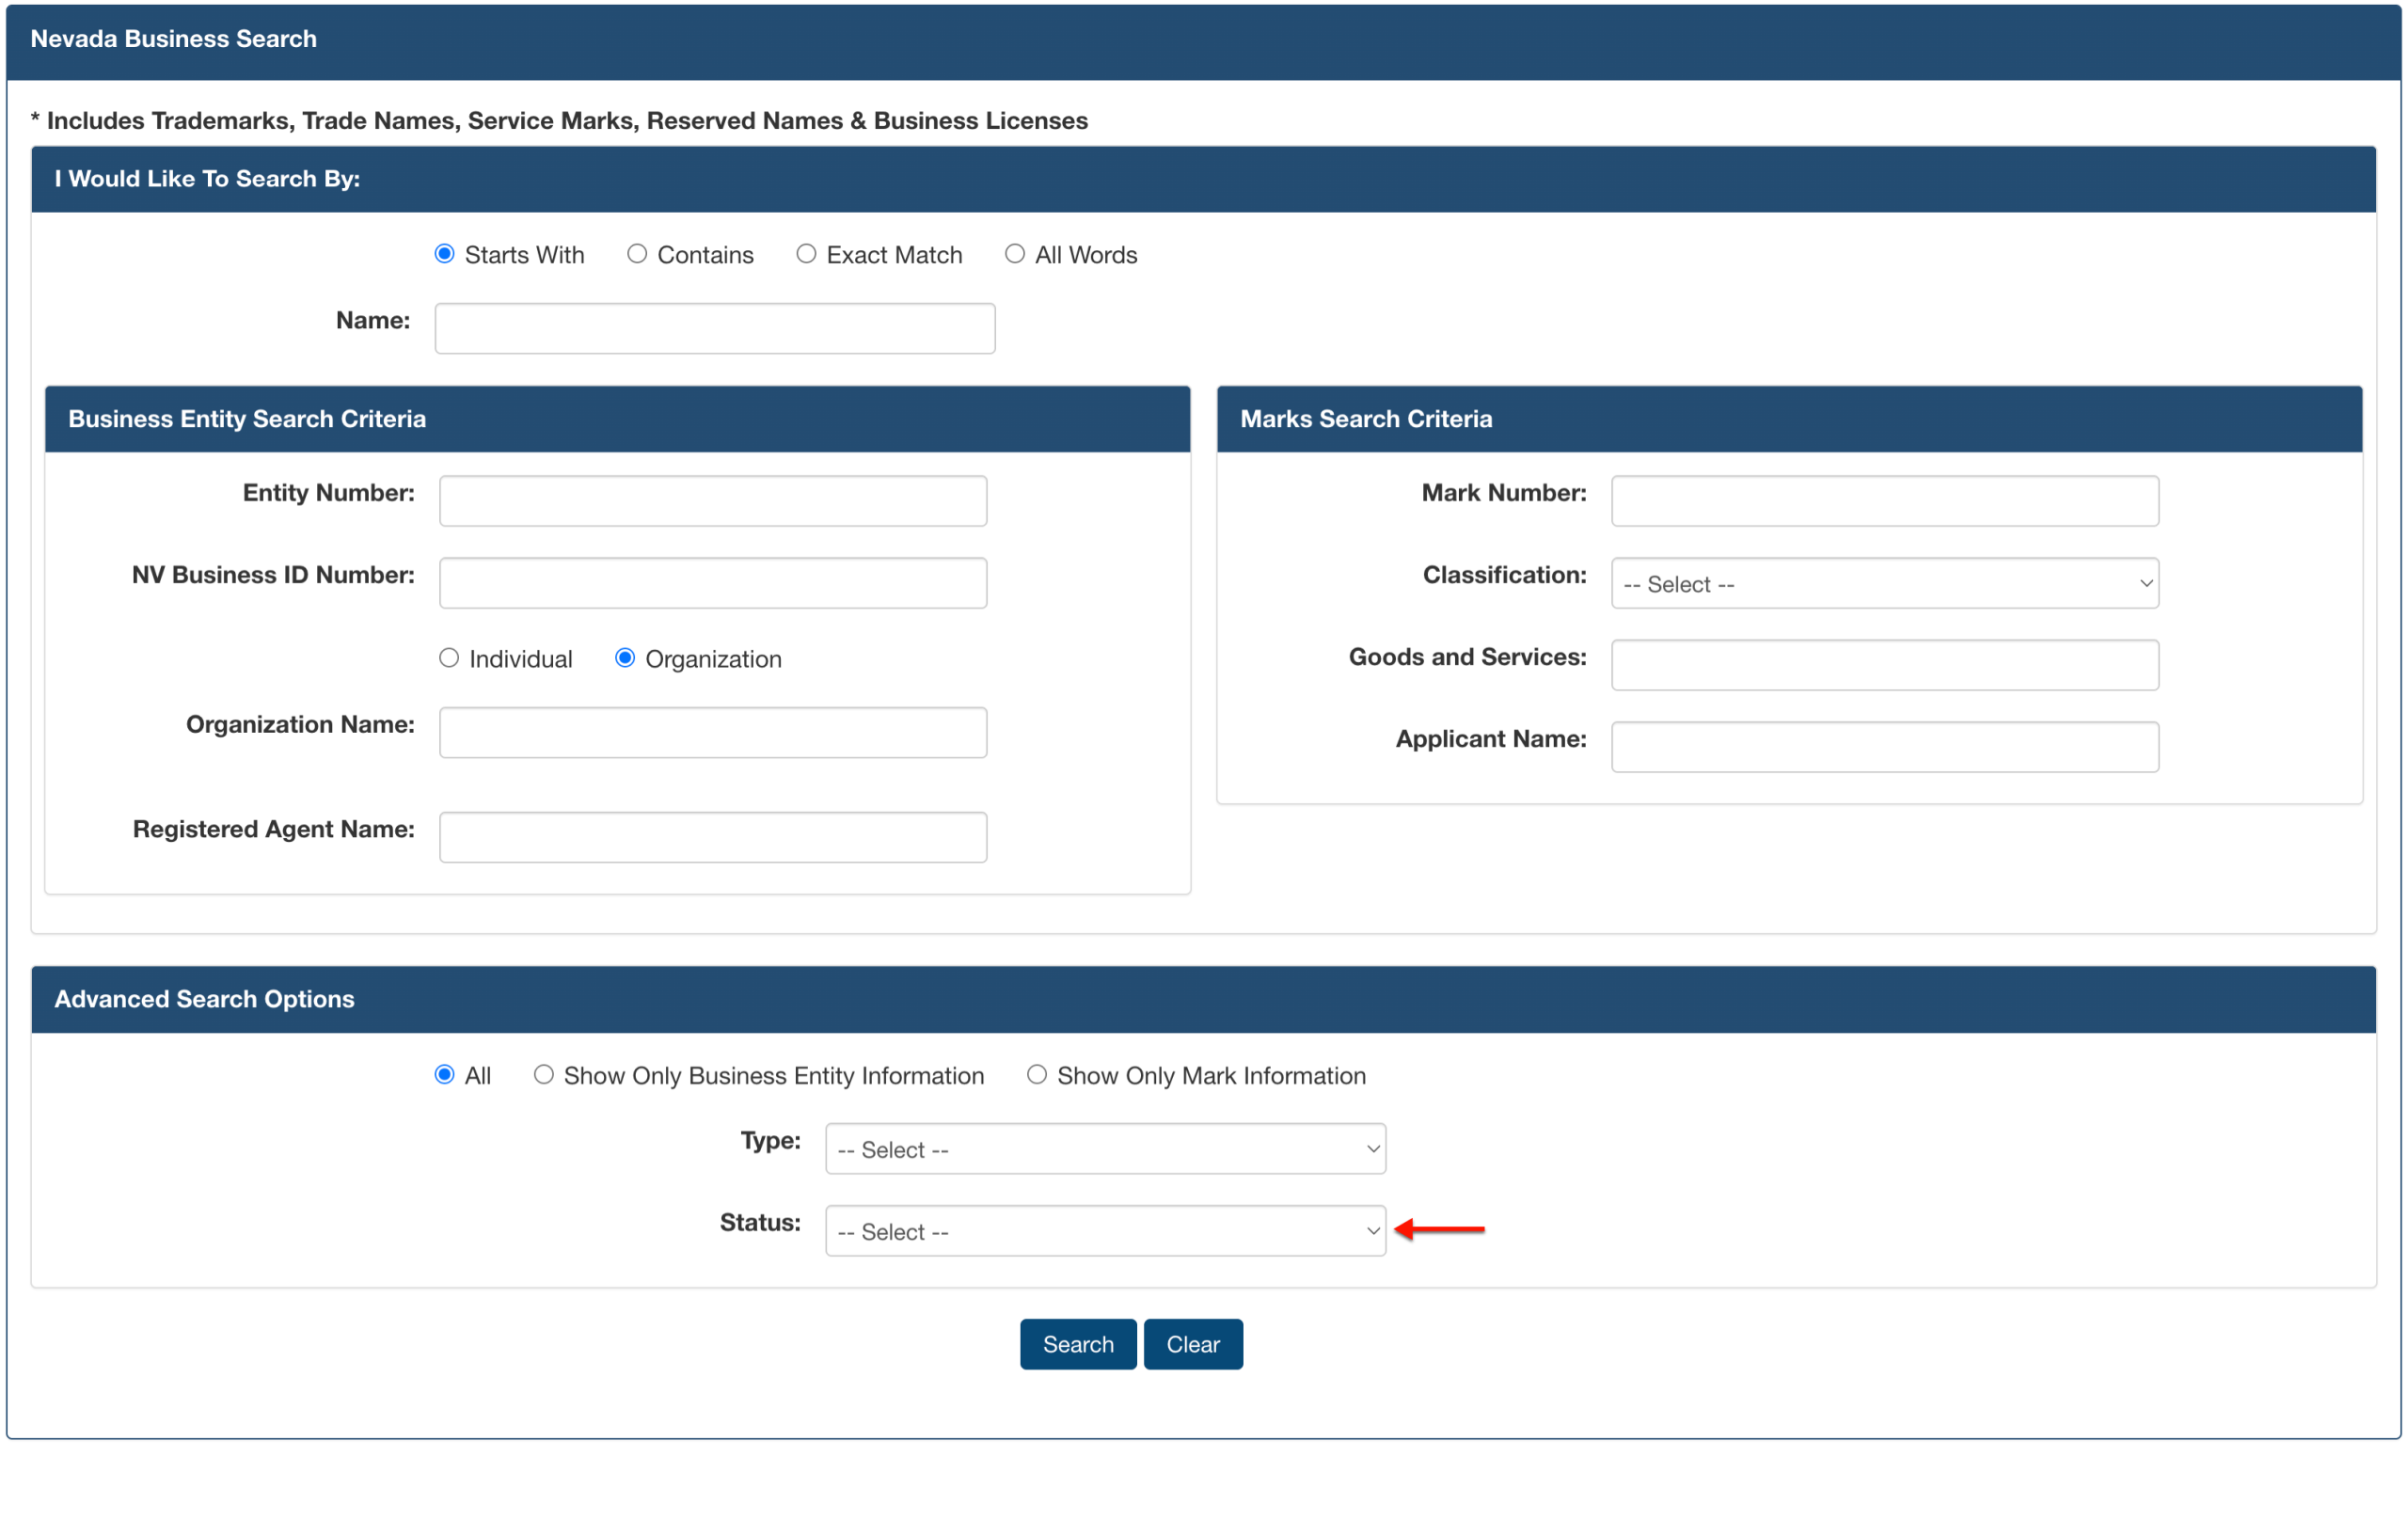
Locate the “Status” menu to exclude entities that do not have a specific status. Require the desired status by choosing it from the “Status” dropdown (see image).
Step 19. Prompt the Query
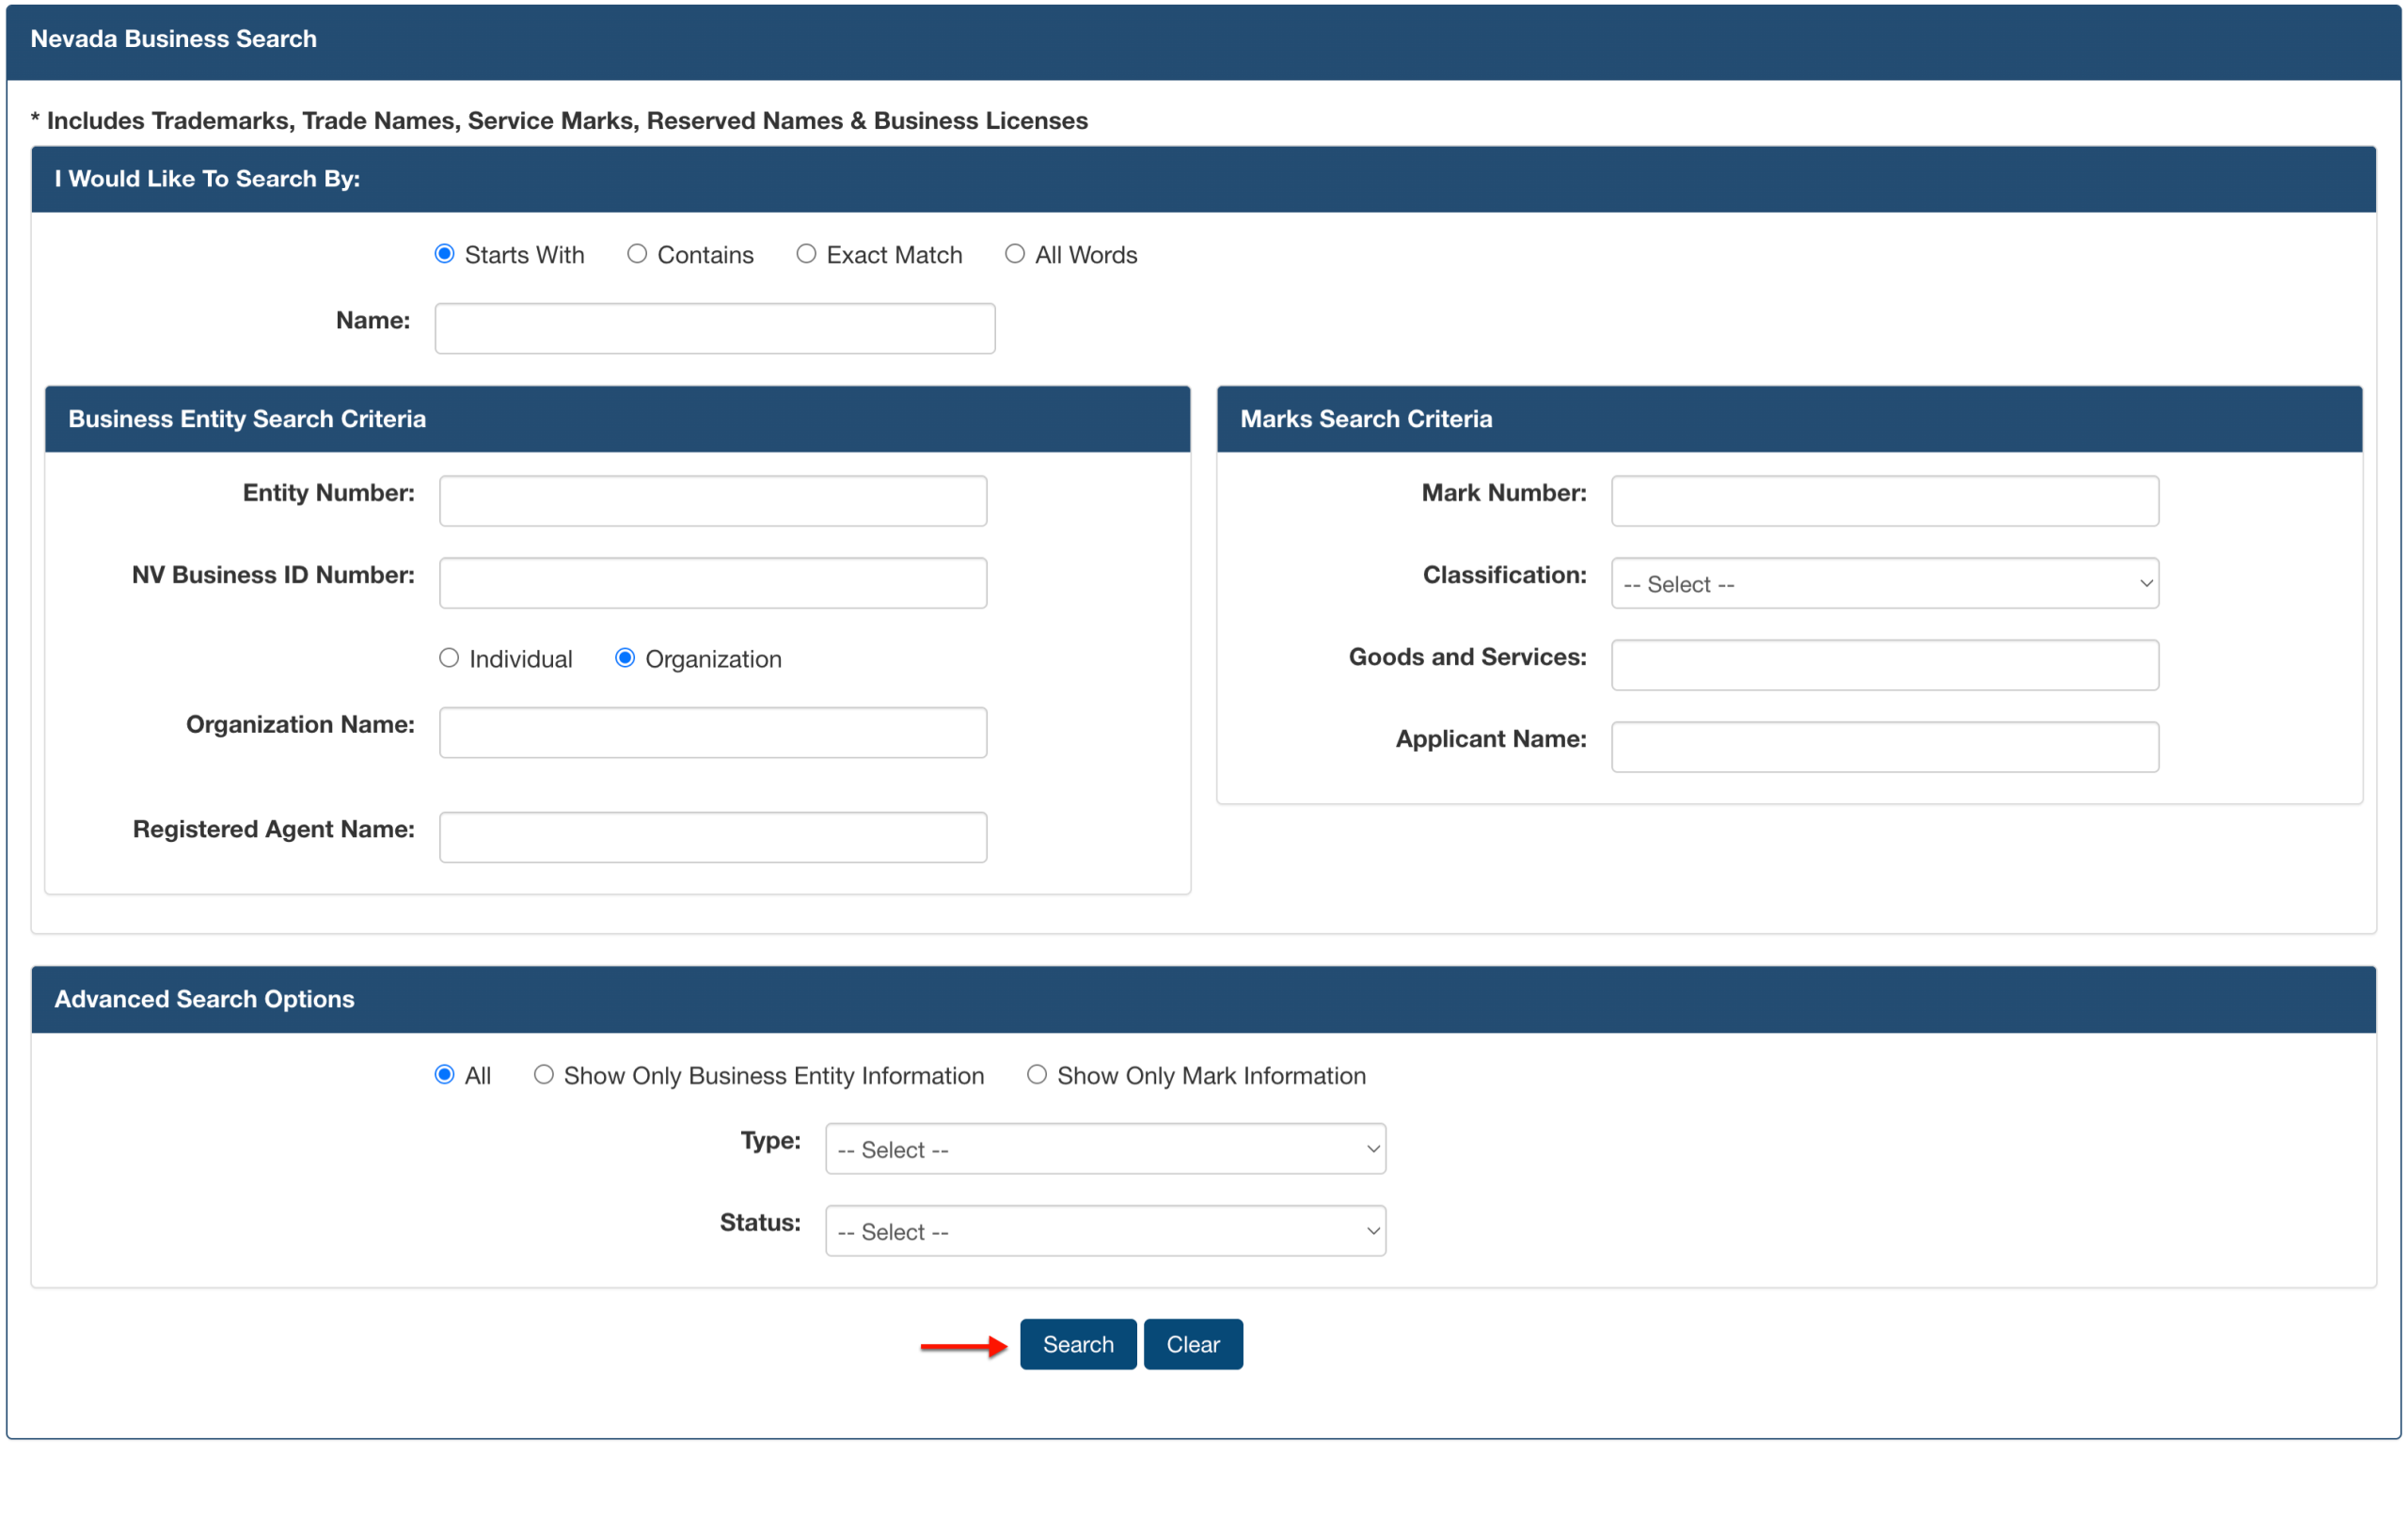
In order to initiate the query, find the “Search” button. Choose this button with the mouse to select it. This displays a table of results of no more than 500 matches.
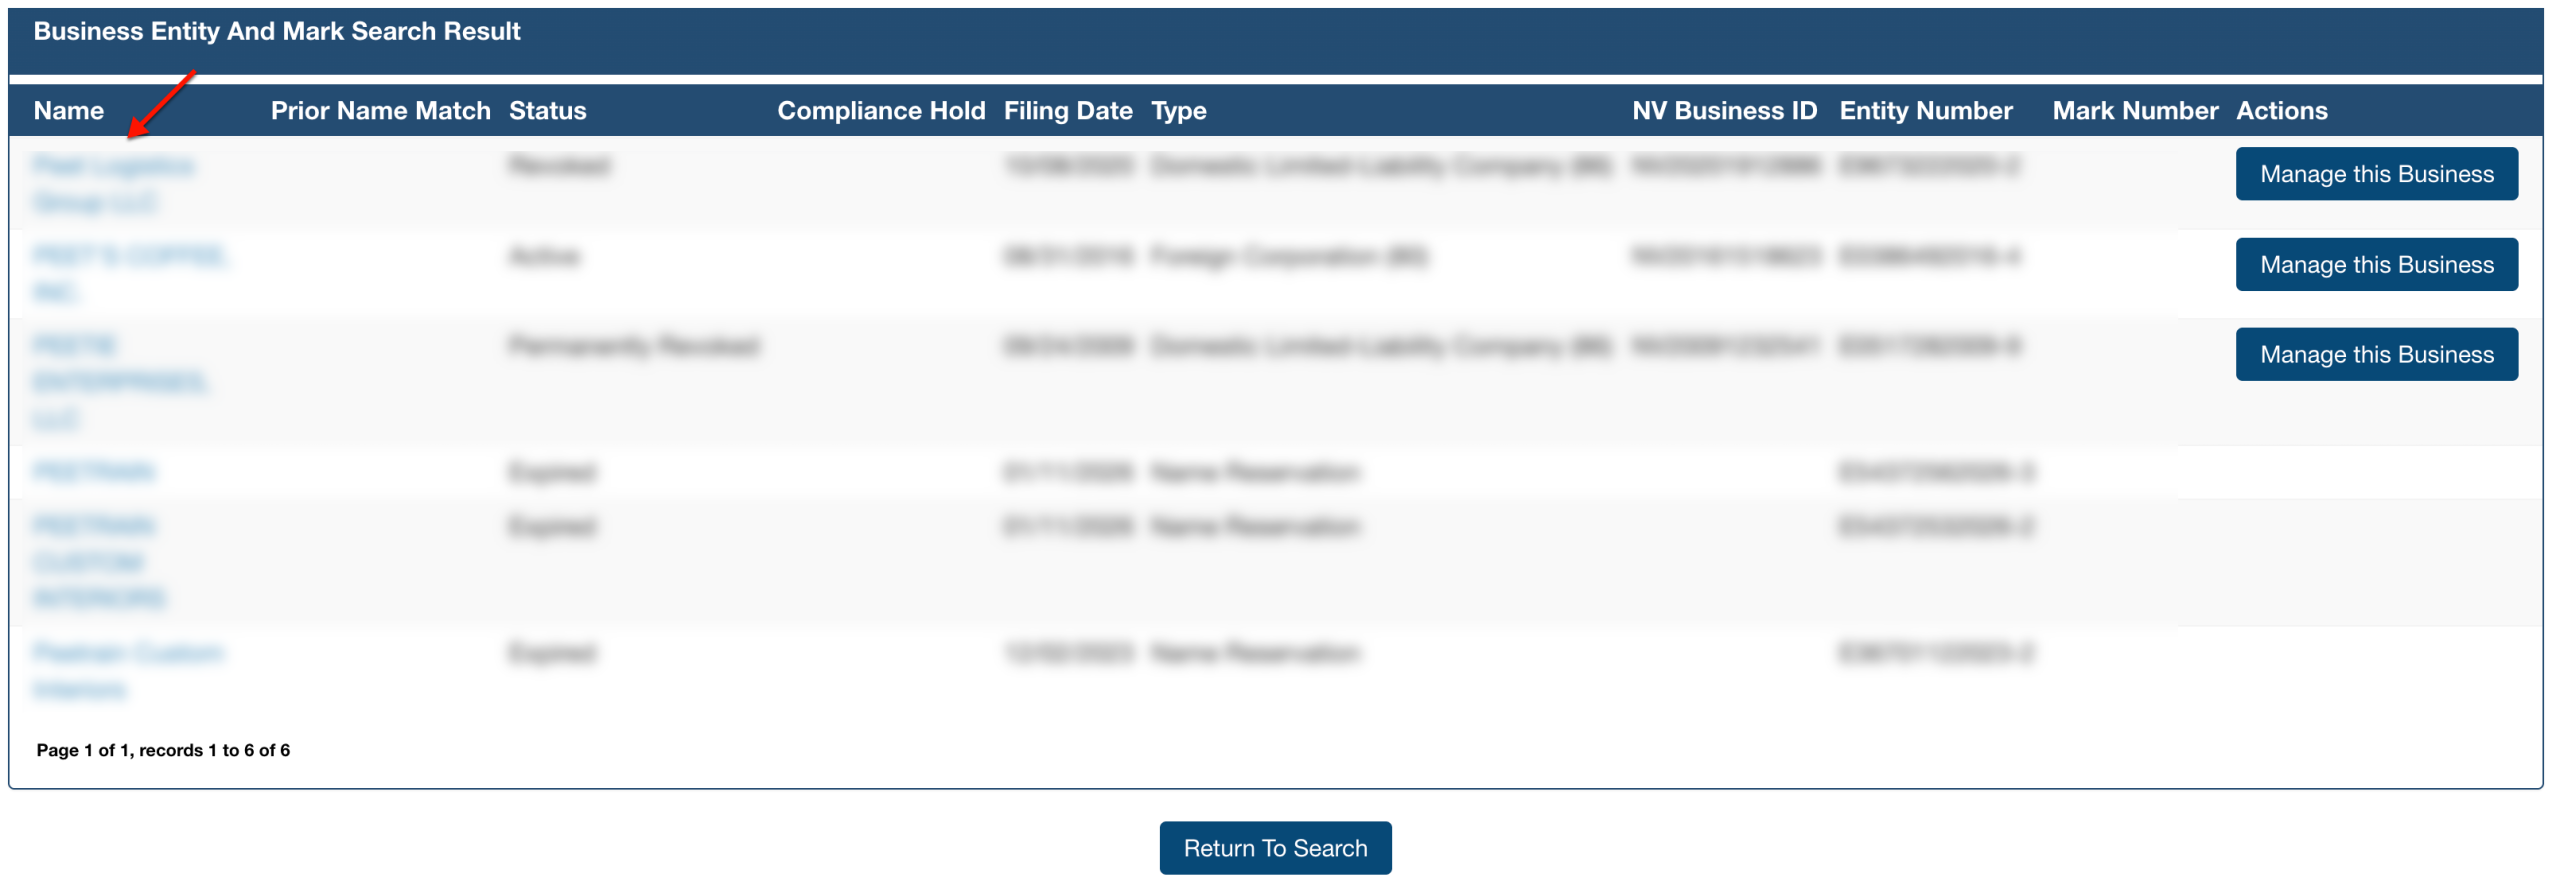
Step 20. Scroll through Table Results
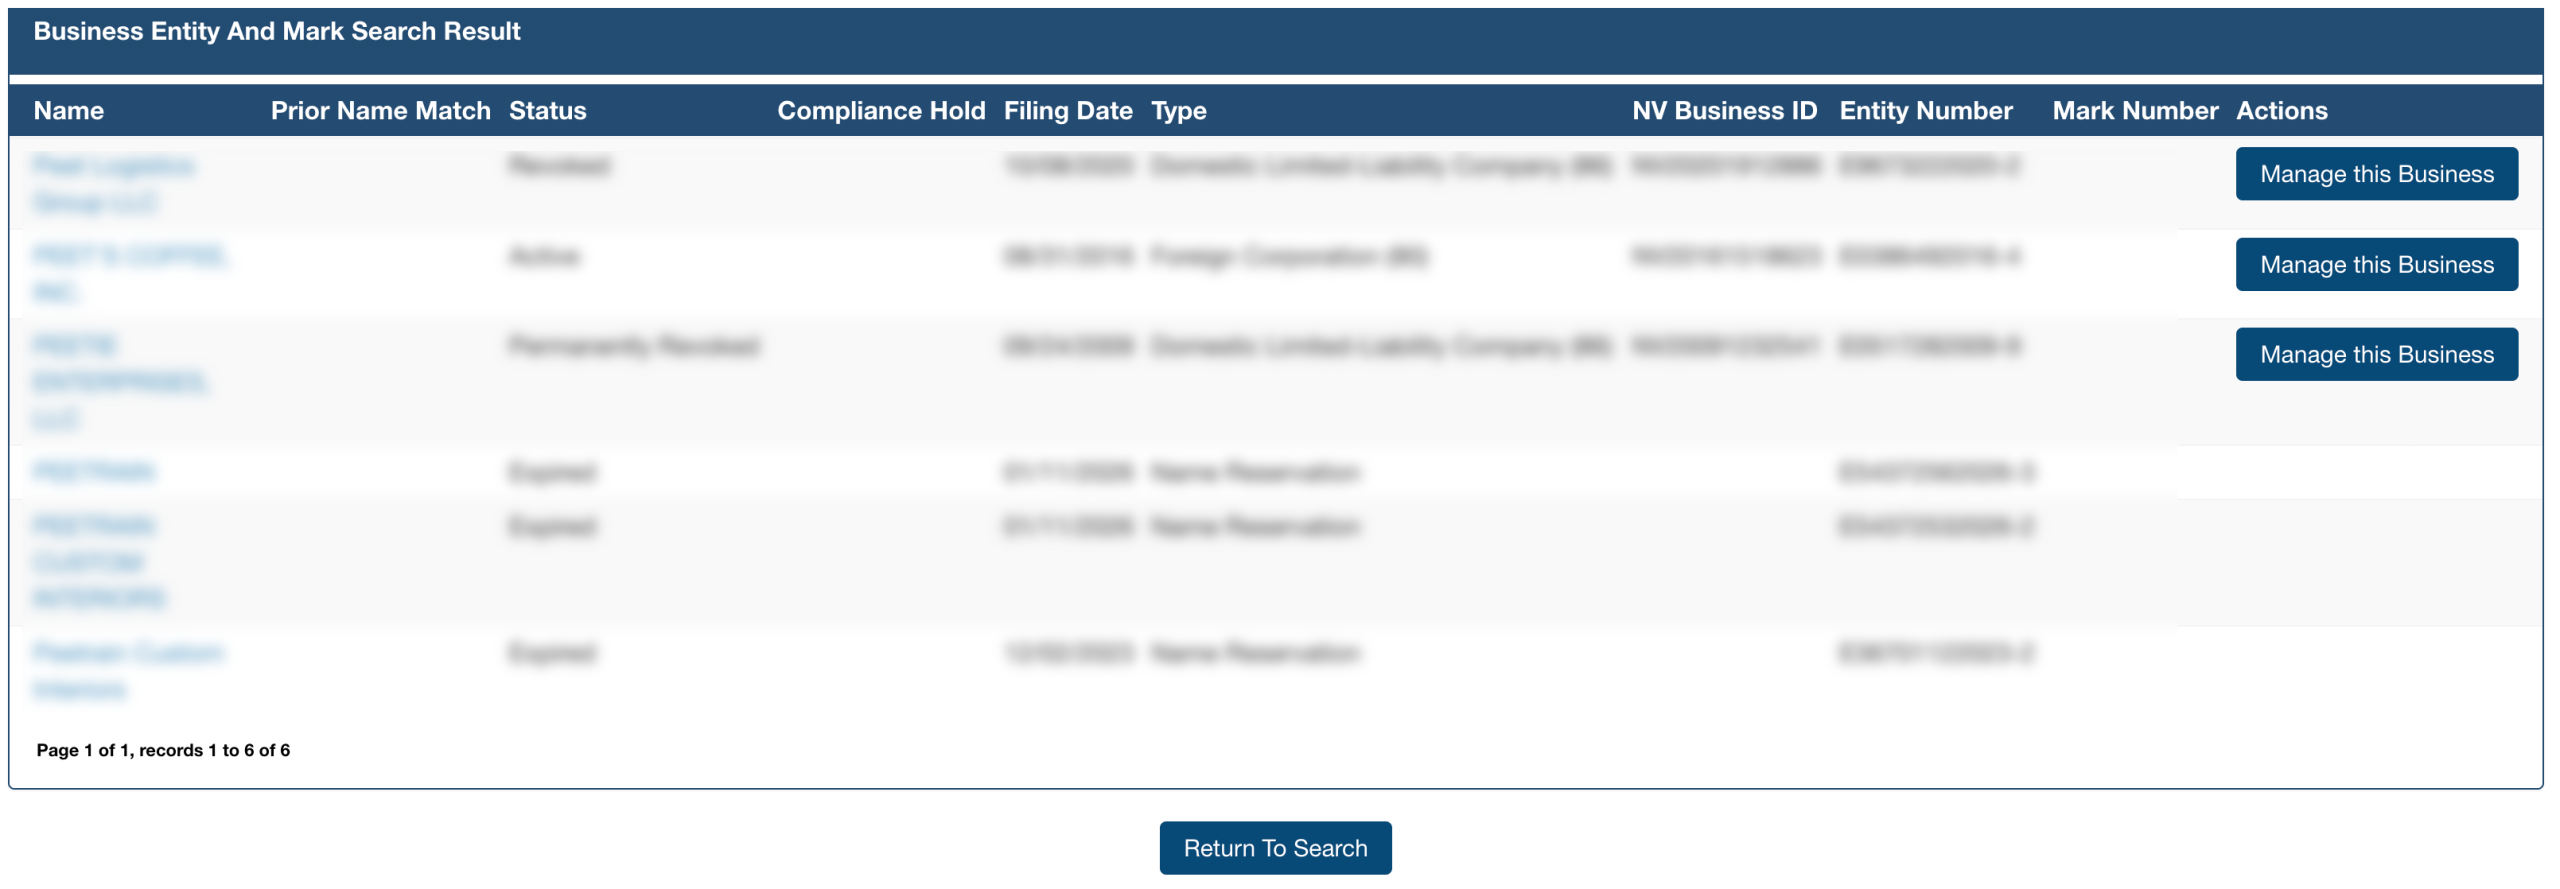
Upon prompting the search, the query will use the information above to locate all matching entities. Review the information in this table to find the entity.
- Name
- Prior Name Match Status
- Compliance Hold
- Filing Date
- Type
- NV Business ID
- Entity Number
- Mark Number
- Actions
Step 21. Access the Nevada Entity Details
After reviewing a record’s information and confirming an entity to investigate, locate the “Name” column. Select the entity’s name to go to its information page.
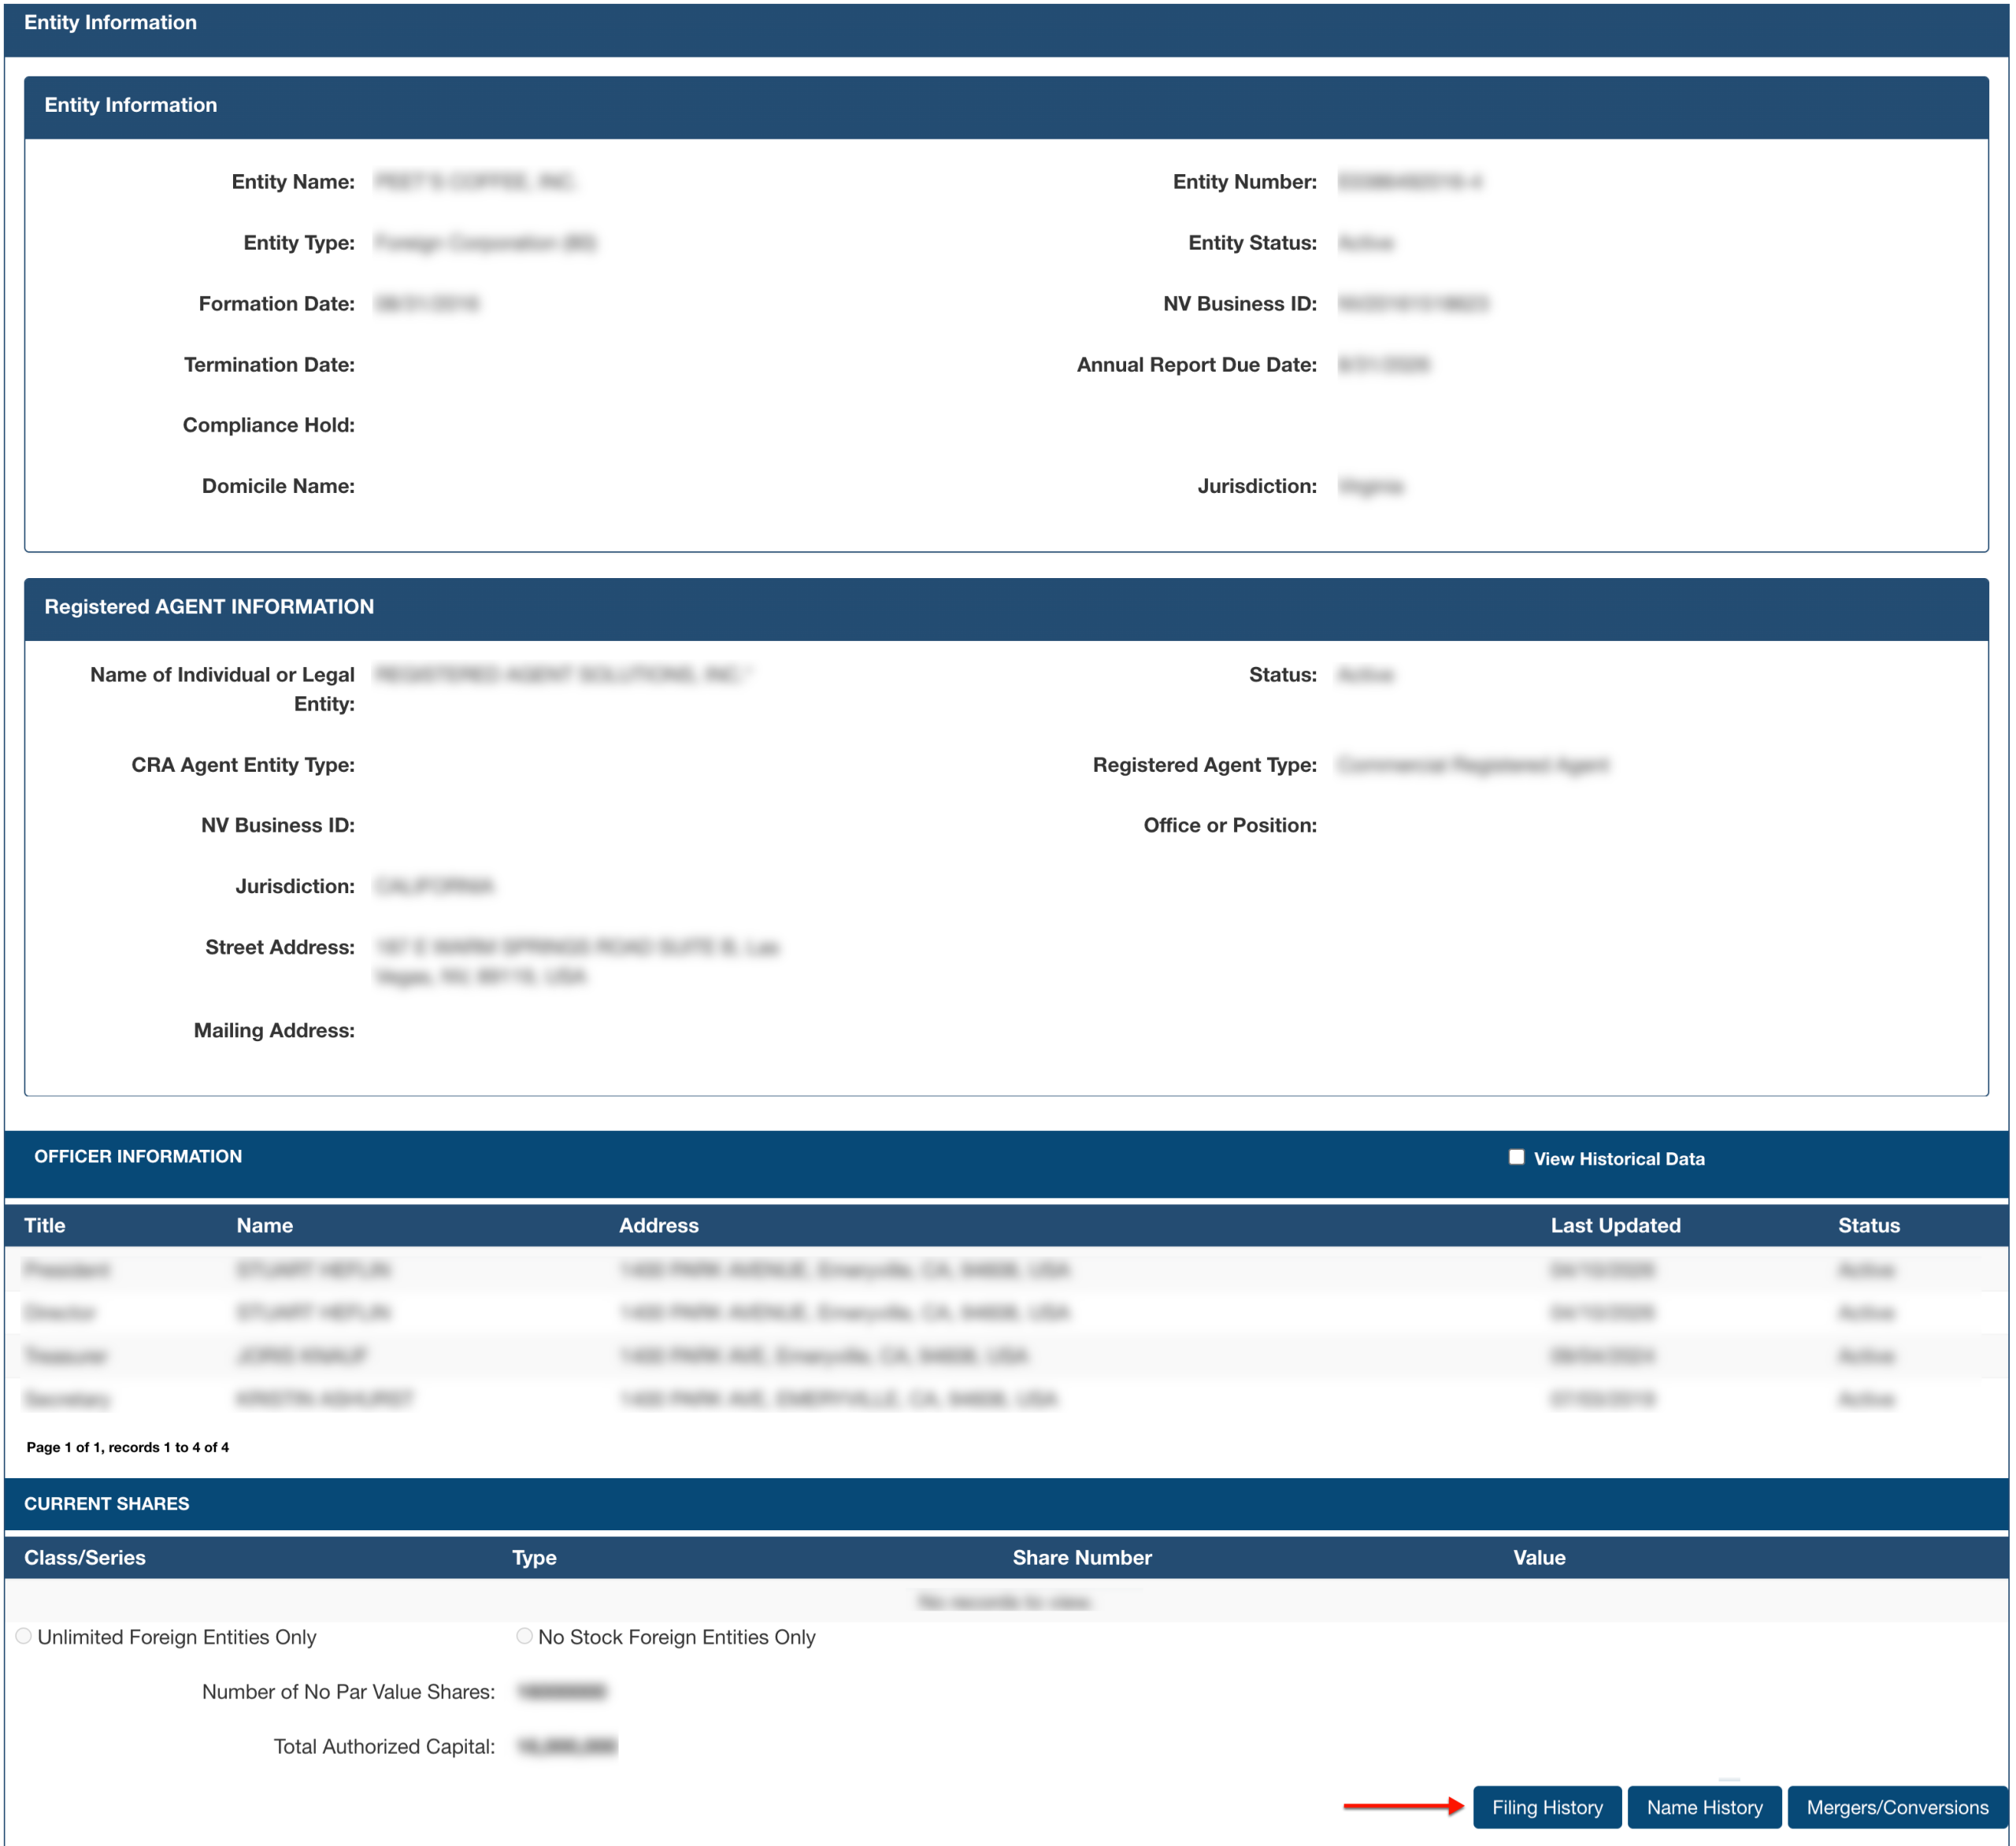
Step 22. Review Information
Read the information the state has on file for this entity. Select “Filing History” to continue to the next step if this is the correct entity; otherwise, return to step 1.
- Entity Information
- Entity Name
- Entity Number
- Entity Type
- Entity Status
- Formation Date
- NV Business ID
- Termination Date
- Annual Report Due Date
- Compliance Hold
- Domicile Name
- Jurisdiction
- Registered Agent Information
- Name of Individual or Legal Entity
- Status
- CRA Agent Entity Type
- Registered Agent Type
- NV Business ID
- Office or Position
- Jurisdiction
- Street Address
- Mailing Address
- Officer Information
- Title
- Name
- Address
- Last Updated
- Status
- Current Shares
- Class/Series
- Type
- Share Number
- Value
- Unlimited Foreign Entities Only
- No Stock Foreign Entities Only
- Number of No Par Value Shares
- Total Authorized Capital
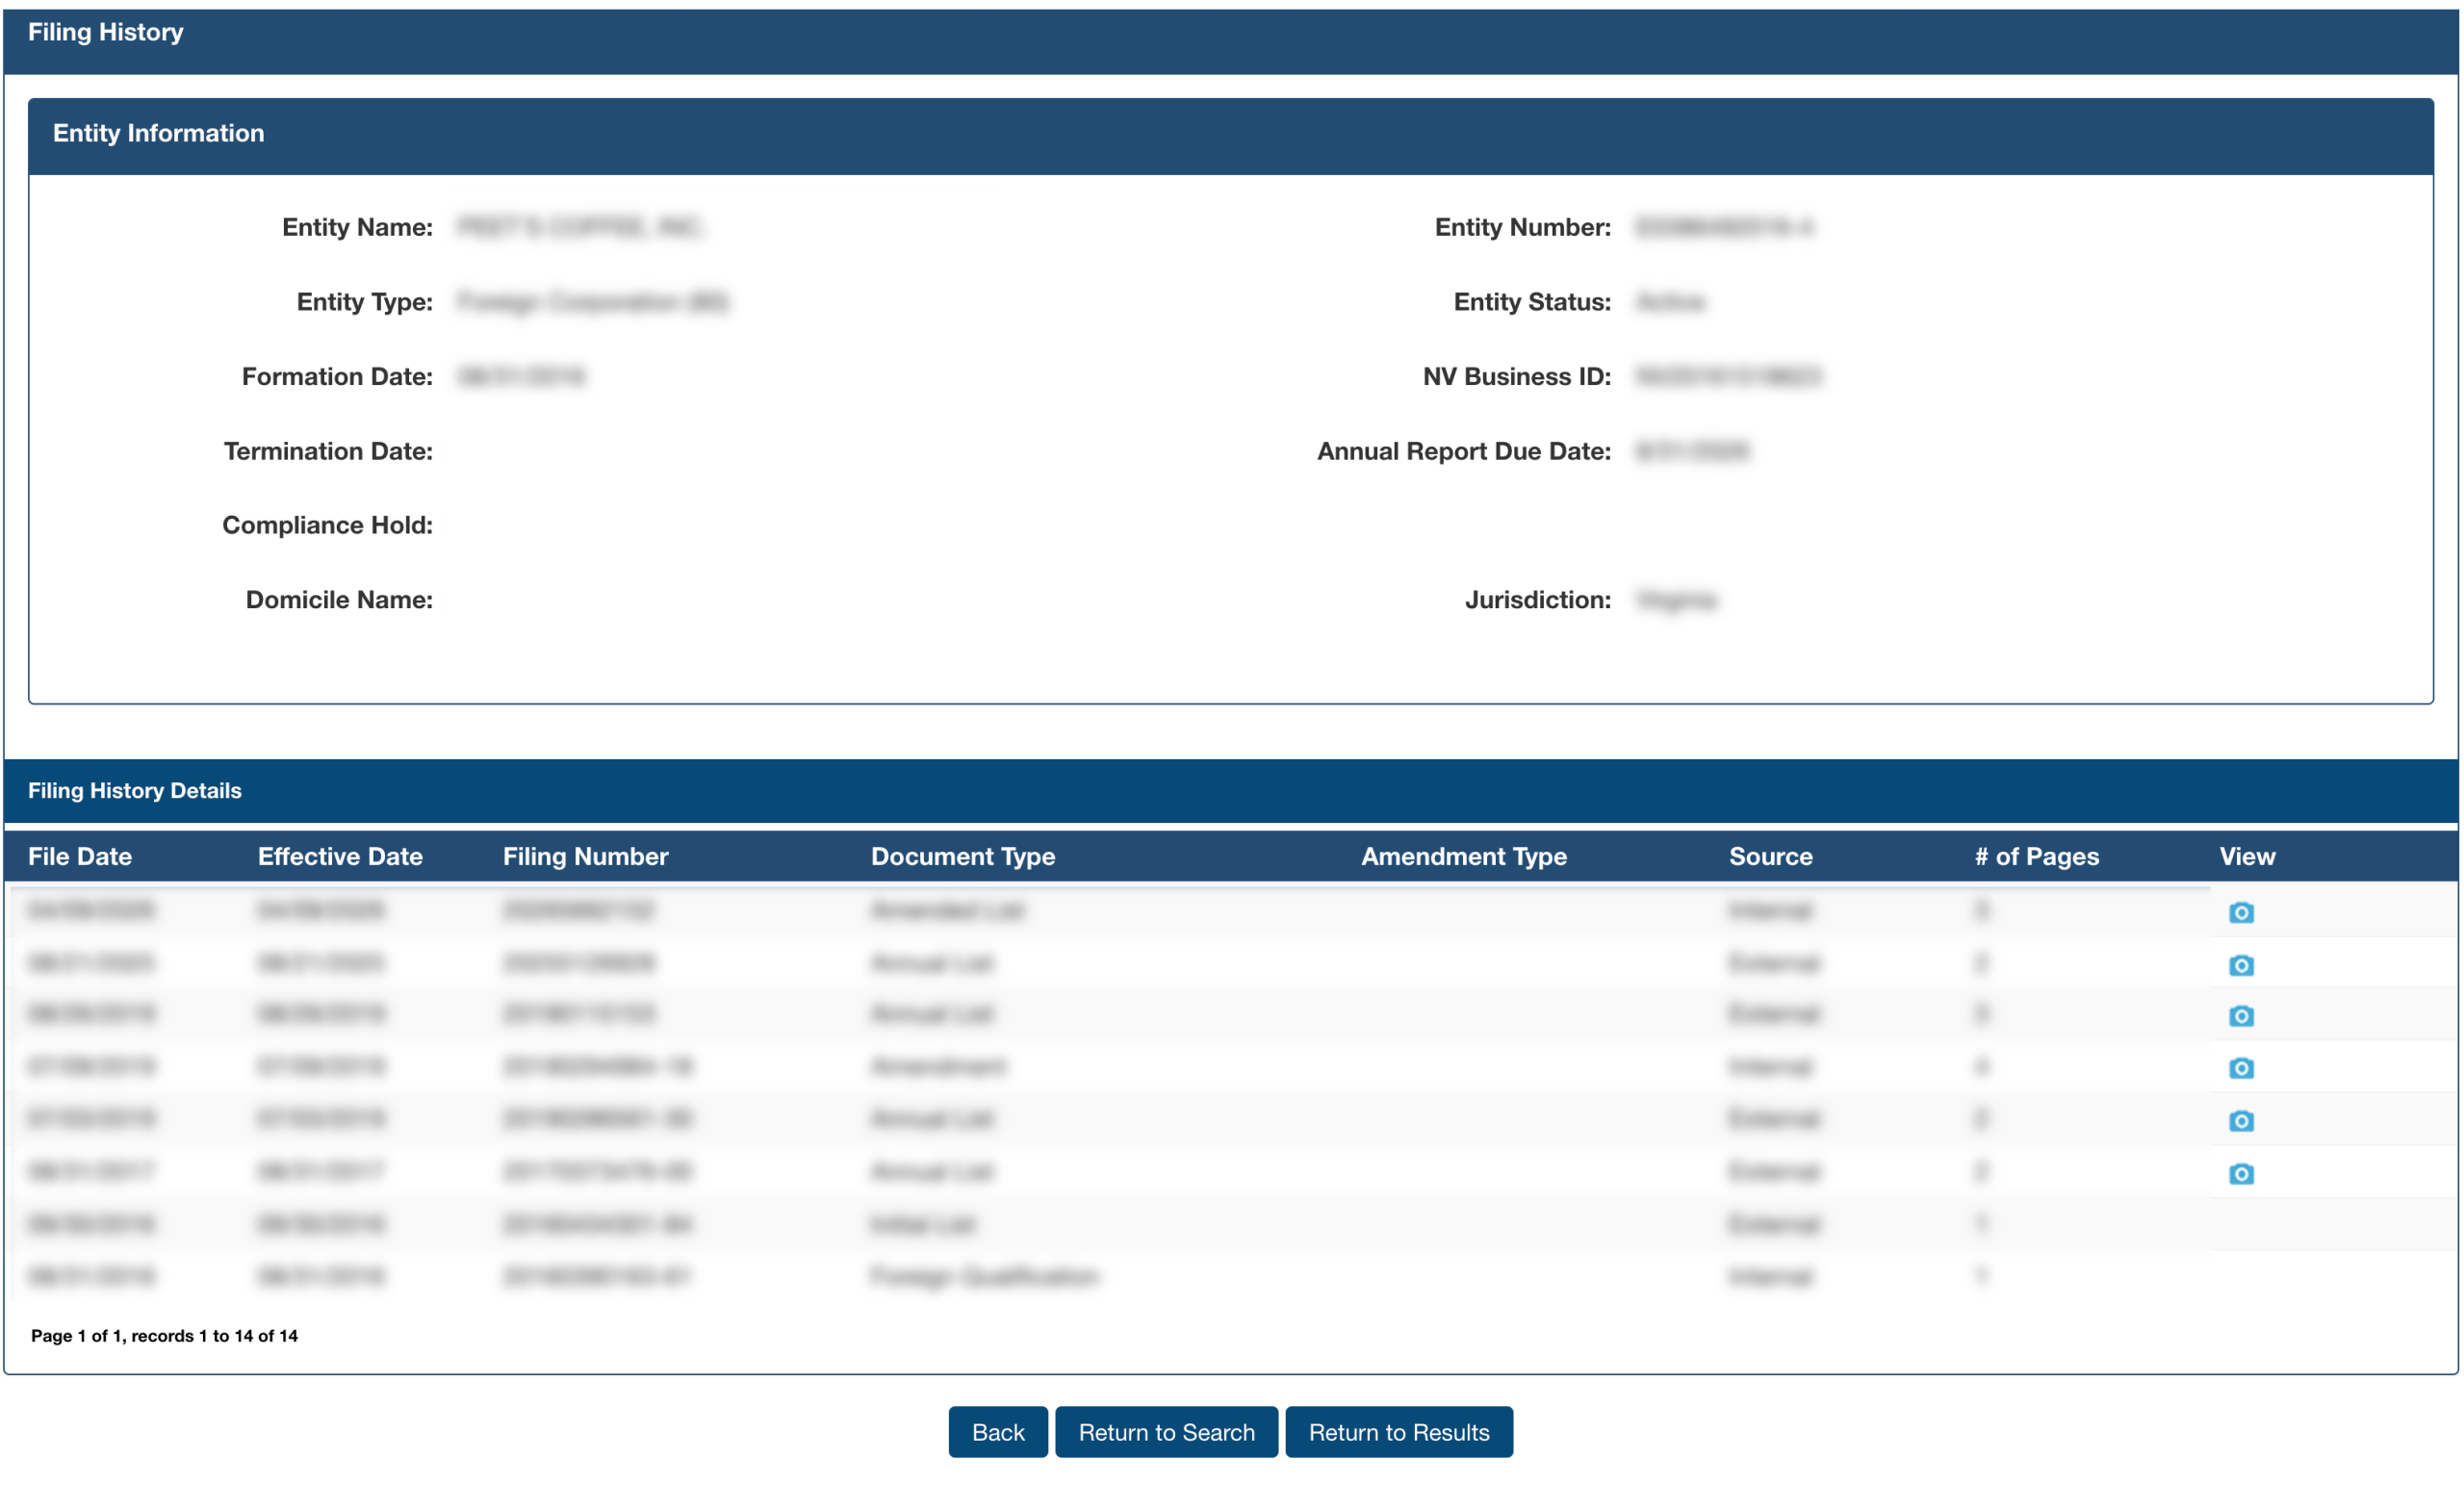
Step 23. View Filing History
Examine the filing history table. Identify each of the filings in the first column using the columns that follow.
- File Date
- Effective Date
- Filing Number
- Document Type
- Amendment Type
- Source
- # of Pages
- View
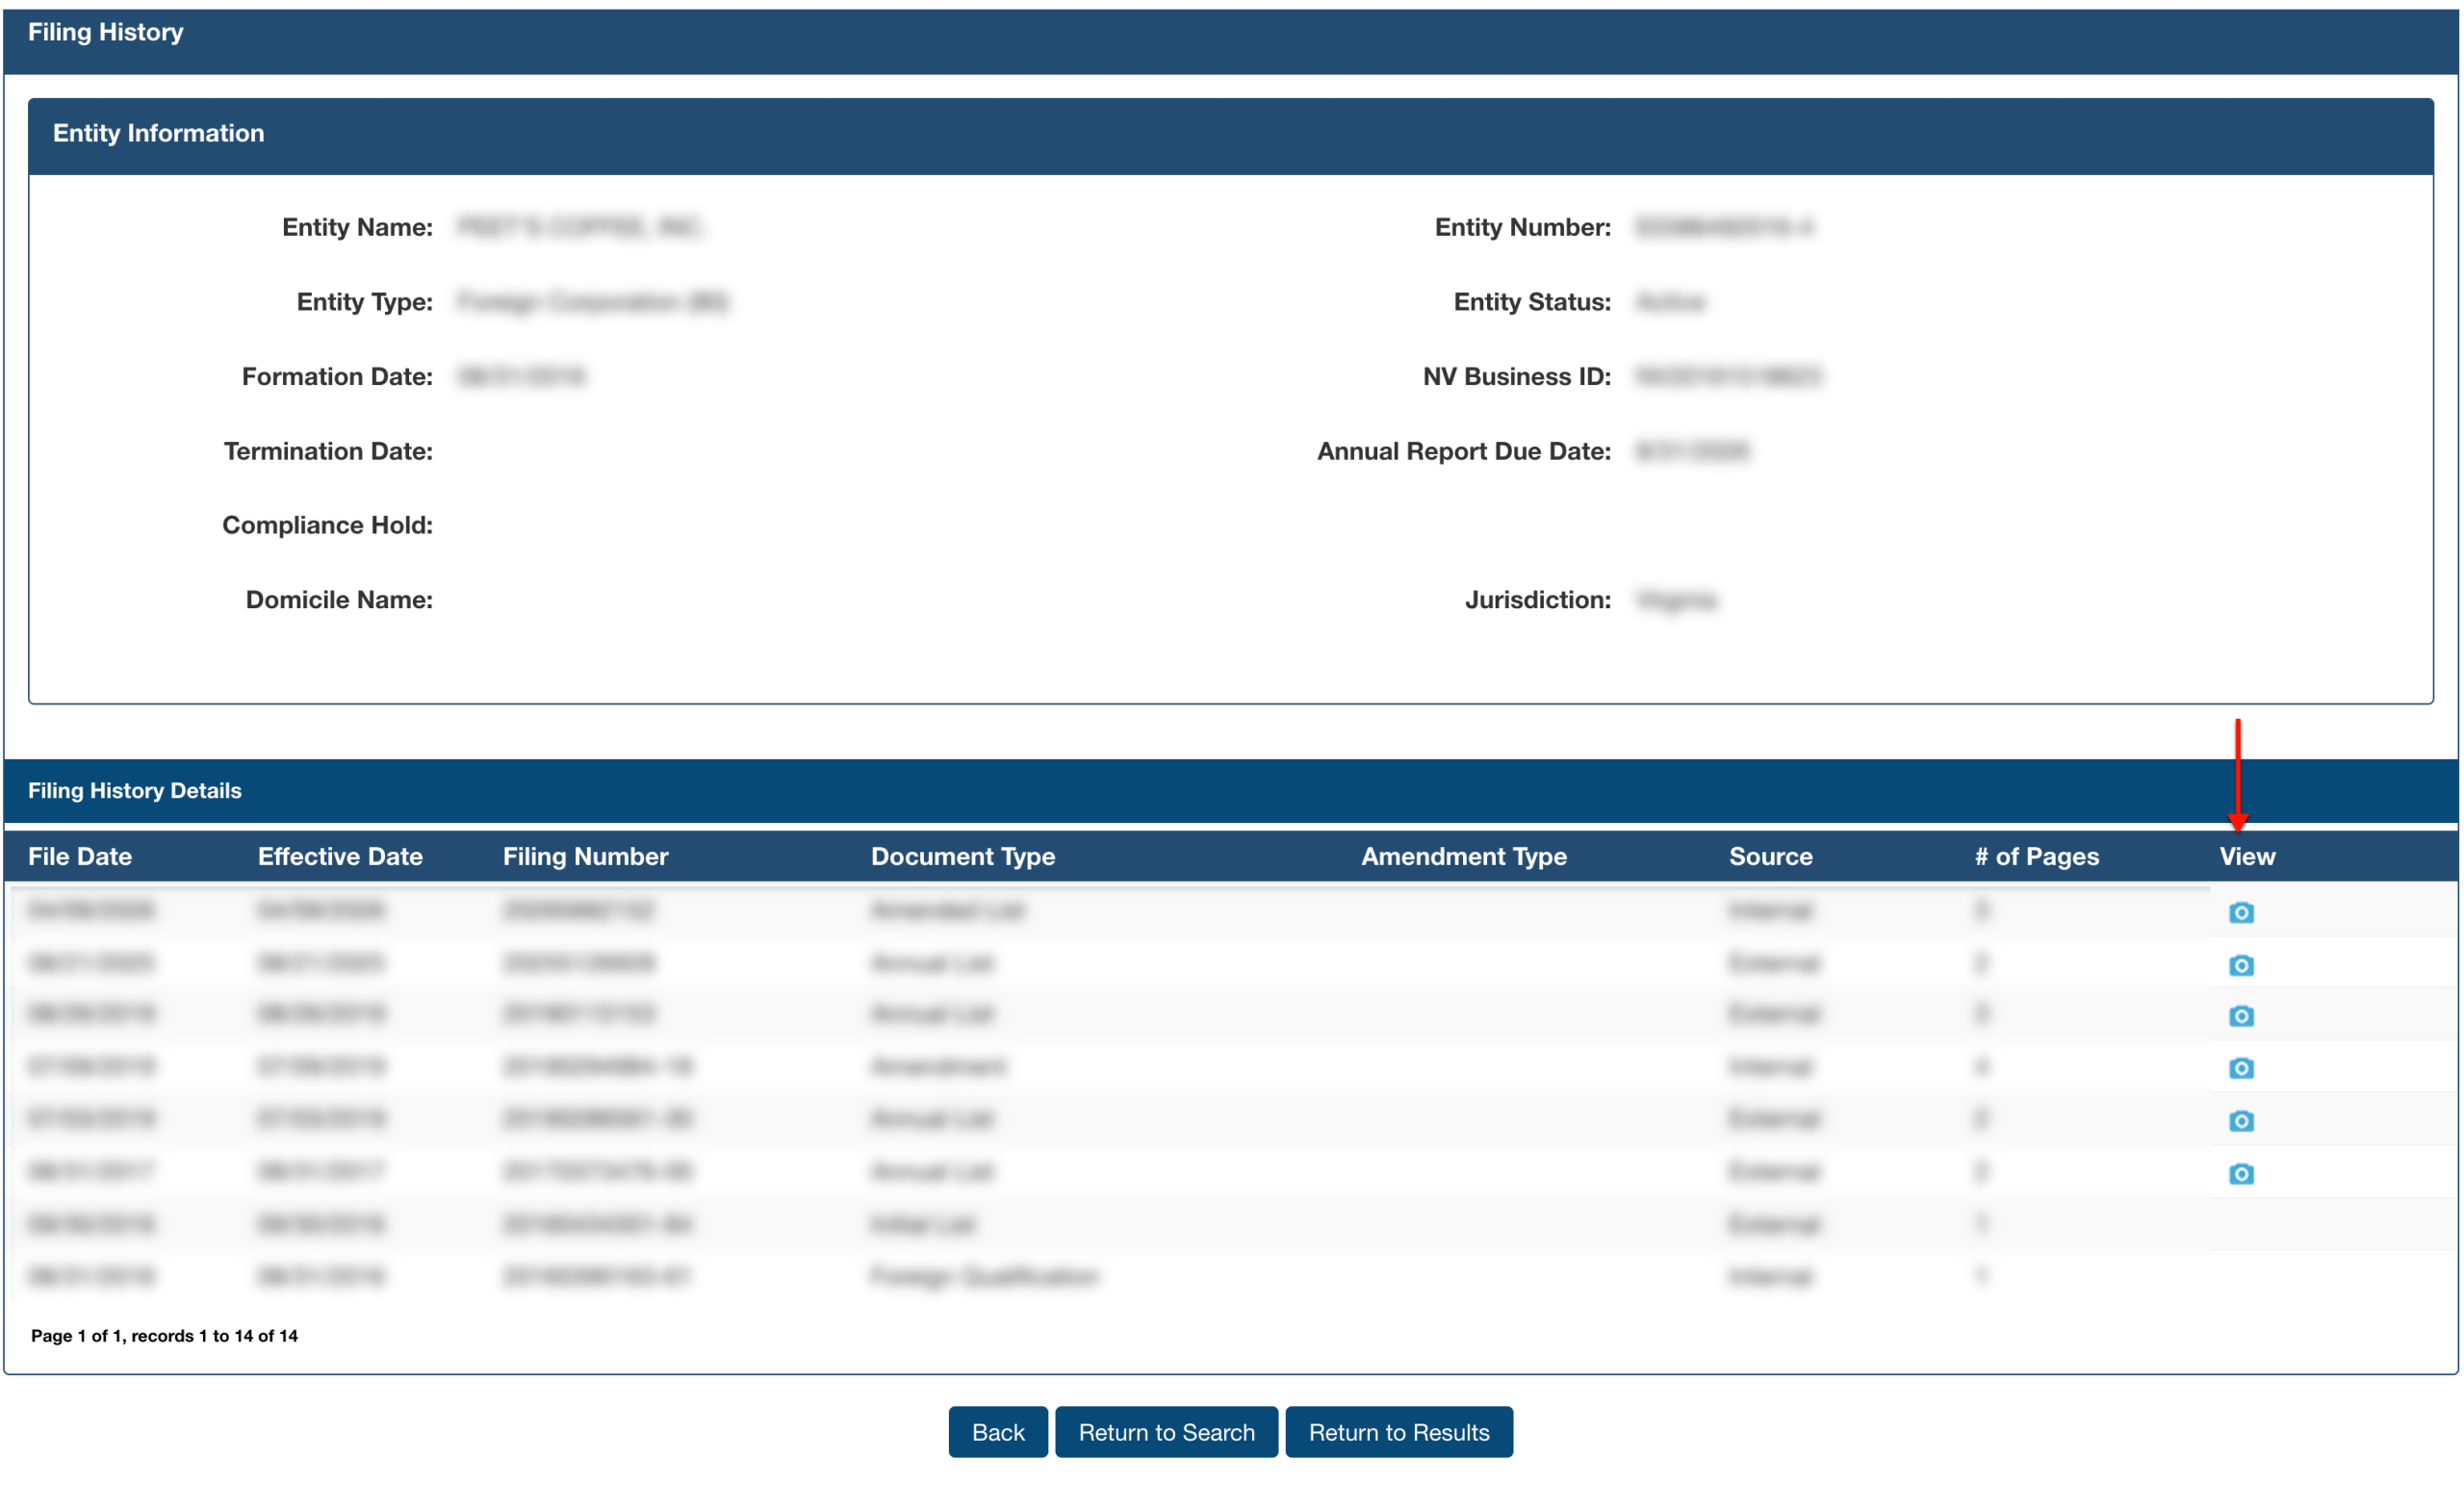
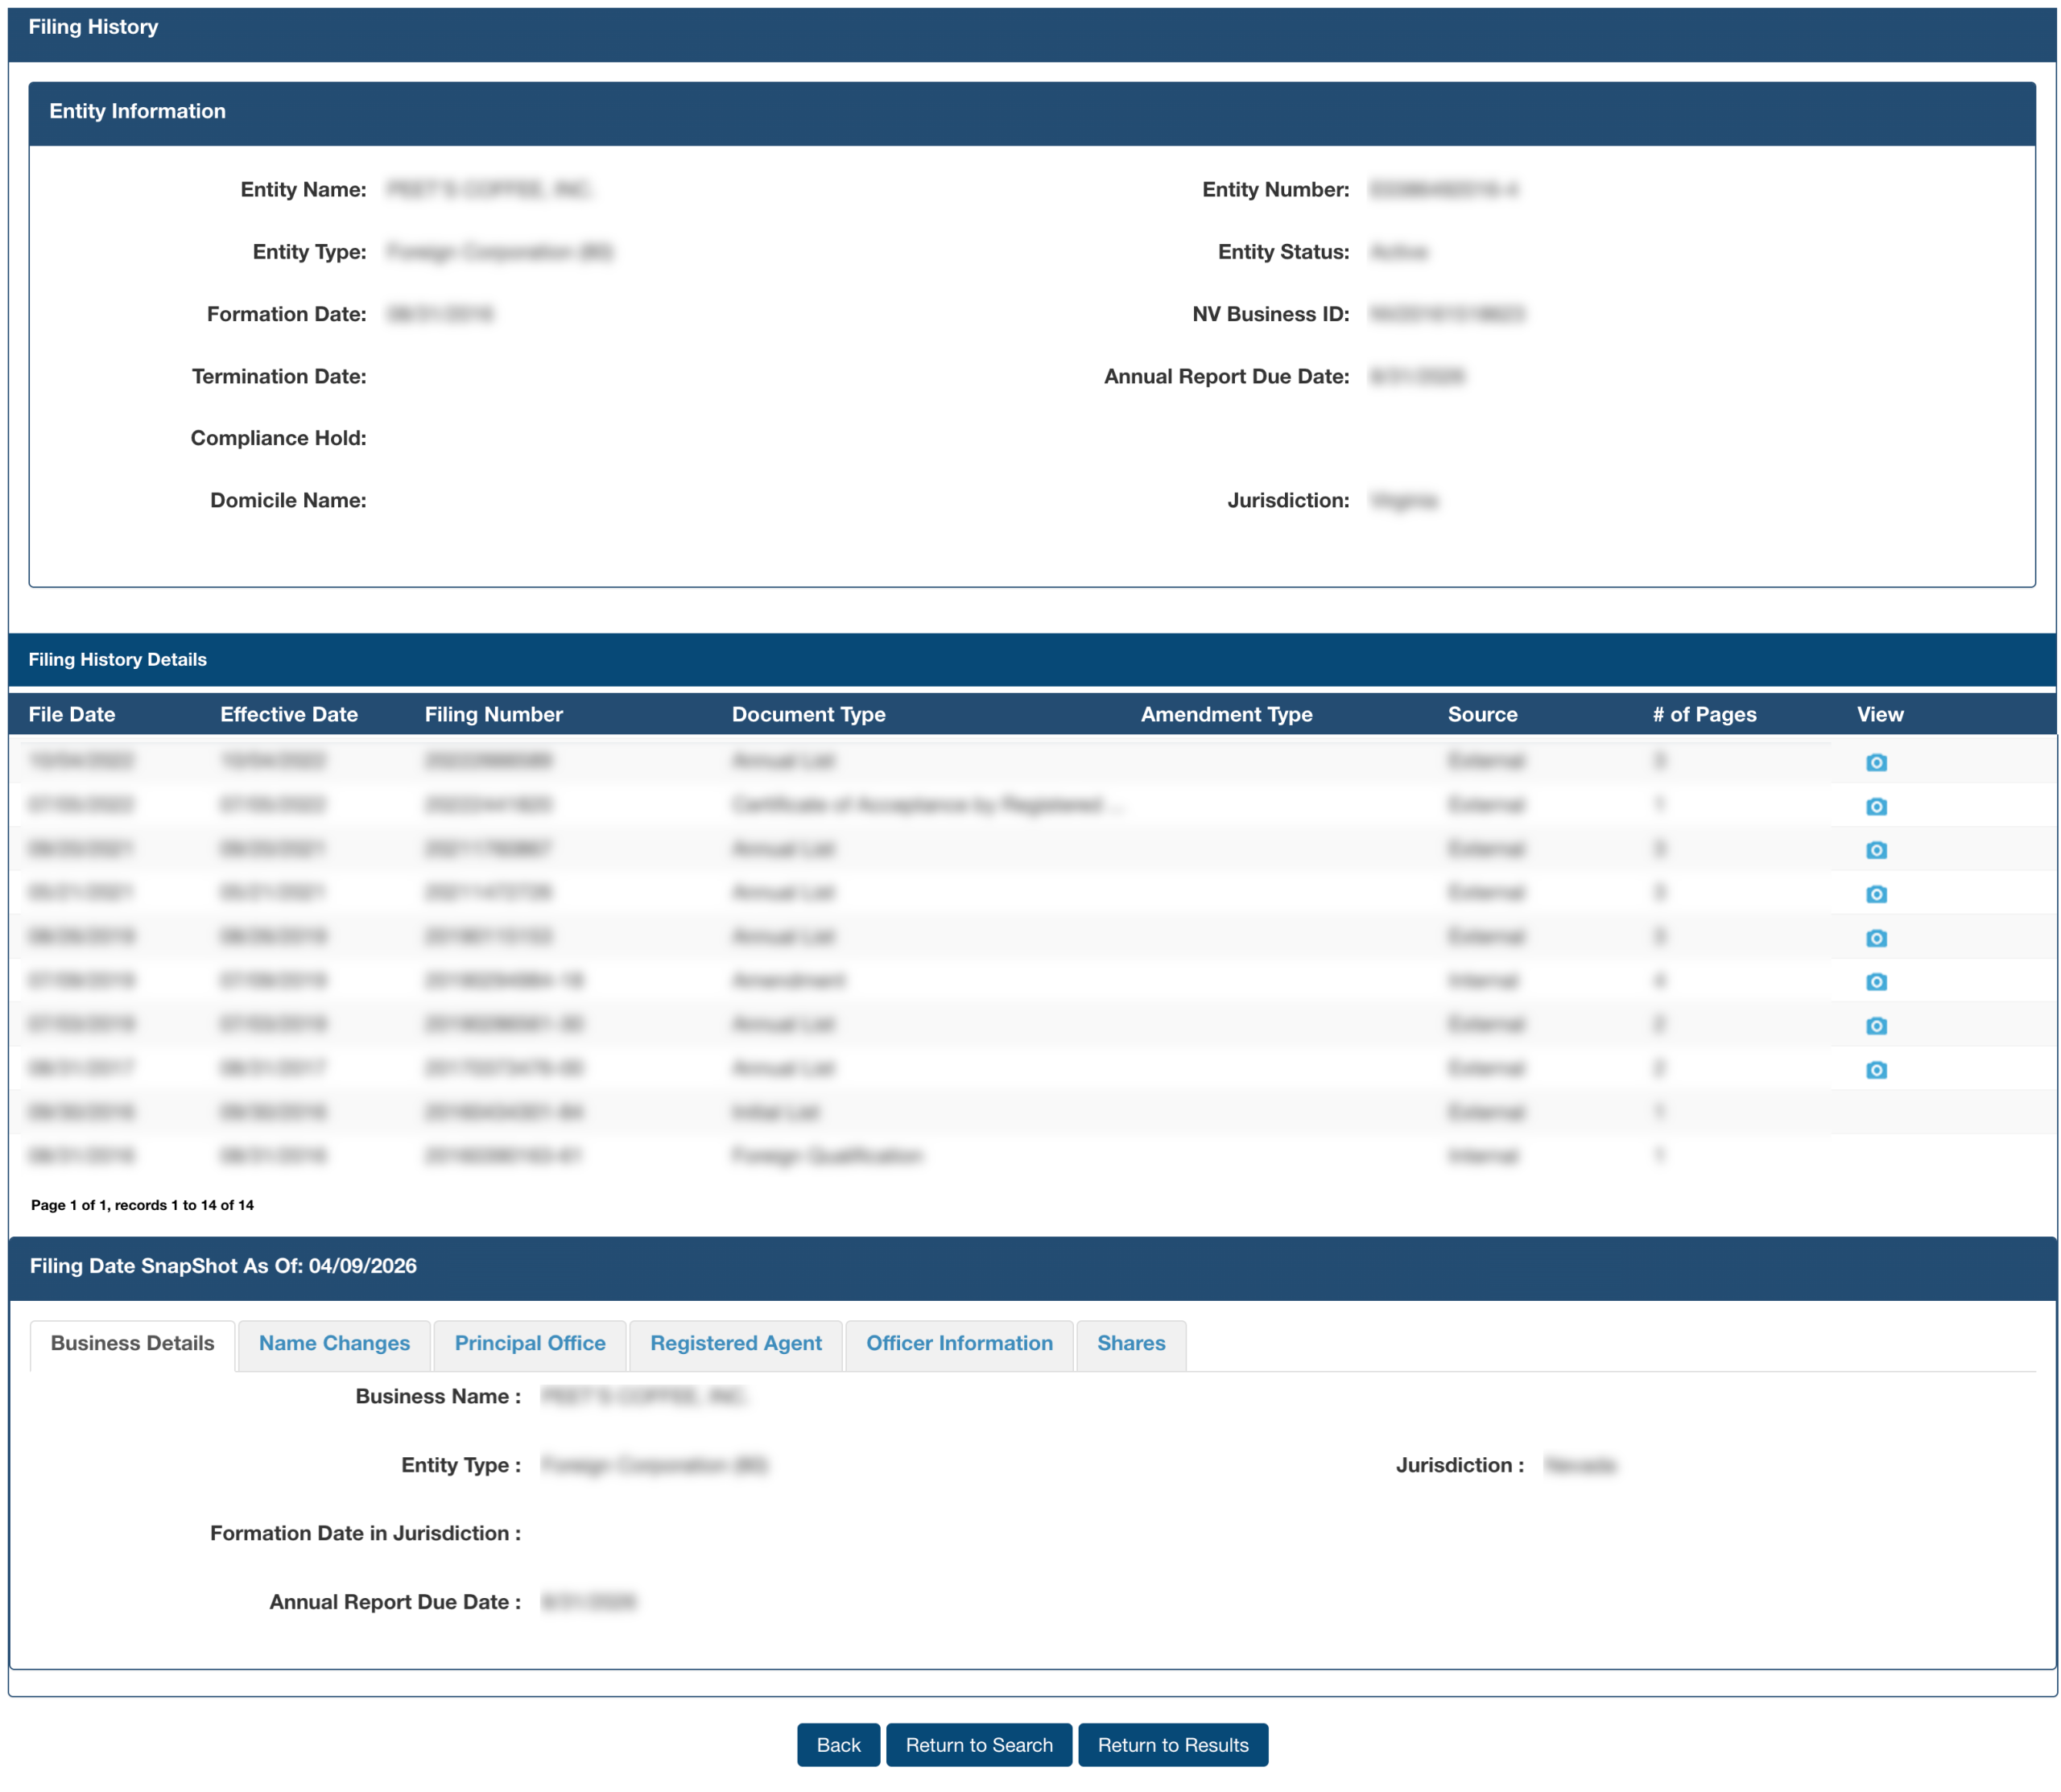
Step 24 Select Snapshots
Notice that you may view a snapshot of the entity at time of a specific filing. To do so, select the camera icon at the end of a record’s row.
Step 25. Review Business Details Snapshot
Look over the snapshot of the business entity’s details during the filing. Once complete, continue to the next tab of this area.
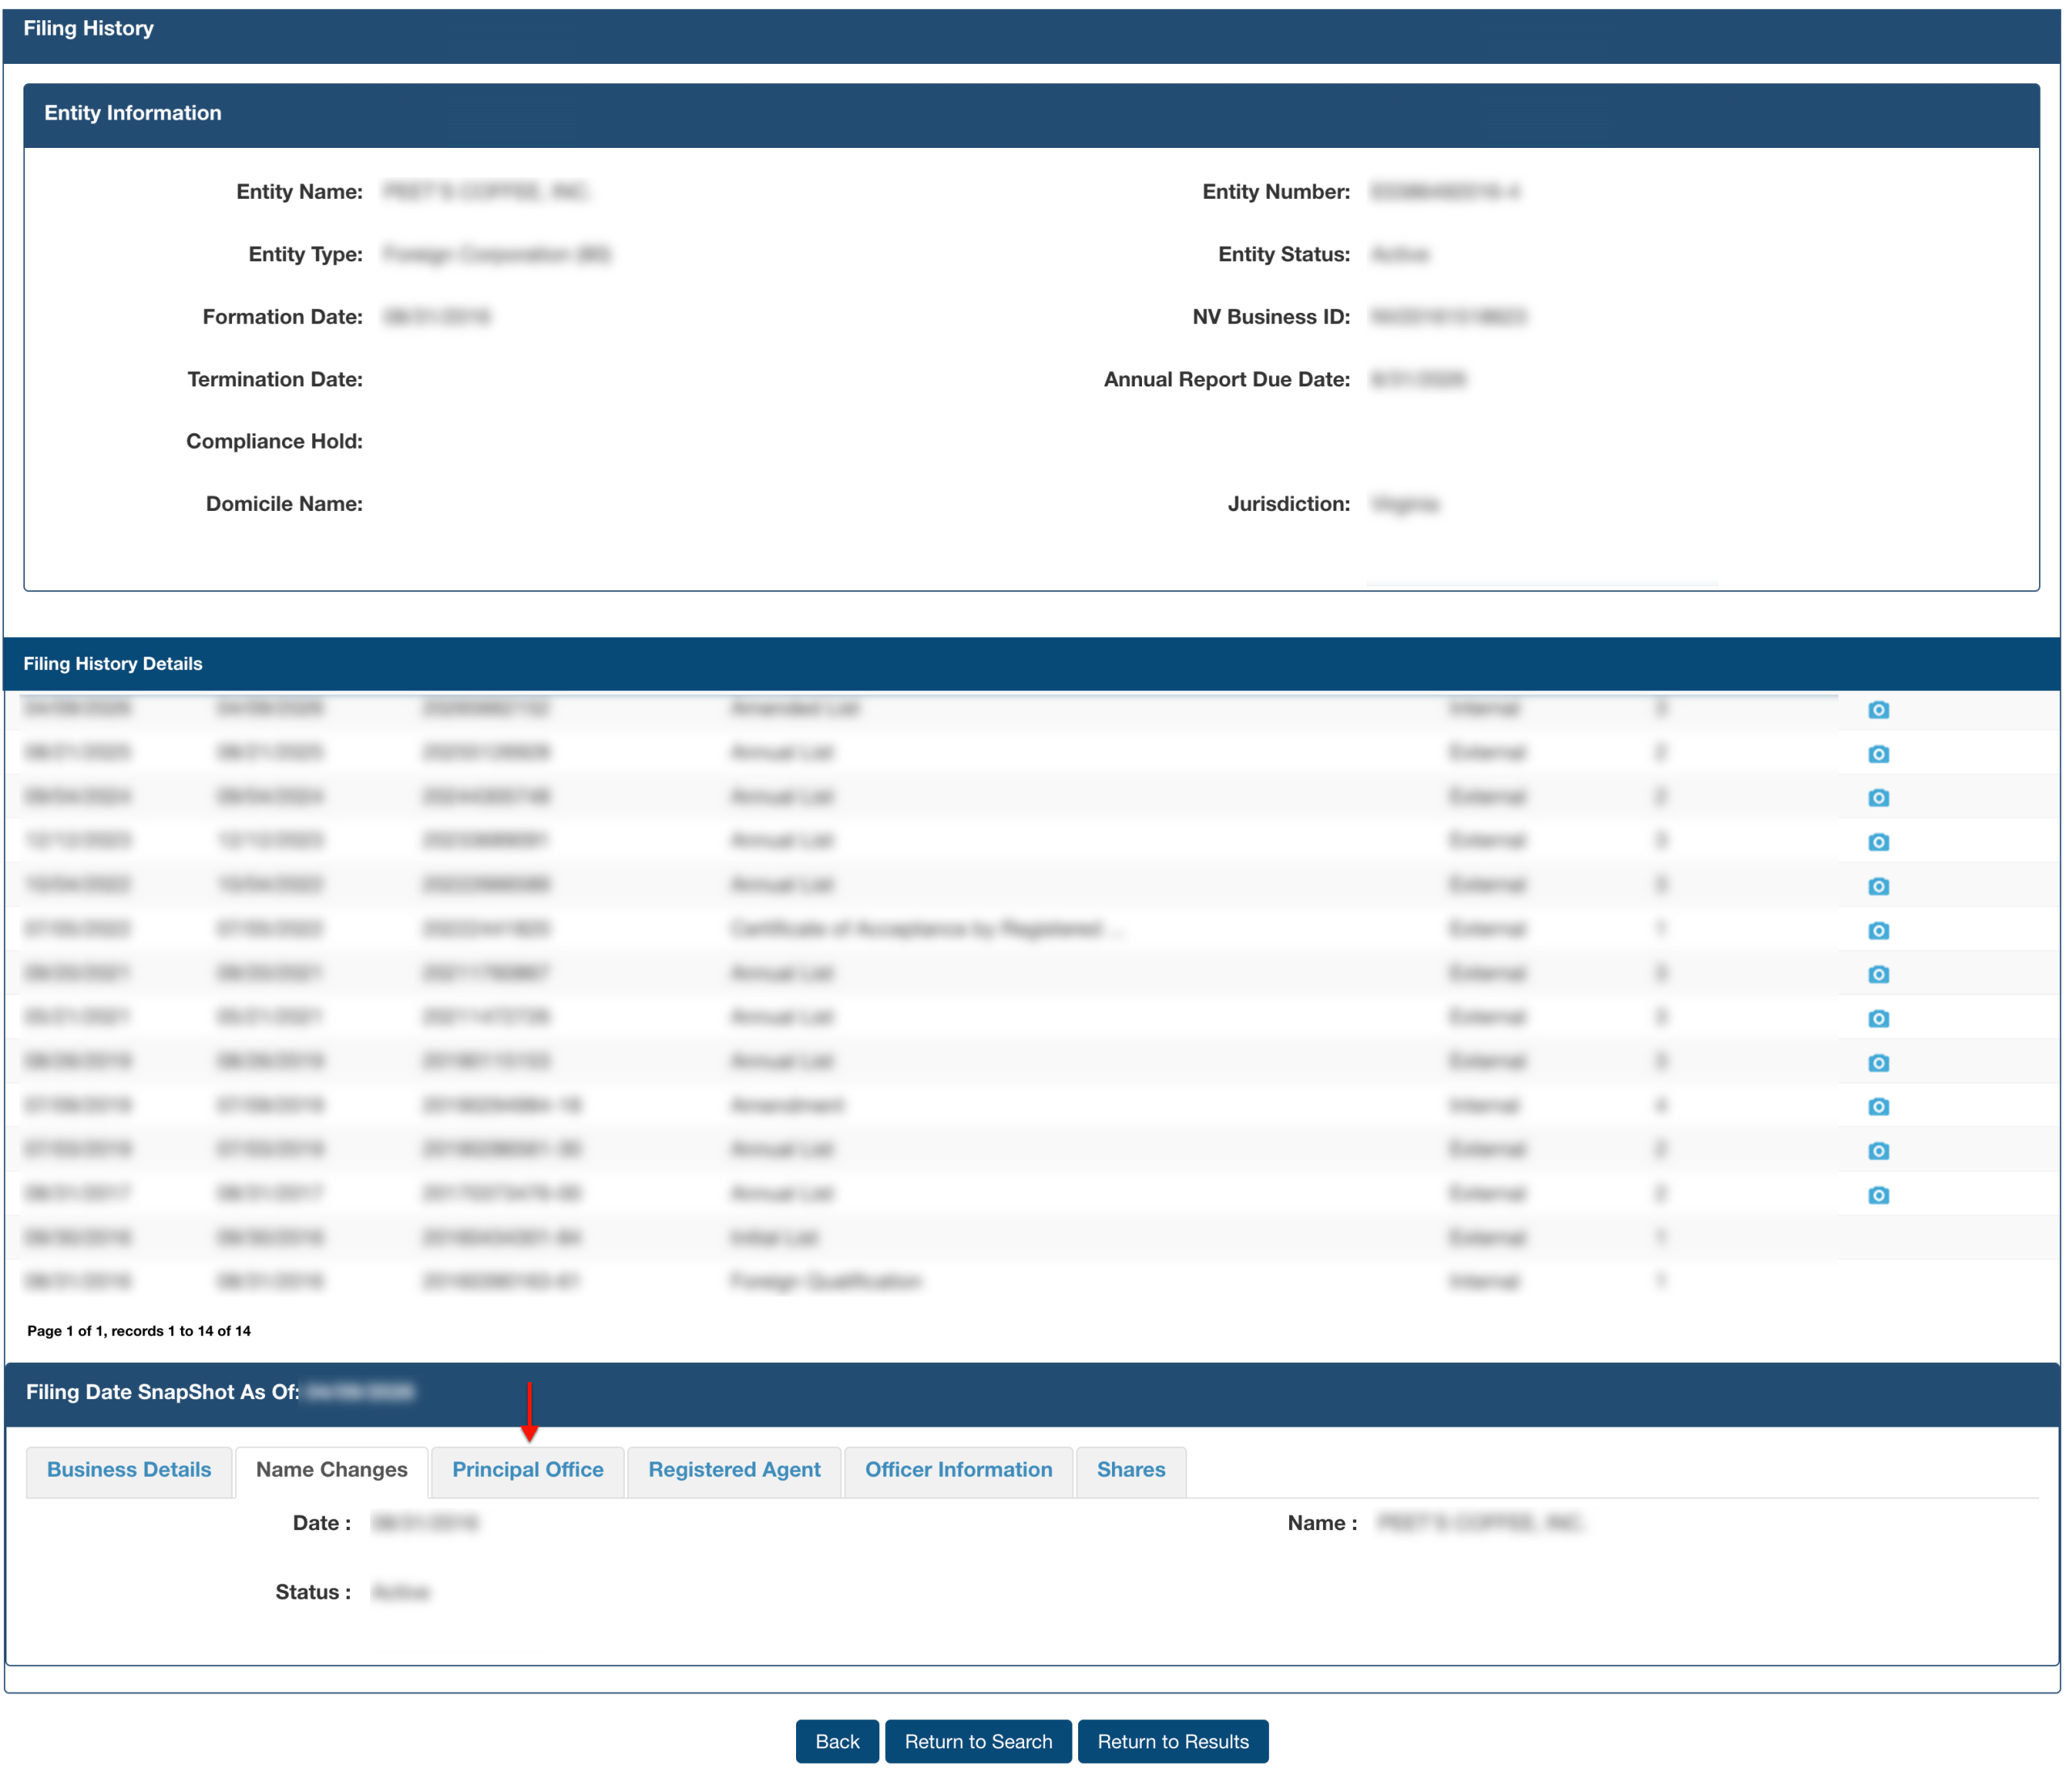
Step 26. Investigate Previous Names
Notice that the last name change on file at the time is available for review. Look over these details, then select the “Principal Office” tab.
- Name Changes
- Date
- Name
- Status
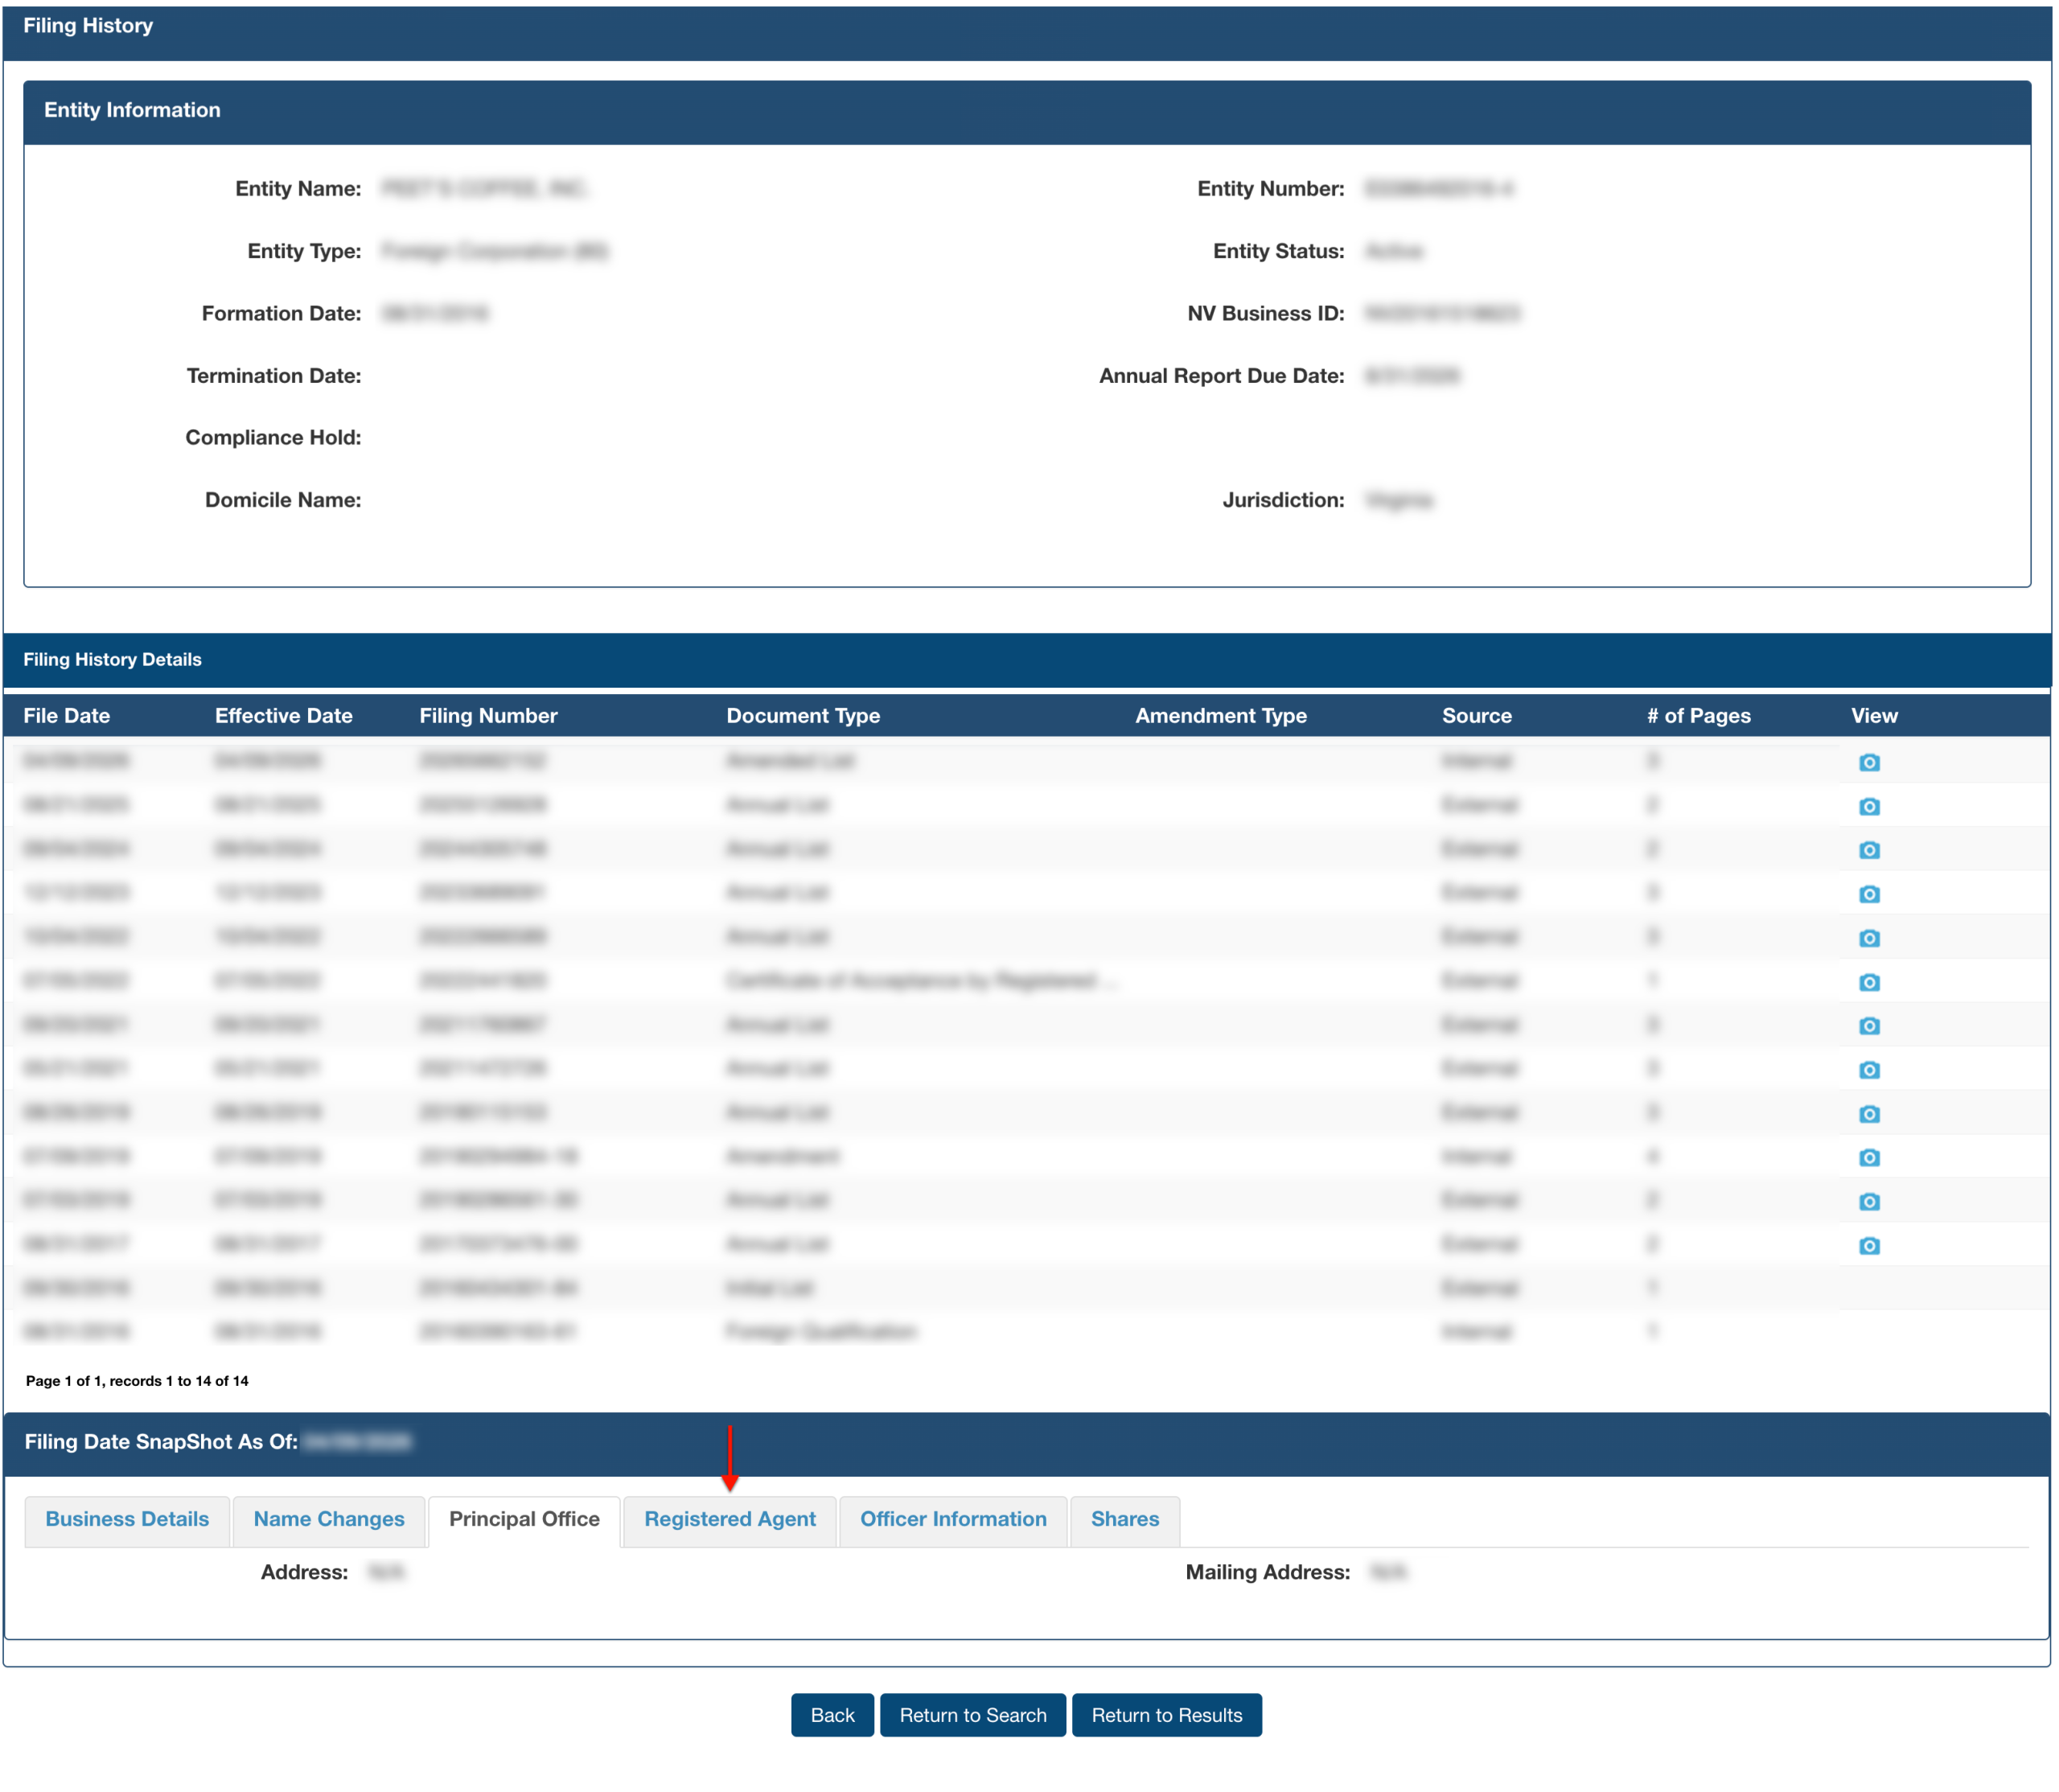
Step 27. Obtain Principal Office Information
The principal office address, whenever the filing occurred, is also available. Review this information, then choose the “Registered Agent” tab.
- Principal Office
- Address
- Mailing Address
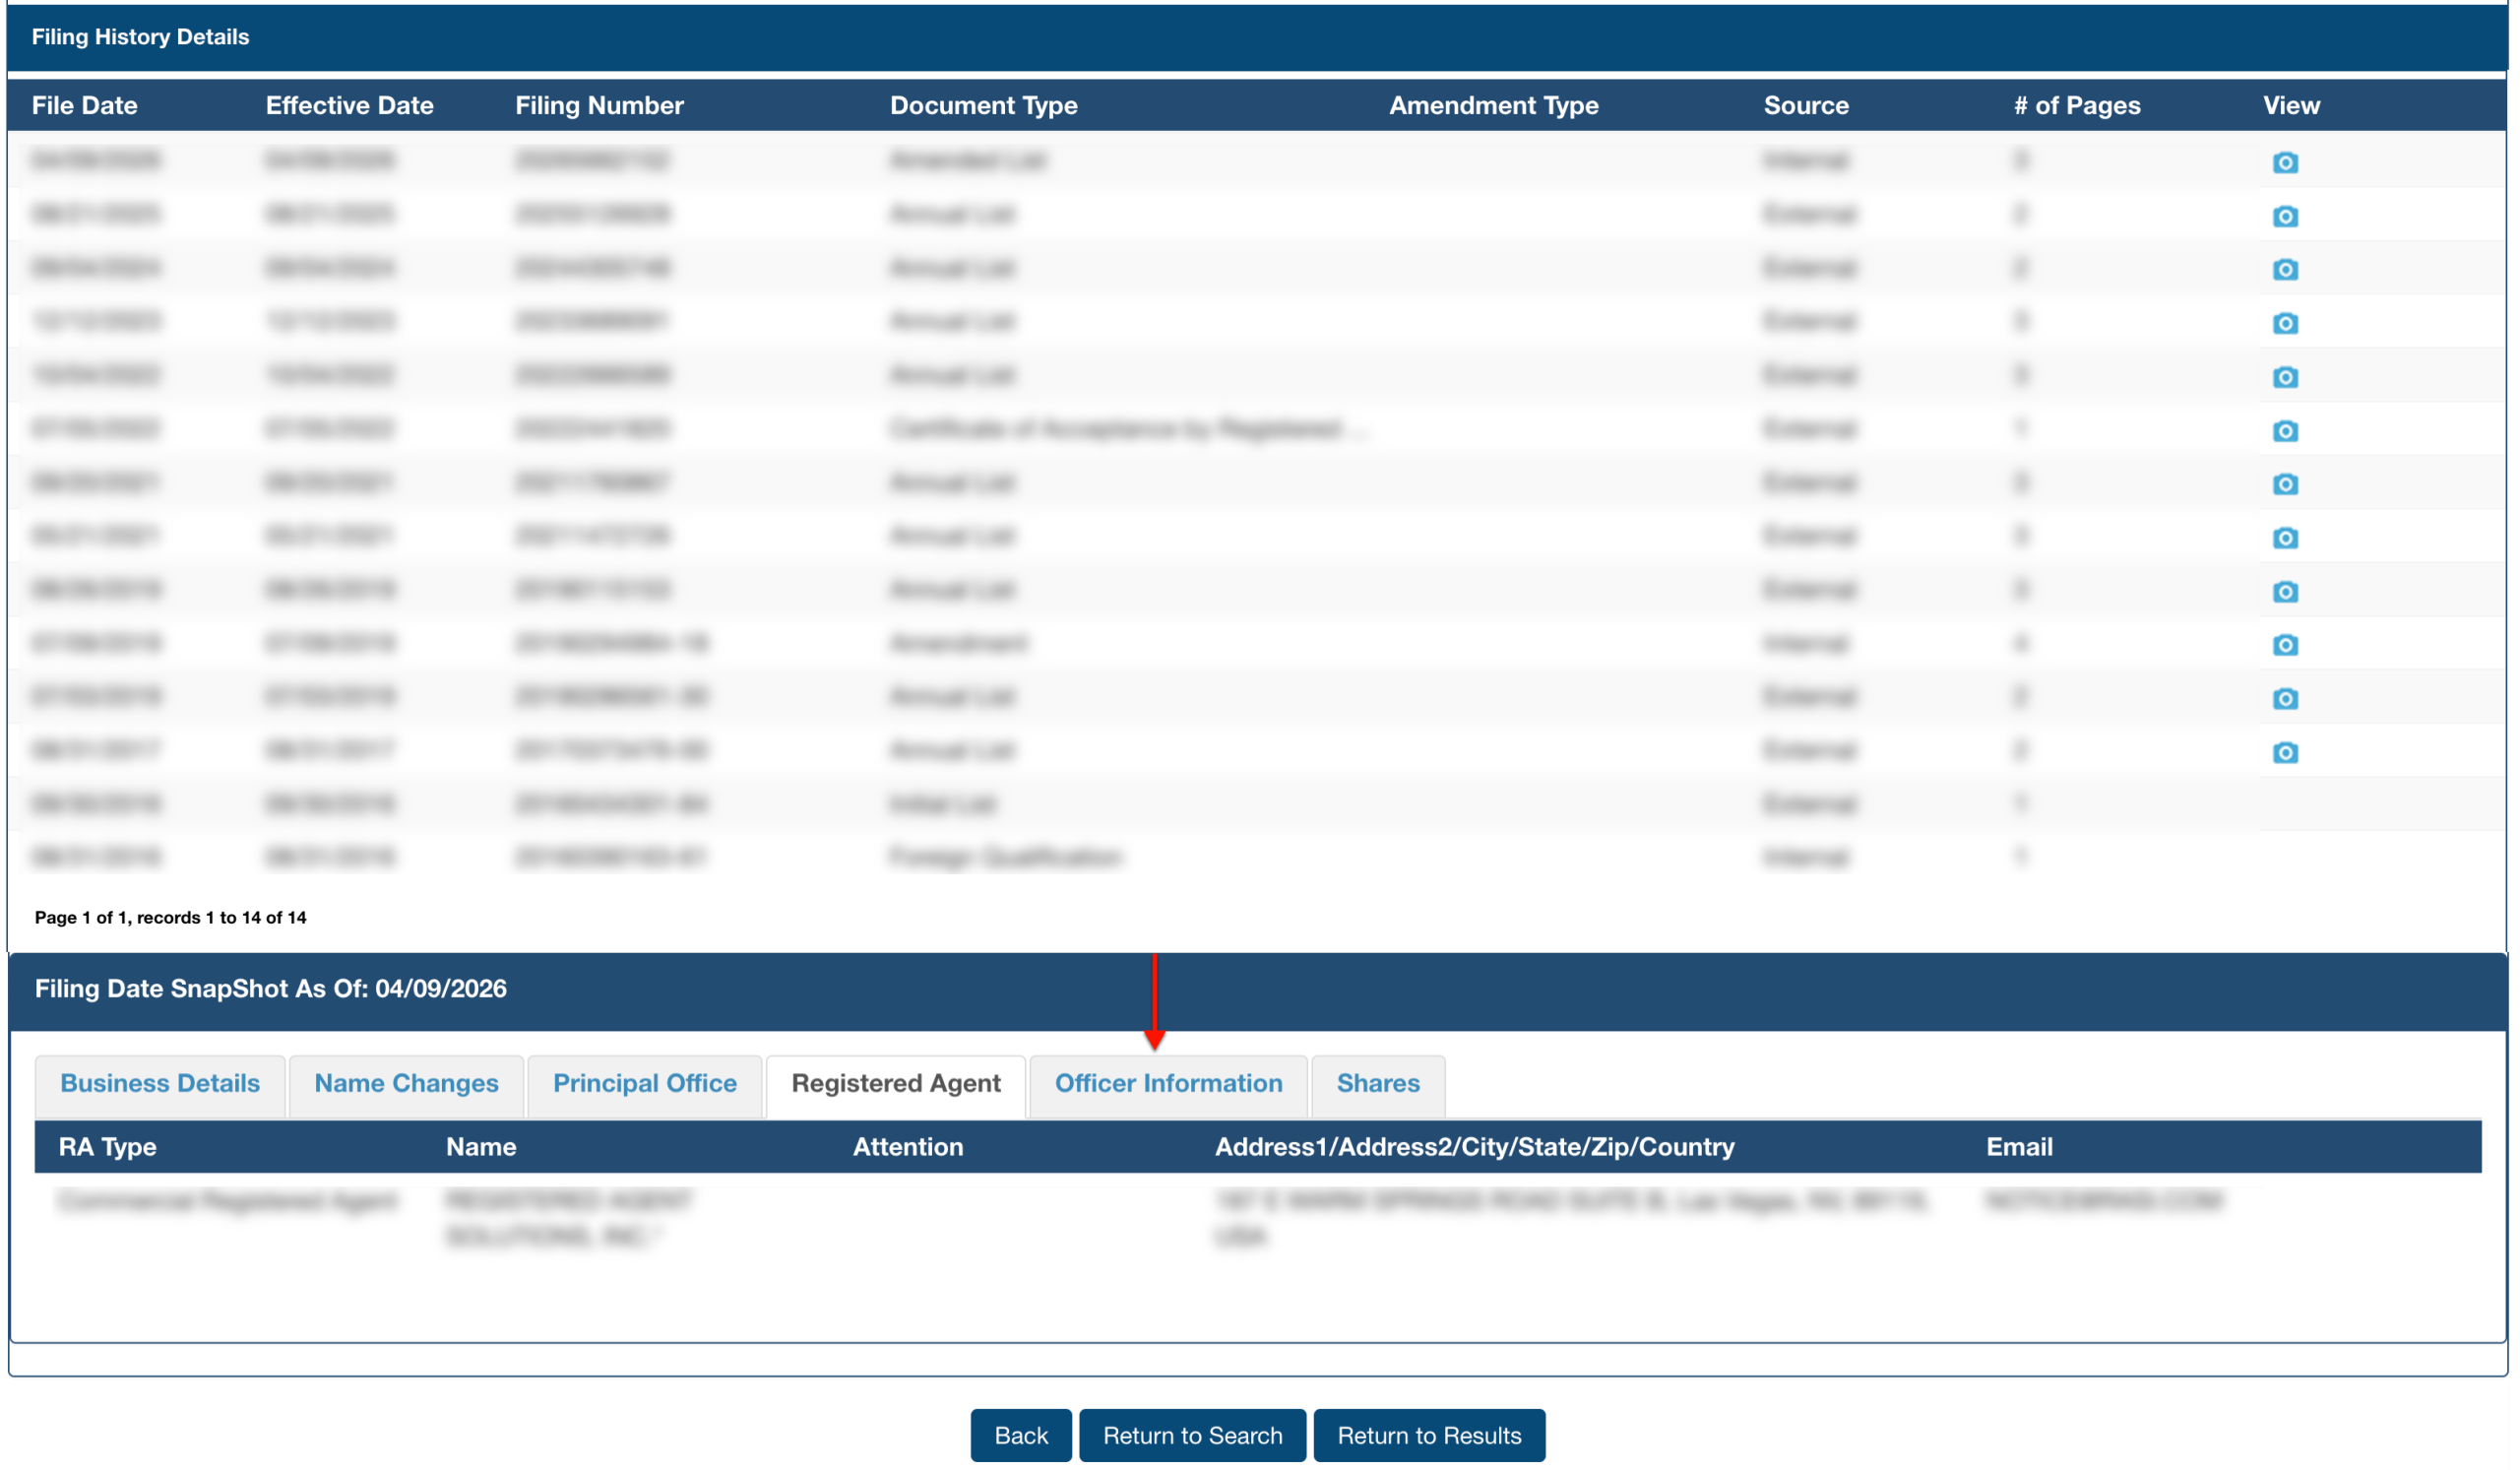
Step 28. View Registered Agent Details
Look over the registered agent information at the time of the snapshot. Note: the current registered agent may be different. Select “Officer Information” to continue.
- RA Type
- Name
- Attention
- Address 1/Address 2/City/State/Zip/Country
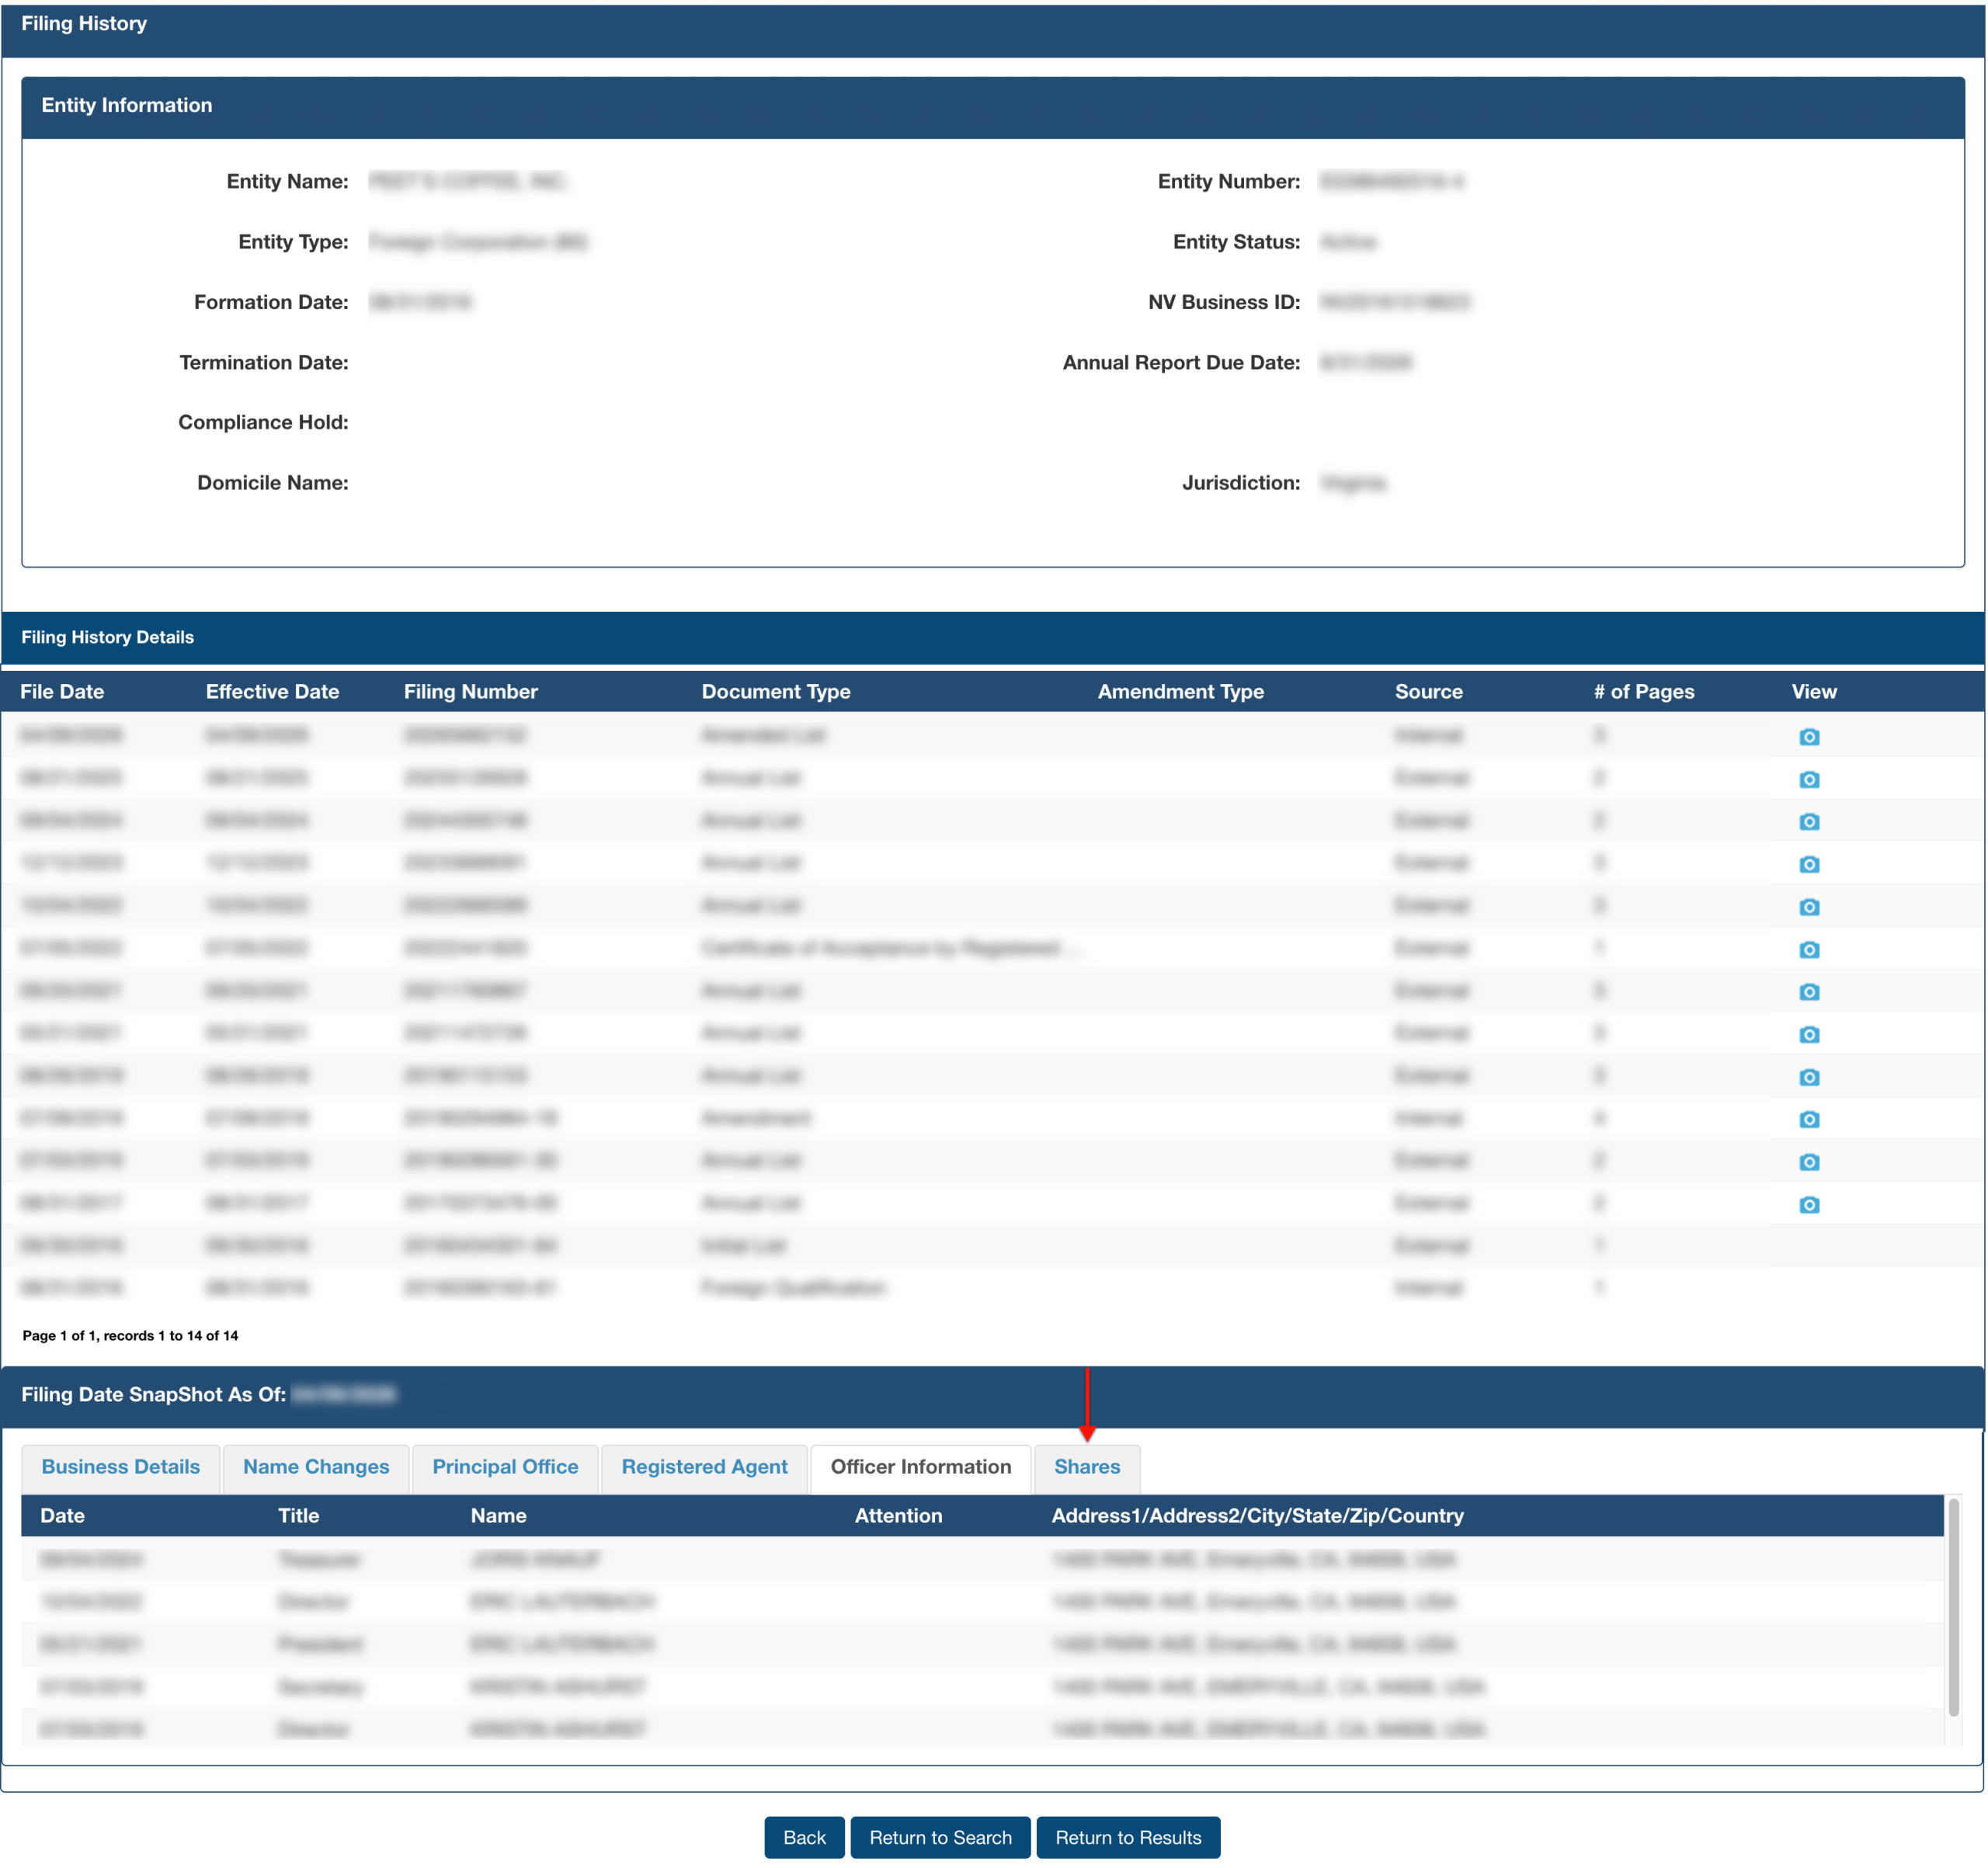
Step 29. Examine Officer Snapshot
Review the dates and titles for each entity officer (or member, owner, etc) during the filing of the paperwork you are investigating. When ready, select “Shares.”
- Officer Information
- Date
- Title
- Name
- Attention
- Address1/Address2/City/State/Zip/Country
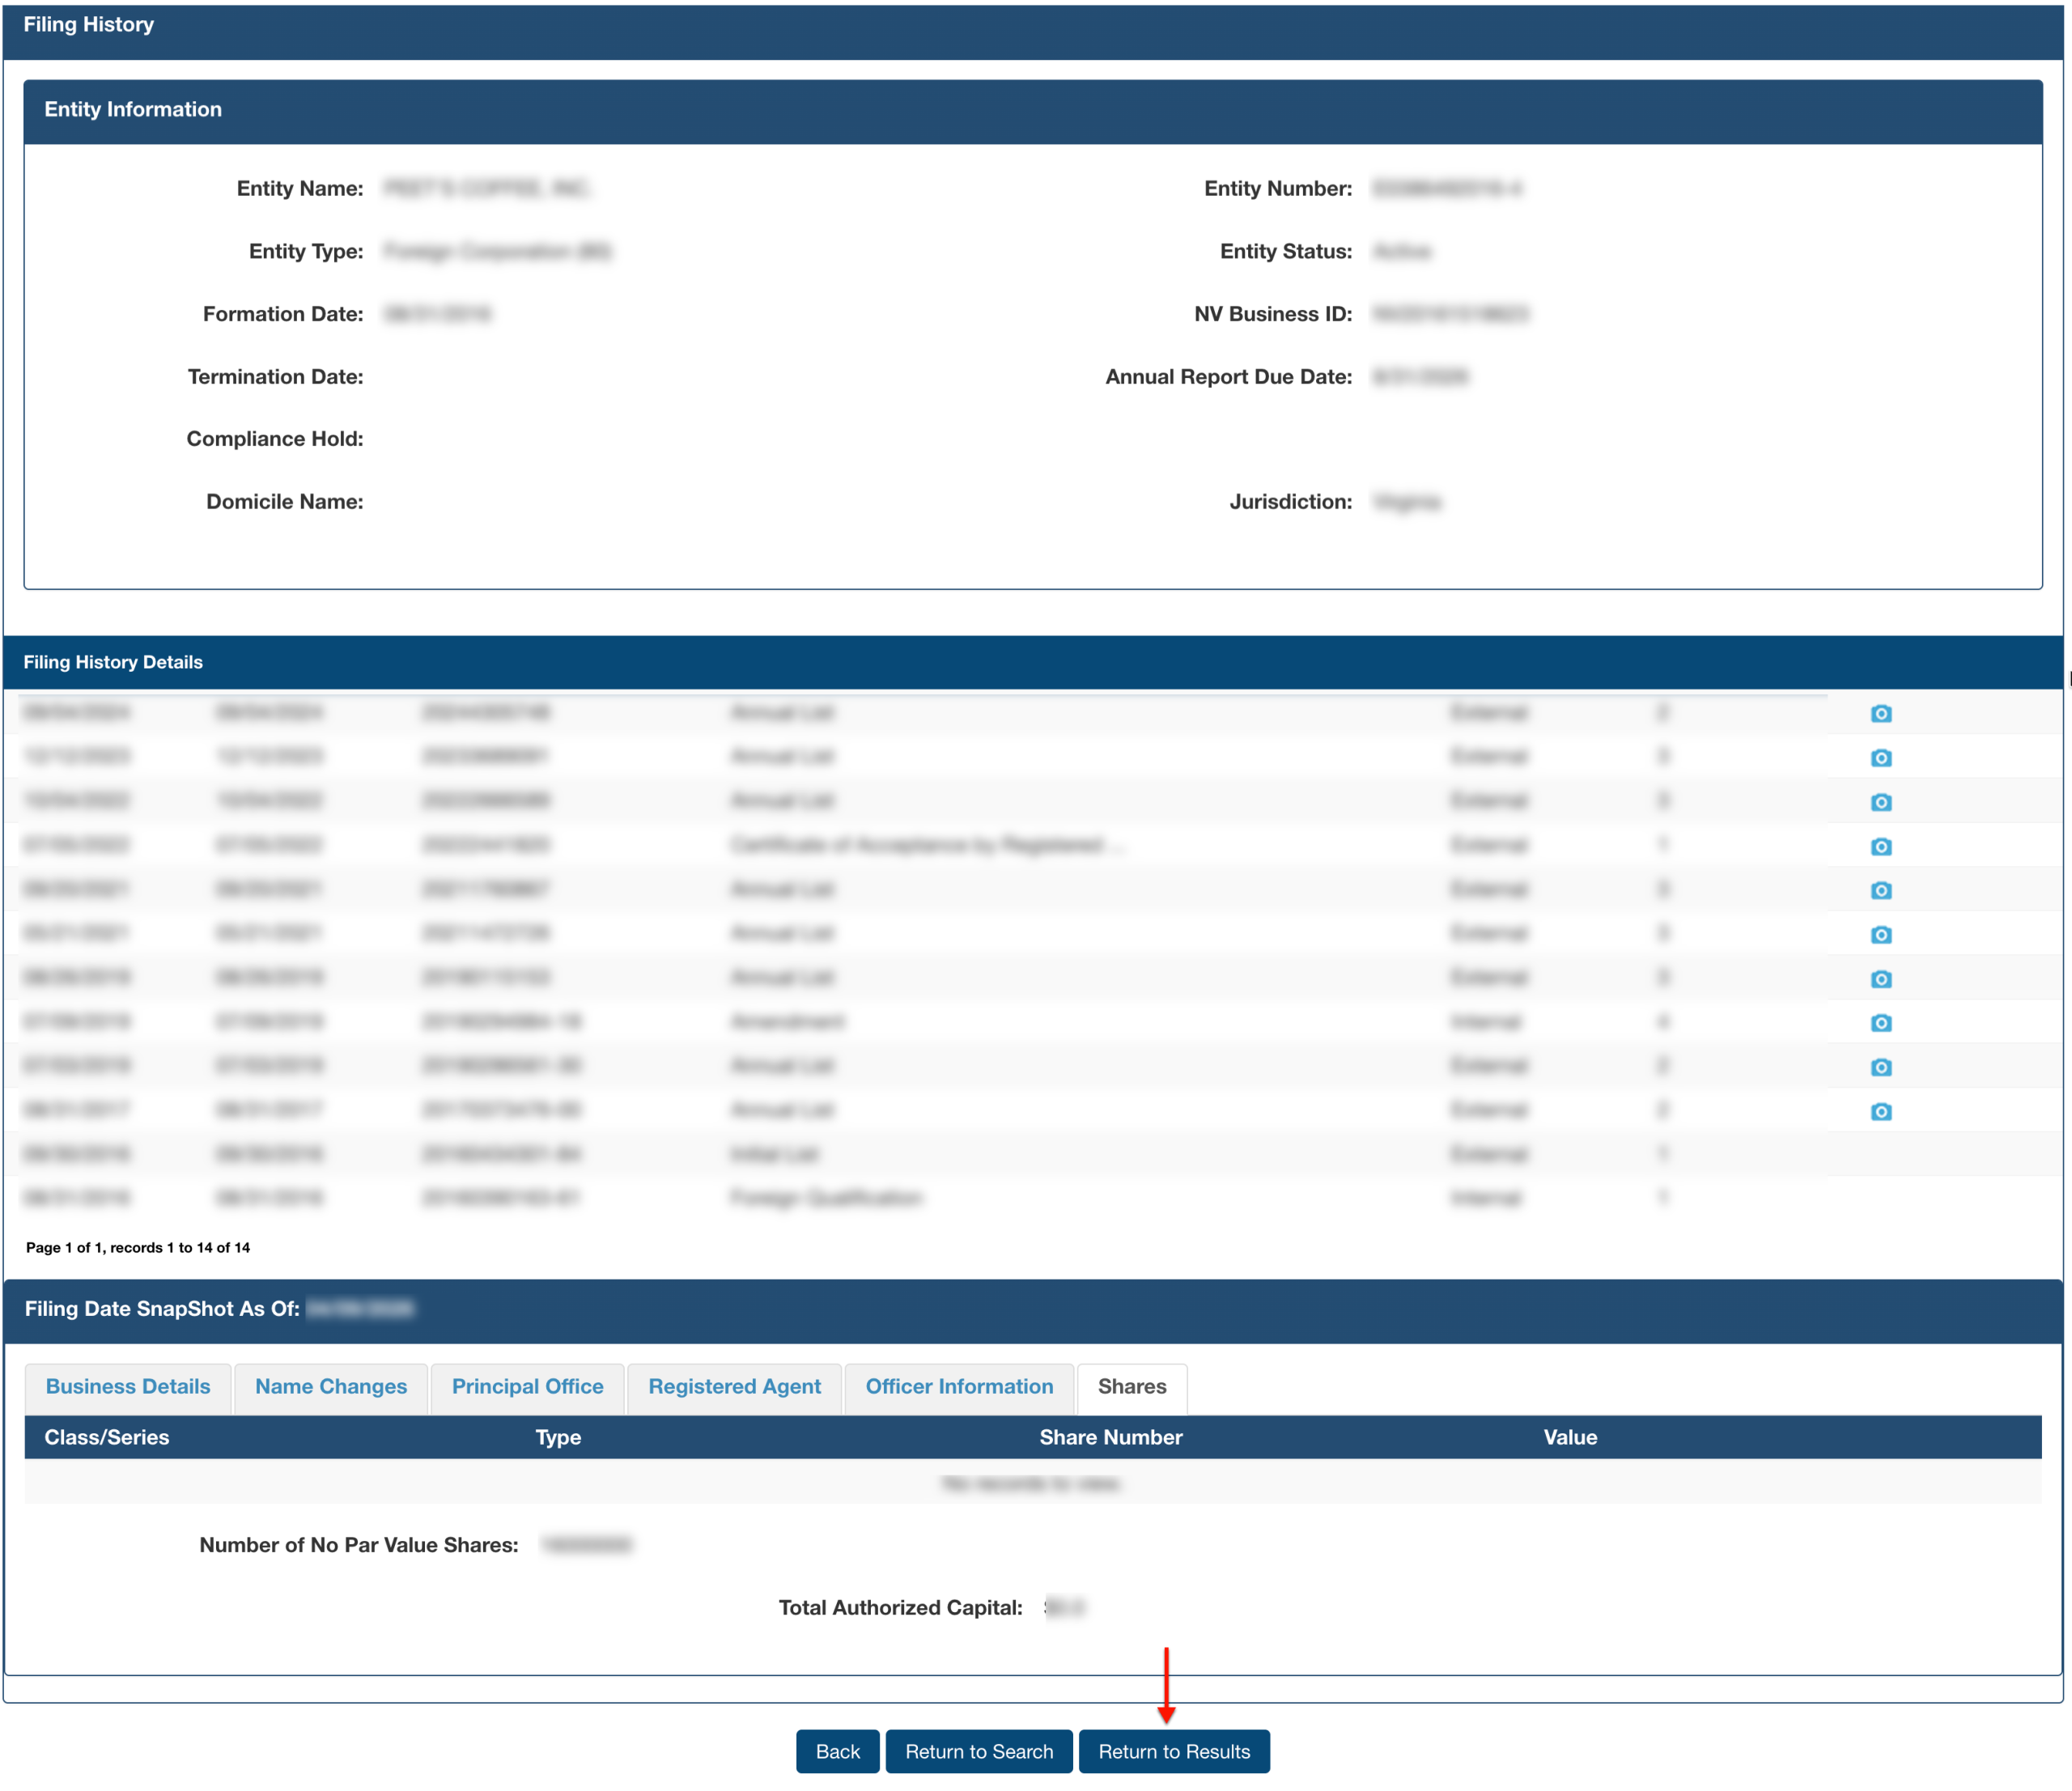
Step 30. Access Share information
Read through the “Shares” table to view the market health at the time of filing. To return to “Entity Information,” select “Back.”
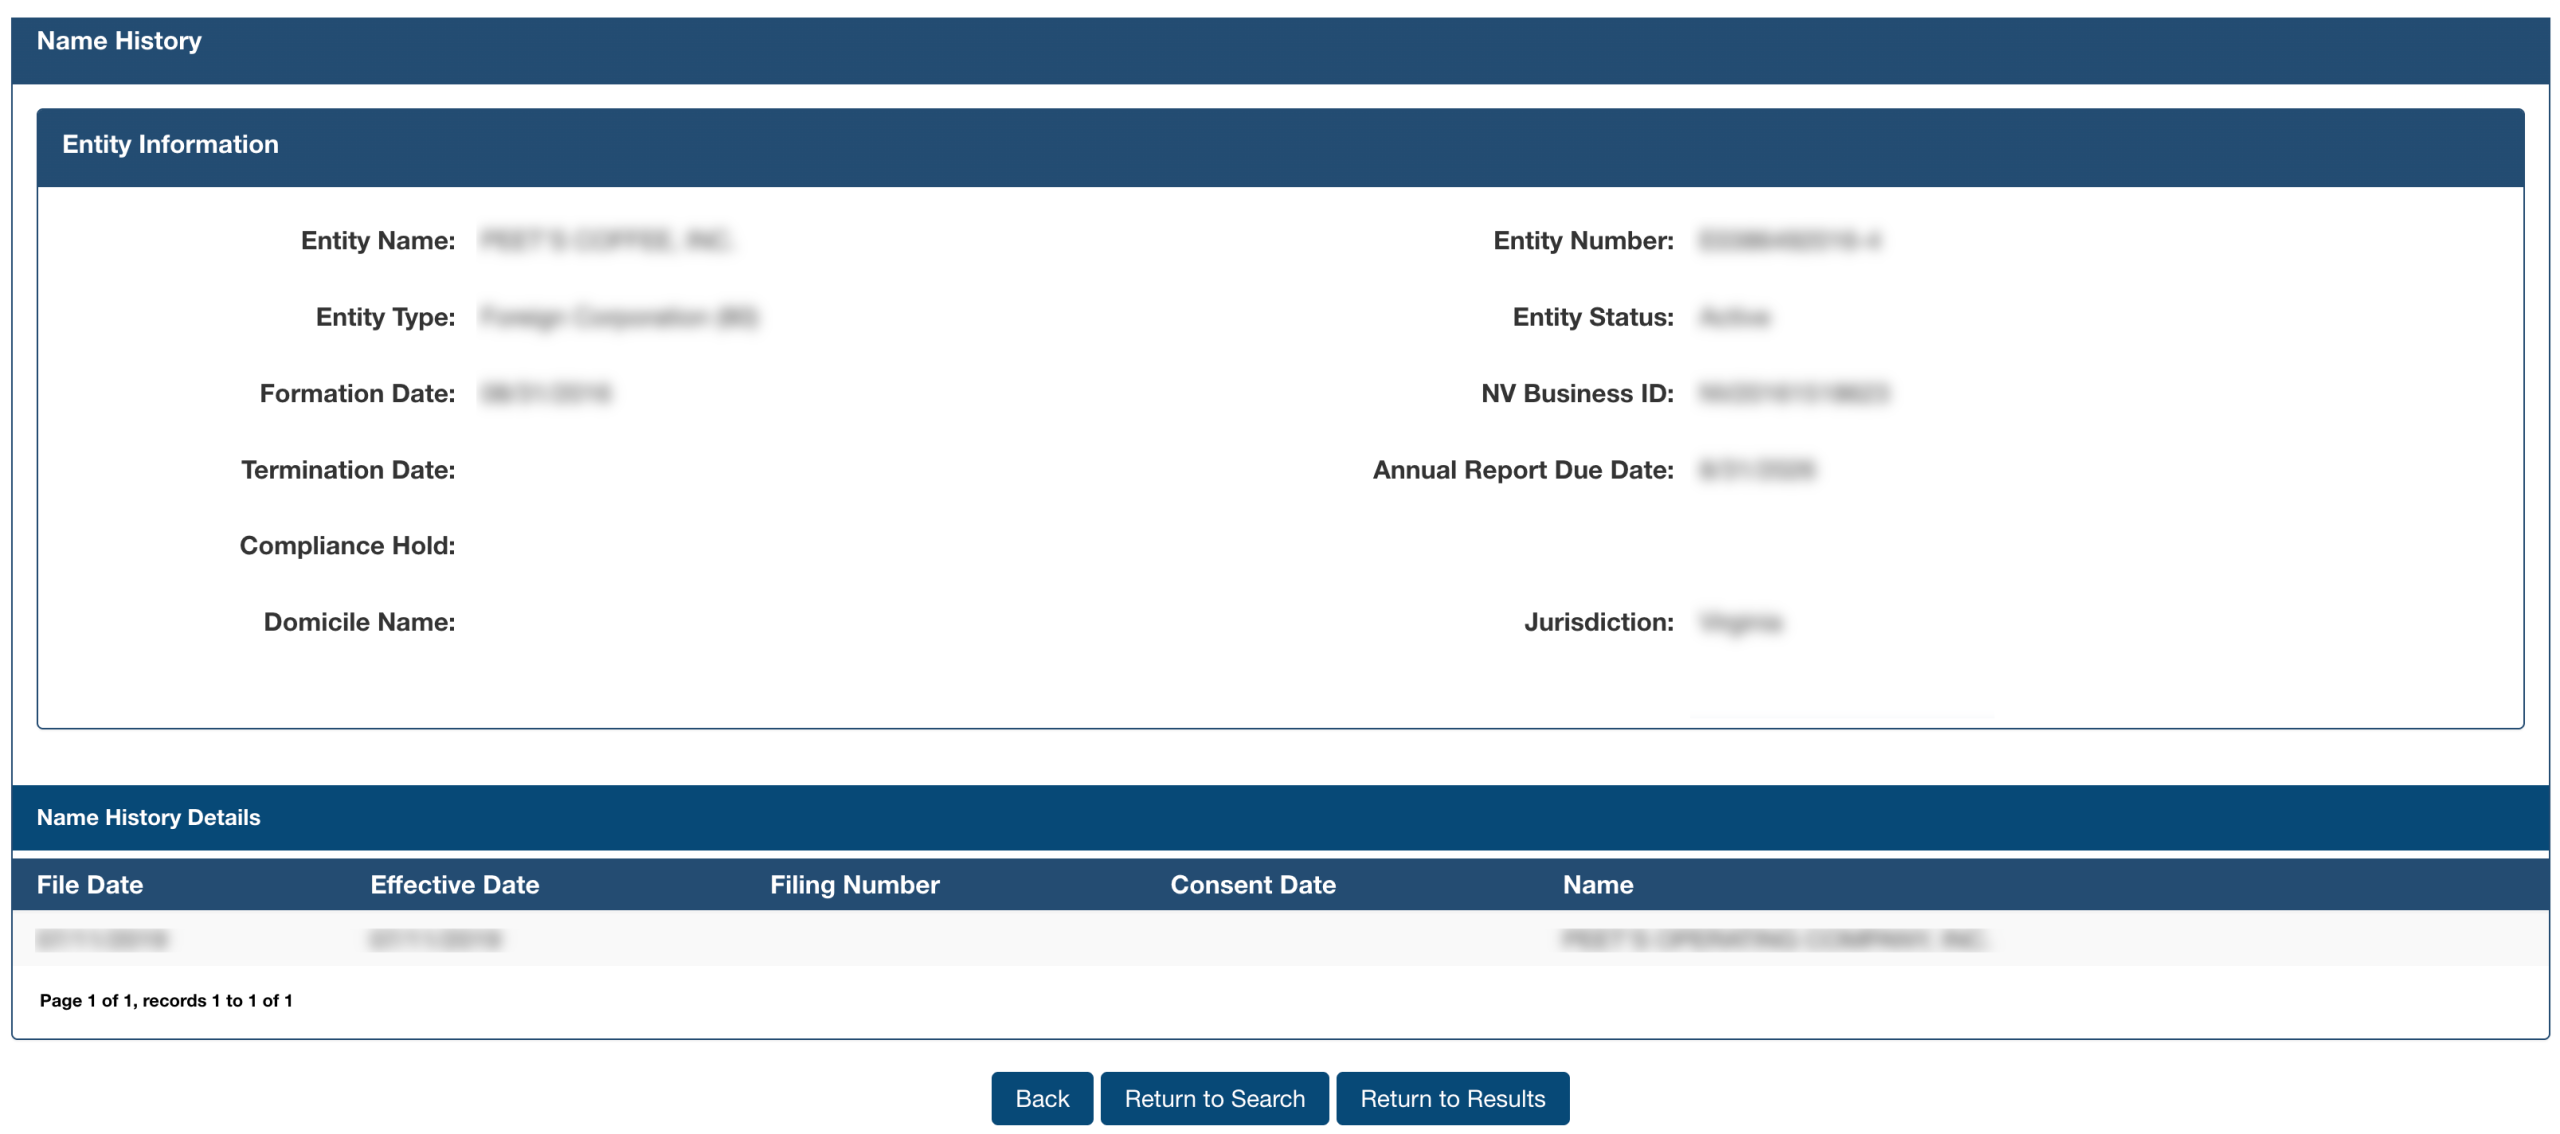
Step 31. Access Name History
Once you return to the entity information page, select “Name History.” Remember, while this gives an extensive report, it only represents what is currently on file.

Step 32. Review Current Name Information
The entity’s previous and current names (e.g., a DBA) are on display here. Review this information, then return to the results and access the details page.
- File Date
- Effective Date
- Filing Number
- Consent Date
- Name
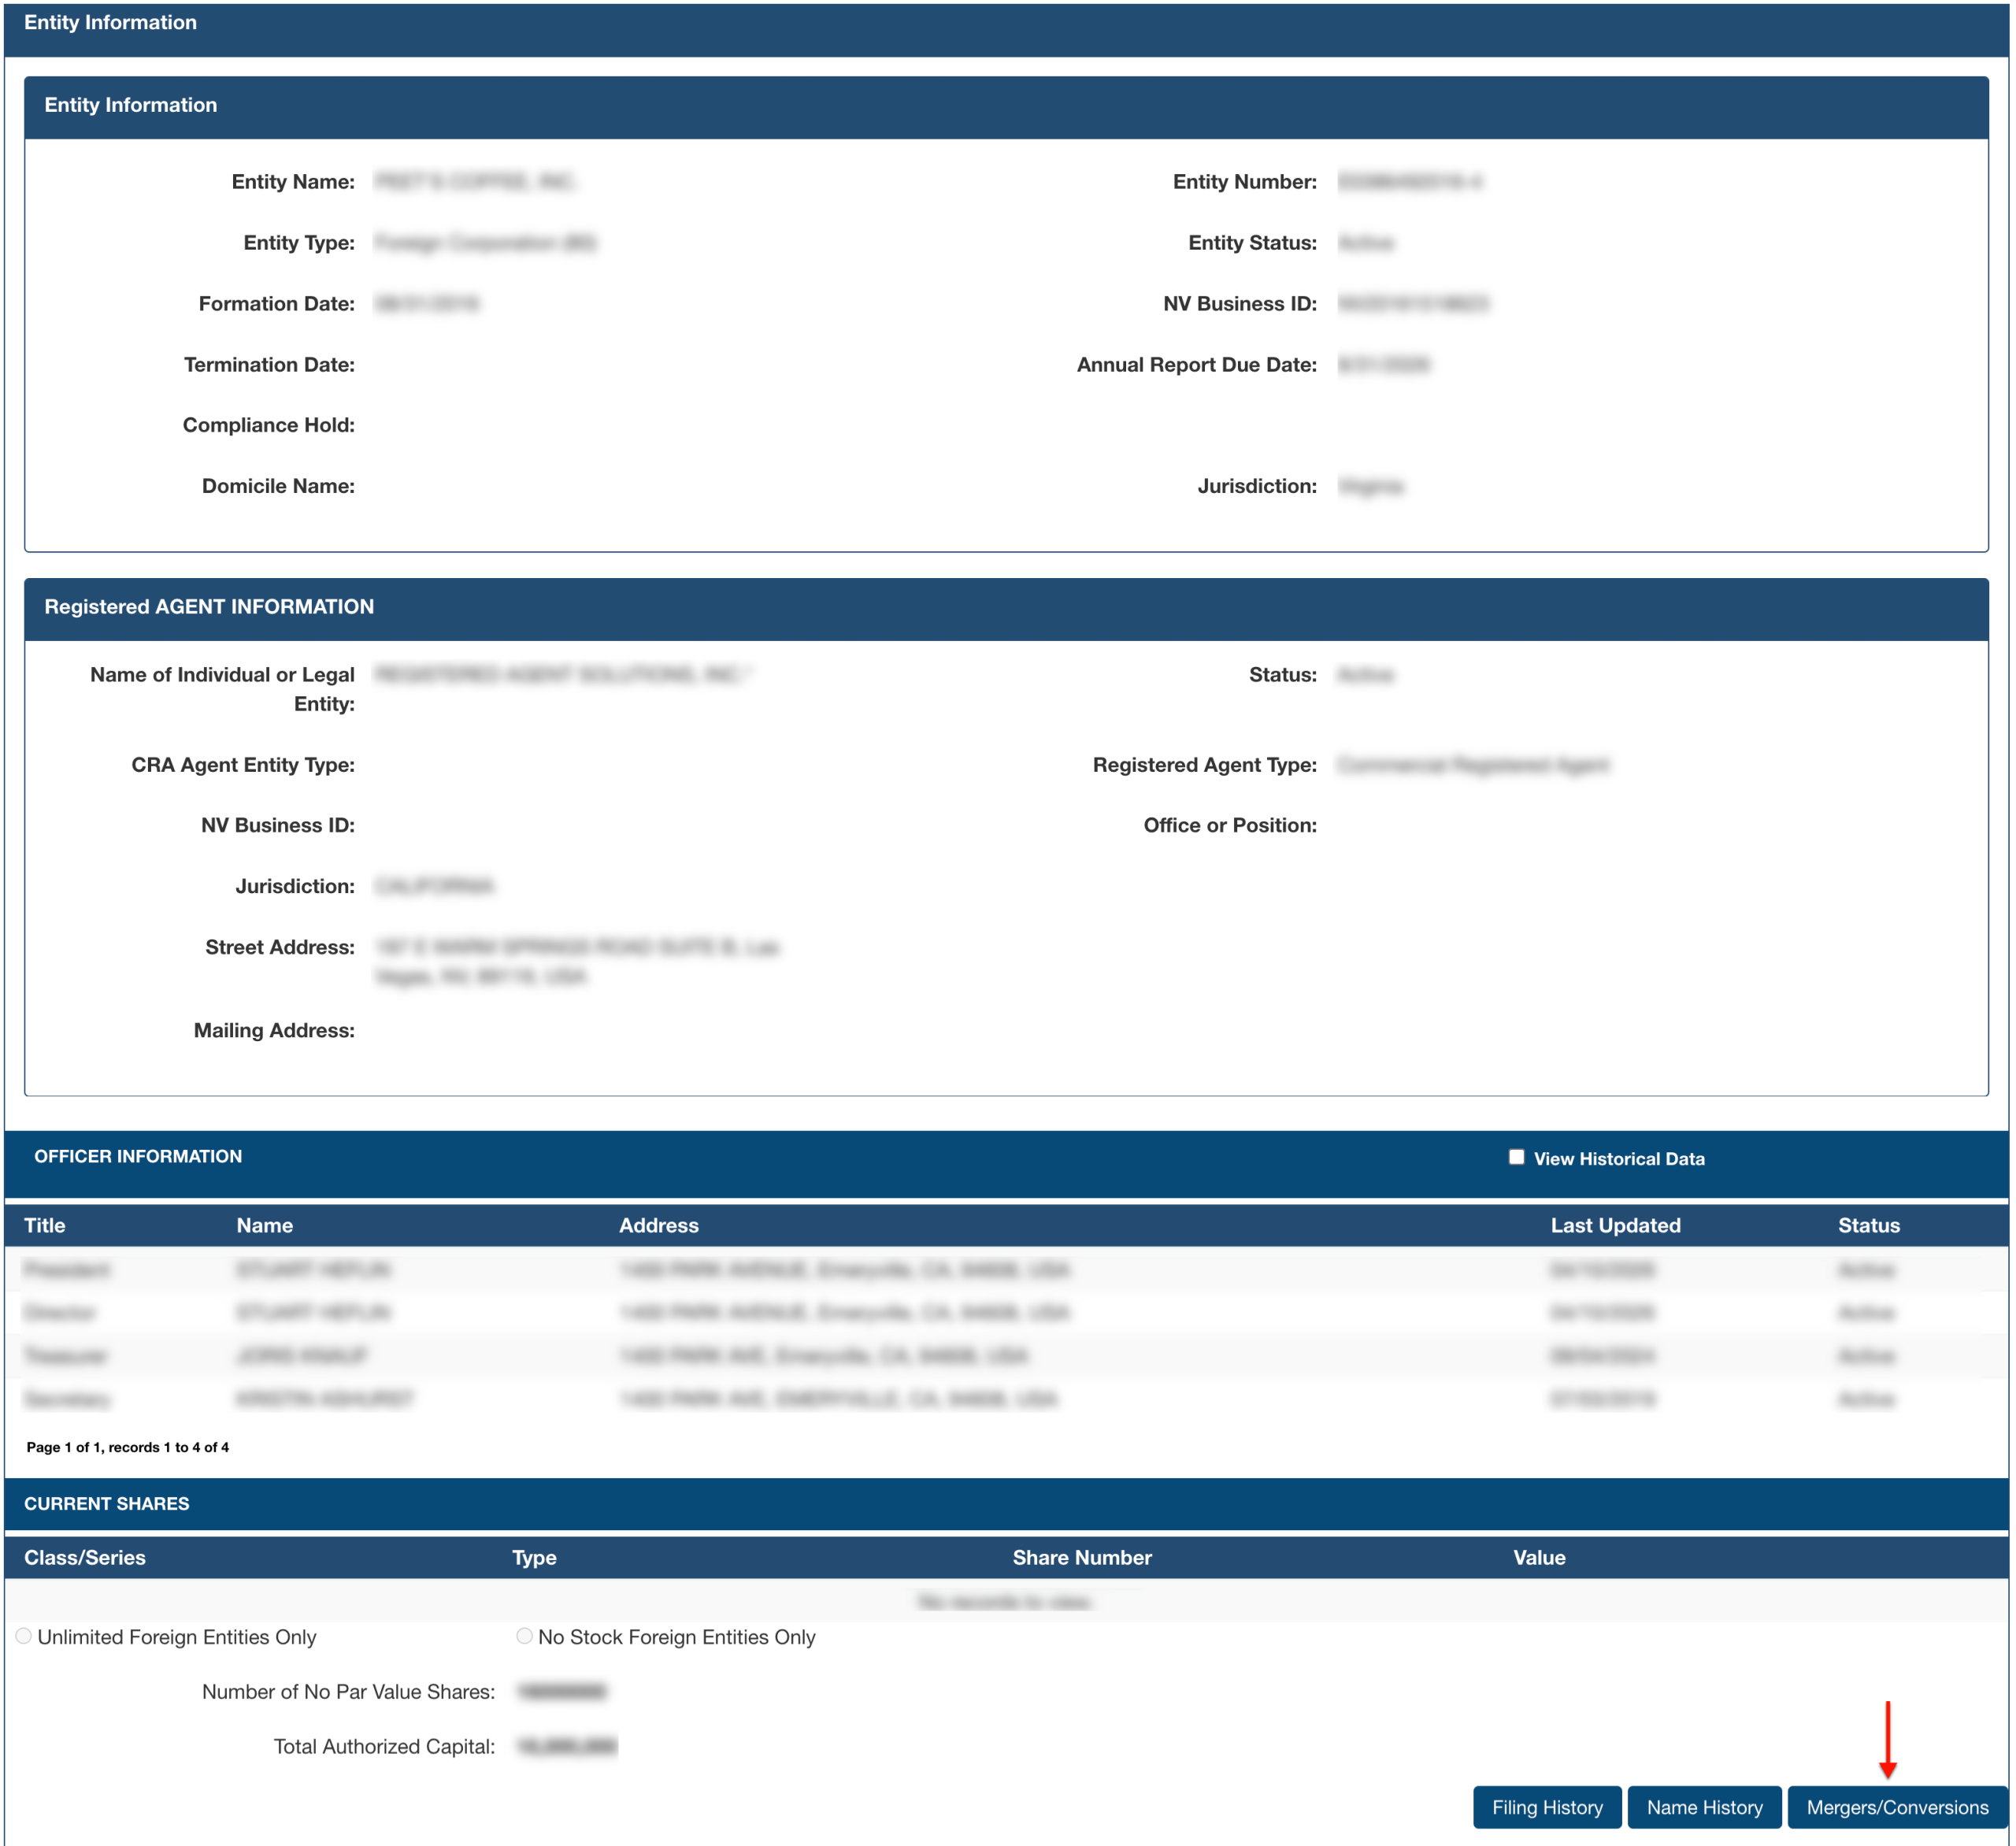
Step 33. Investigate Converge and Merger Information
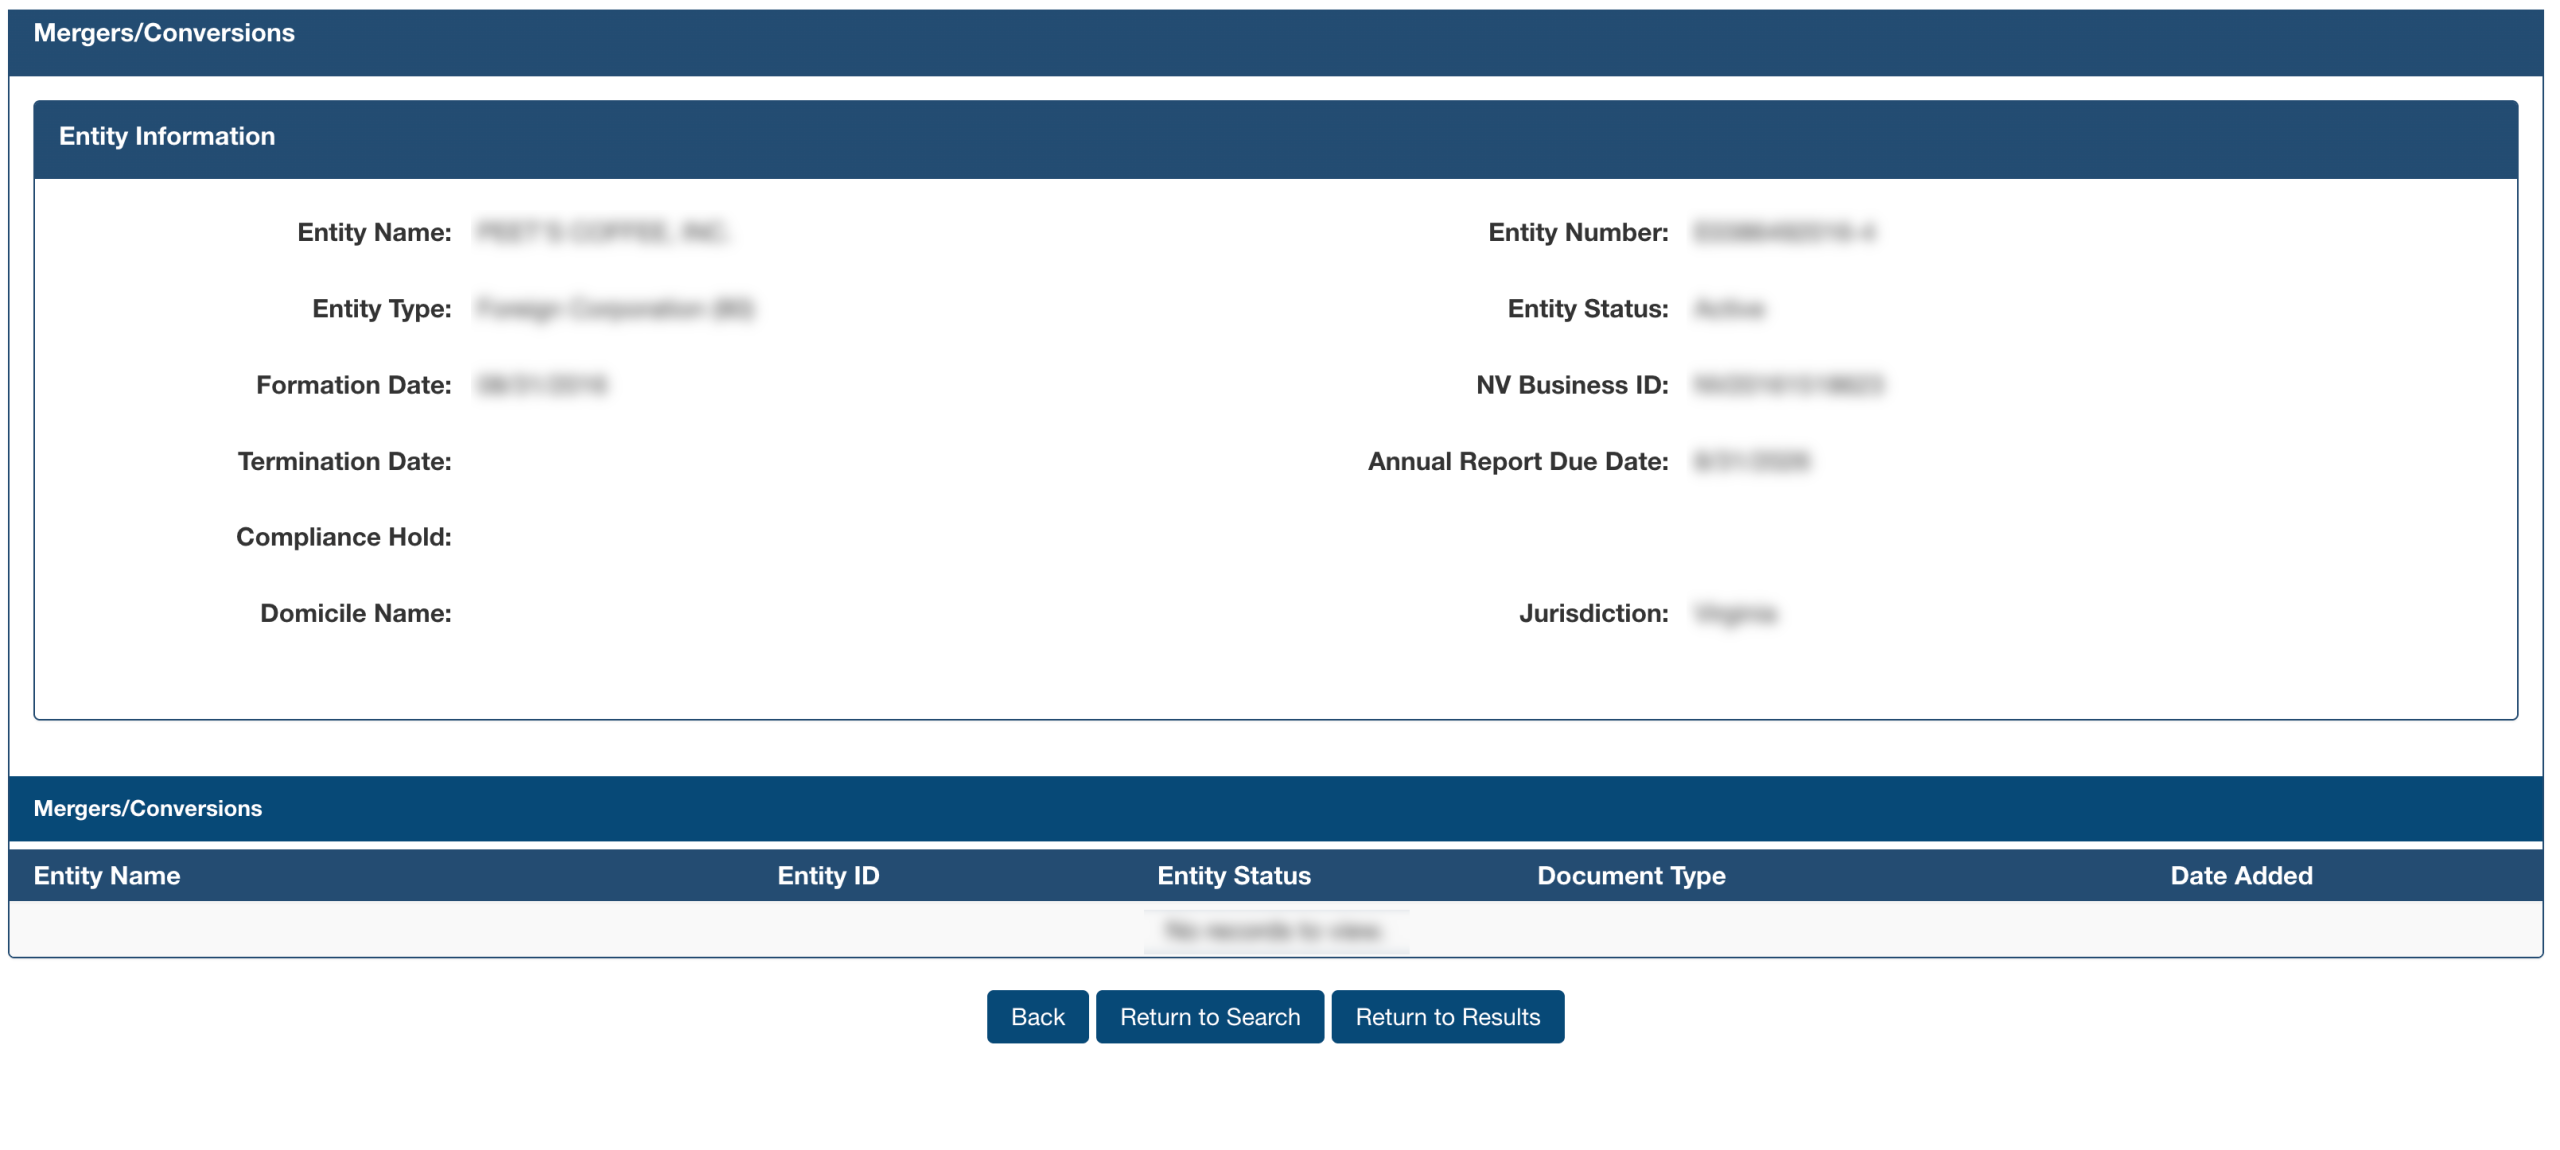
After returning to the entity information page, locate the “Conversions/Mergers.” This shows a report on the entity’s structural changes as appearing on the books.
Step 34. Review Conversion and Merger Information
Scan through the “Mergers/Conversions” table to learn more about the current entity’s status. When done, you may conduct another search or return to the table results.
- Entity Name
- Entity ID
- Entity Status
- Document Type
- Date Added